Posts Tagged ‘garbage’

I just learned that word. Trash and fashion=Art? Another phrase for it is Junk Art. Whatever you want to call it, it is art made from what most people would call garbage.

A lot of my art is made with stuff I found for free or thrifted or gifted….but some of the stuff for these projects are downright trashy garbage. The worst of all worse garbage, plastics found on a beach where I wish all Sea Plastics went to die.

(PHOTO: One particular bad plastic garbage day at what I now call “Plastics Beach”.

Last month my hub and I went for a drive and without our knowledge we ended up on what may be the most sea garbage filled beach on the island. It’s in a corner of a bay and the wind and tide seem to go straight to the particular area of the beach. I was overwhelmed with the amount of it all. I didn’t just see garbage. I saw color and I saw childhood laughter. And even though I didn’t know it at the time, I saw potential. That place never left my mind, so much so, we we went back. This time, I was prepared mentally and with reusable shopping bags.

(PHOTO: My sweet husband collecting plastics and beachcombing)

This time to “Plastics Beach” it wasn’t as bad, by “not as bad”, I mean there was less bigger pieces. It was still very bad. I focused on collecting the most colorful plastics. While I was on the hunt, I noticed some big black bags at the edge of the beach in the trees. I assumed they were filled with the beach garbage. This made me feel good, but I also wondered what colorful fun things could I find inside them. Don’t worry, I did not open them. They are destined for the dump for the rest of their long plastic life.

(PHOTO: This is what we brought home in our 4 large reusable shopping bags)

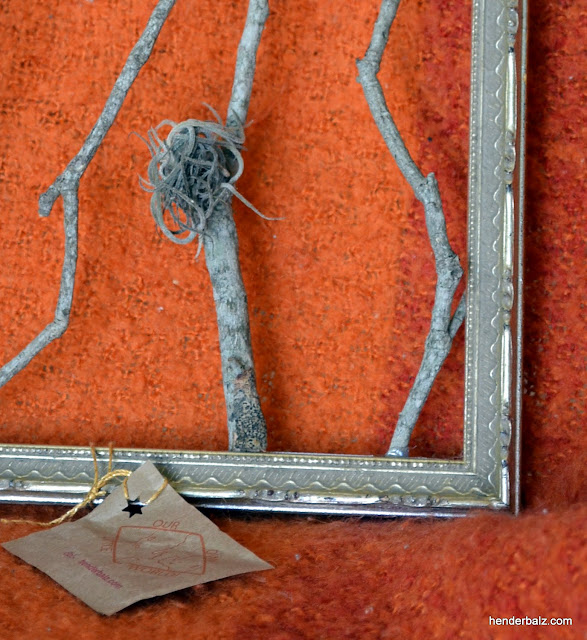
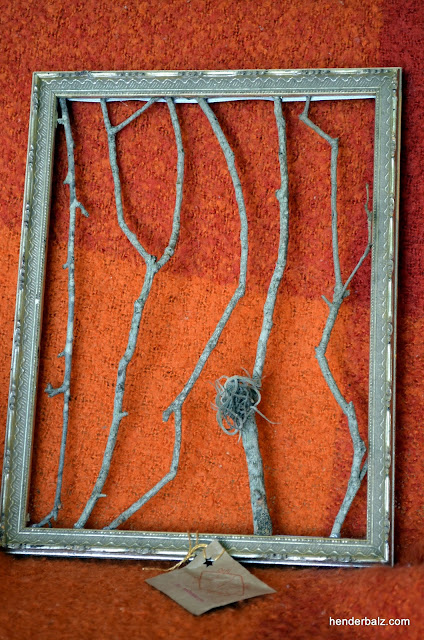
I cleaned every single piece, a lot to be cleaned again. While doing this, I thought of the price of art, even art made from free stuff. It took hours to do the initial clean. I can use old, scratched, marked, broken things for art, but I can’t use dirty stuff with sand embeddeded in it with the potential to smell over time. A lot of this time consuming. Even though, I’m not big on selling my art, I support artists that do and their prices. Oh, I will sell my art, just ask me. Anyway, I recently picked an old frame out of the trash area of my apartment building. Do you see the trashy thing going here? And here is me playing with my idea of art.

(PHOTO: The first juxtaposition of pieces inside of the frame.)
(PHOTO: I almost love this view of the piece better)

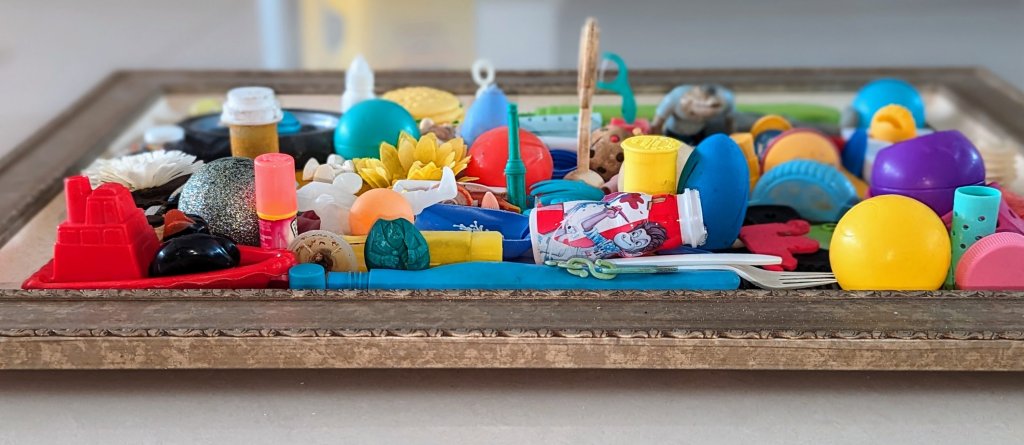
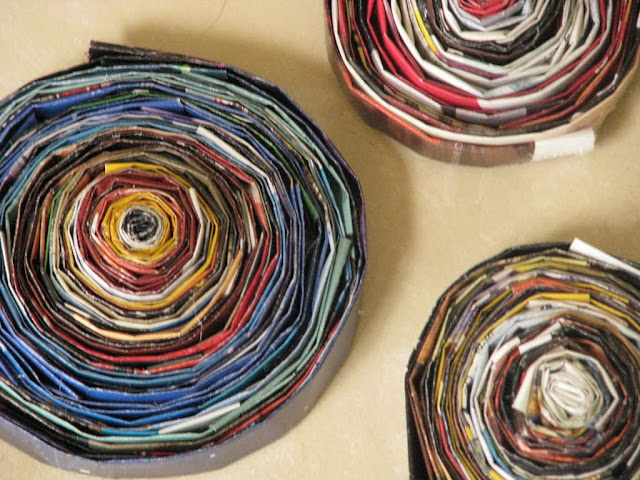
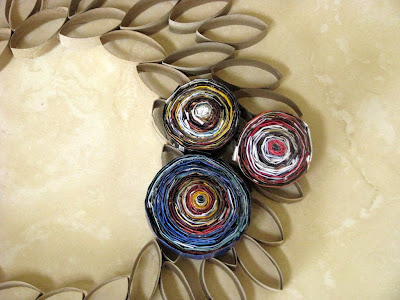
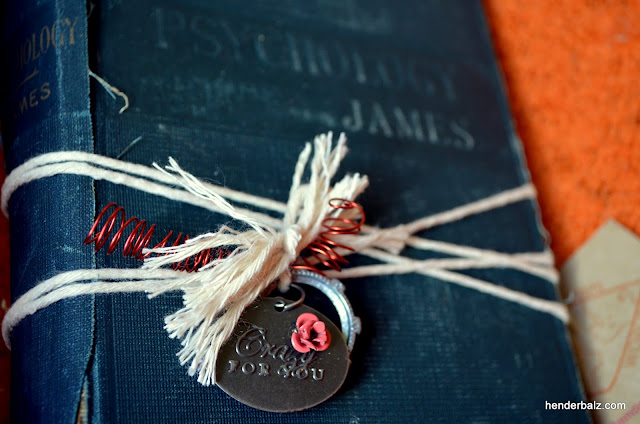
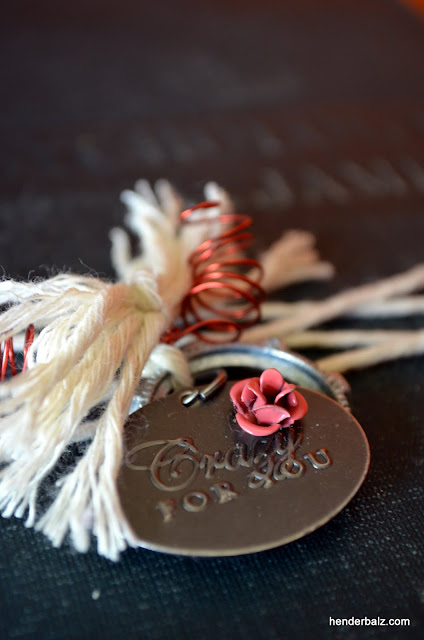
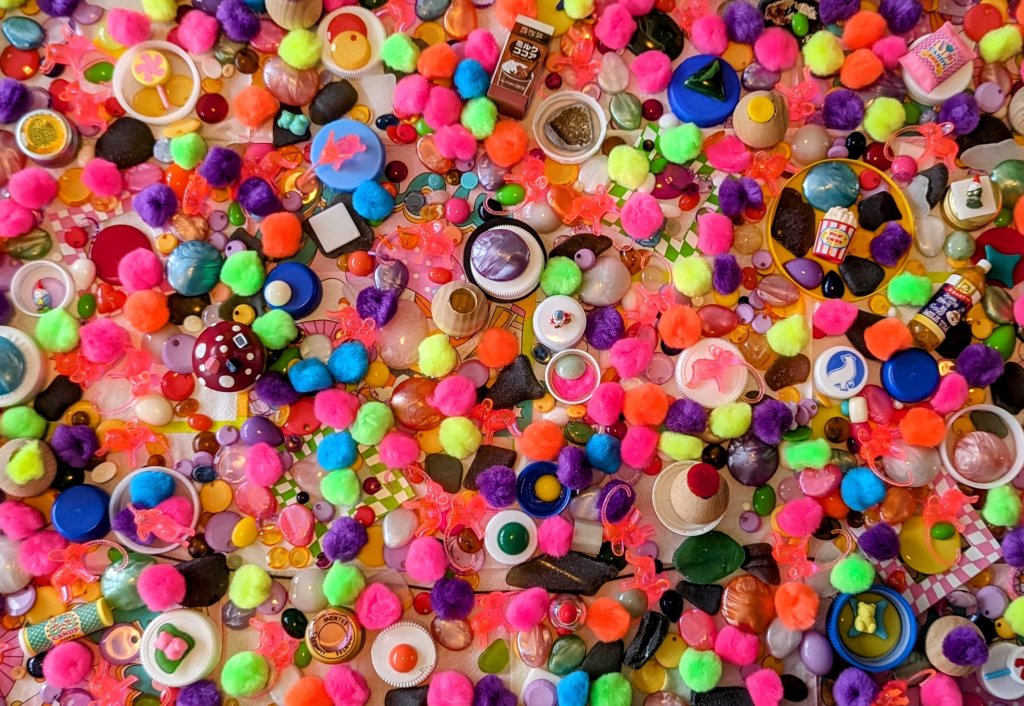
I really like it. I go through many processes with my pieces. Here is where I was before creating the one above (mind you it is not done…the things are in a box now), I recently went on a trip to where I got things for cheap or were gifted them. Fun, bright, cheerful things, including beads, miniature stuff, and vintage cabochons, but not limited to that. Here is where I went with those items when I got home.

(PHOTO: I put all the stuffy things together, added items I had already and this is what I got.)
(PHOTO: I love the neon and brightness of this piece and I will make smaller versions of it when I can thrift some fun frames.)

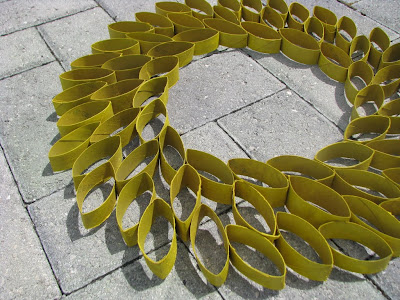
If you haven’t seen my art, besides using upcycled materials, I love texture for the eyes and hands. I love surprises to be found. I love that I see art when others see magazines, belts, twine, and garbage. I love that I can see how to use things in unconventional ways, like beads not beaded, a belt buckled around a canvas, old rough twine in macrame, and torn maps not used for directions.

(PHOTO: My art in my home)

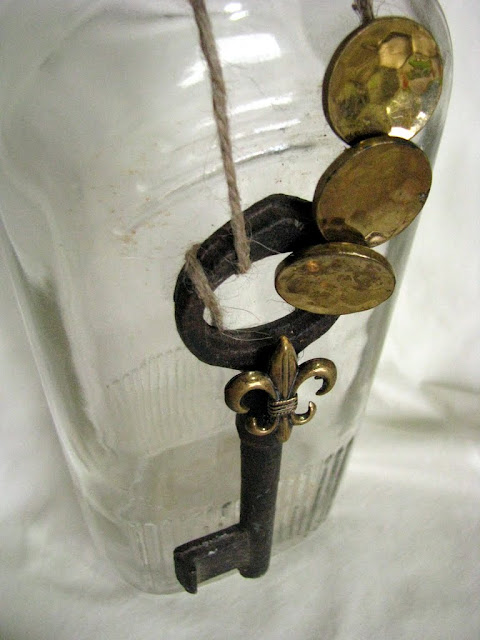
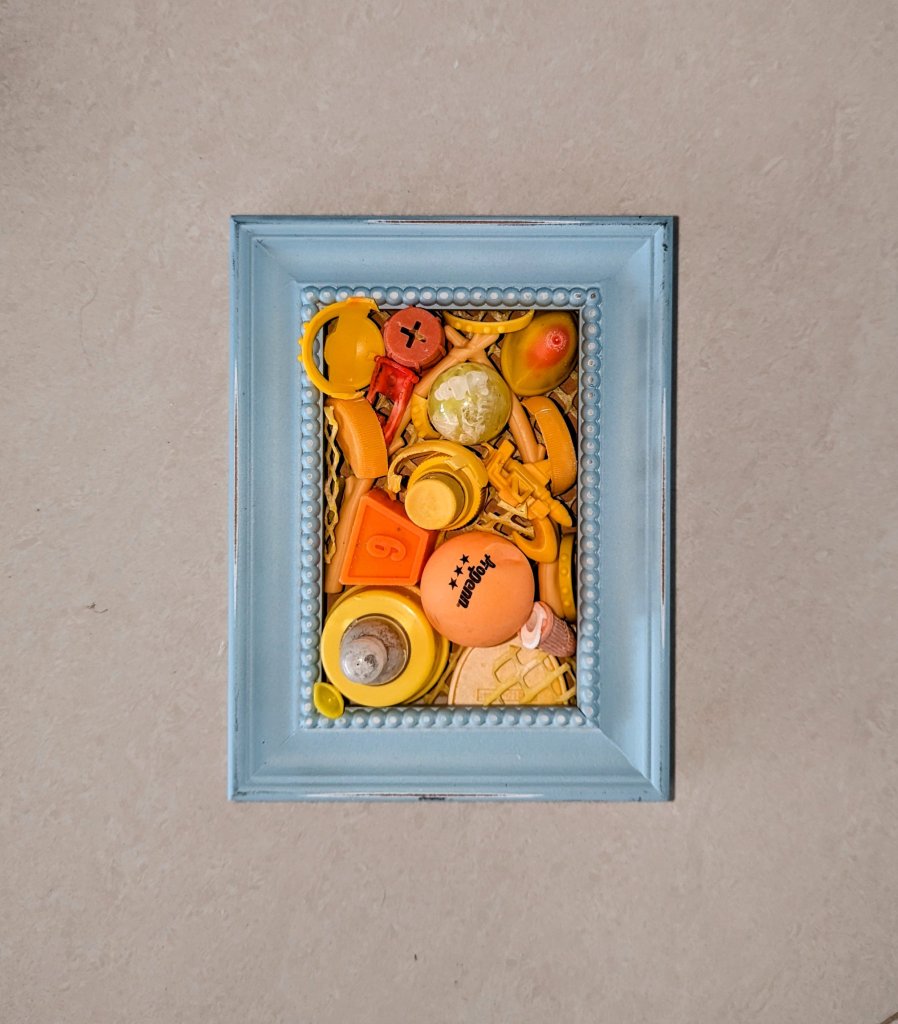
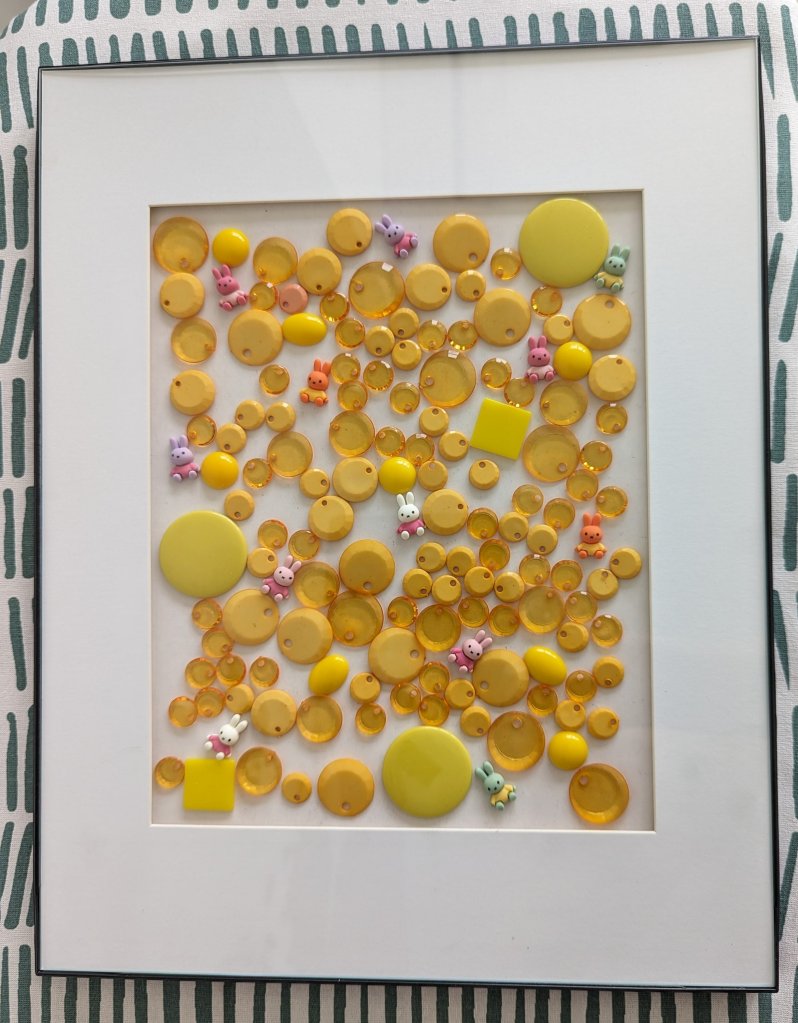
Here are other versions of pieces I may do with my plastic beach finds….

(PHOTO: I love the idea of one or two bold colors. So, yes, I love this small 5×7 piece, but if I do it I will paint the frame a brighter blue.)
(PHOTO: So, I love anything round, circular, spherical, and globular including balls, orbs, globes sport supplies, decor, plastic caps and so on. This piece is a mixture of all found or saved round things. Honestly, I’m notot as fond of this piece.)

Since I’m on this maximalism, lots of stuff in one piece journey, yesterday I was playing more with some of the beads and cabochons I got at General Bead in SF recently (and vintage plastics from a friend there too). Also, I recently have been enamored with miniatures, and bought some while traveling and at a store near my apartment. Yes, new stuff. Ack, but give me a break, they are so cute. Look!

(PHOTO: I Call this “Bunny Bubbles #Yellow)
(PHOTO: See the Adorable tiny Bunny? It is actually what is called an “Nail Ornament)
(PHOTO: I call this “Bear Bubbles #Purple.) (Sorry for the bad photo.)
(PHOTO: But look at the bears…this time 2 sizes!) (Squeeee!)

Okay, before you go crazy making orders and wanting to buy…none of these are made yet! 😉

But I did just paint the large frame, and I am looking for a back to adhere items safely to it. Will update this post when I’m done!

Once again, Thanks for visiting… My Gnome Little World!!

—————————————————

I live there.

Sometimes I buy things that I have to take apart to make  better!

This is a story about a cute little metal basket with some fake flowers stuck inside it.

From Tear Down & Build Up Craft

I freed the basket!

And made something from the removed “stuff!”

From Tear Down & Build Up Craft

I love decorative balls, but I have never made one for myself.

So, to add this “mossy” one to my collection, that I made, is quite exciting!

From Tear Down & Build Up Craft

And now, how cute is this metal wire basket?

From Tear Down & Build Up Craft

And I will use the flowers for displaying my “book” vases!

For 75 Cents, I got a basket, a ball, and extra flowers to boot!

———————————————————————————————————————————————————————-

I have to admit, I AM a Serial Creator.

In my past, I have killed off many mediums, and then moved on to the next!

Sometimes bringing back old haunts because…you know…they always return to the scene of the crime!

Here is The Life Cycle of This Serial Creator.

Pre-High School: Anything the Art Teacher Would Make Me Do!

From My History of Creating

6th Grade: Block Print (Did the carving, water colors and printing!)

High School: Writing Poetry & Photography

From My History of Creating

10th Grade:  For Photography Class!

From My History of Creating

12th Grade:  My Nationwide Winning Photo for the “Year of the Disabled” Photo Contest.

I worked with this girl at McDonald’s…she was a friend that was born with just part her arm.  I still admire her!

College: Photography & Writing “Witty” Letters to the Editor of the School Paper.

From My History of Creating

A couple of my letters to the Radford University Newspaper’s Editor.  I was so sassy!

I wish I could still write that neat!

20’s: Making Greeting Cards (When the Name “My Own Little World” was created), & Rock Jewelry.

From My History of Creating

One of a series of the “Hill” themed birthday cards. The only sample of them that I have left…because I actually gave them to people after making them! I have a person in mind for this particular “Vintage” card of mine.

From Safety Pins & Pendants

My Rock Jewelry. I actually still wear these! Timeless Beauty!

30’s: Writing Children’s Stories, Making Greeting cards, & Creating Small Odd Gifties.

From My History of Creating

Bookmarks that I thought were awesome…not so much now.

You should have seen the ugly Christmas Ornaments I made in the same design!

Ack!

Sorry friends and family for that “creative” period of mine!

But I still love the below creative flow!

From My History of Creating

A variety of my Christmas Cards!

There is The “Gangsta’ Santa” one , The “Safe Sex Christmas Tree” one (It says “Keep Your Christmas Bright…Wrap It Tight”), The “Reindeer Got Ran Over by a Grandma” One, and of course, The “Dancing On Top Of Santa” one!          Good times!

Now, my one and only published piece!  And mind you, I got paid for it too!

Okay, I wrote on the internet too, but in the writing world, it is just not the same!

Click and Read, My Friends, Click and Read:

Volunteer, Learn a Language Combine Language Study and Volunteer Work in Guatemala

Early 40’s: Writing.

From The Books I Made

Although, I just made these actual books, I wrote the stories in my early 40’s for a Children’s Clothing Line…that never went into the book business. But they said they liked them, they really did! Now, they are just for my 7-year-old twin nieces!

Mid 40’s: Blog Writing, Photography & Videography.

Examples of this are all wrapped up neatly in “Vintage” HenderBalz Blog Posts!

Click and Browse, my friends, Click and Browse:

HenderBalz Blog: El Salvador Story Time

Later Mid 40’s (ahem…NOW): Making of Things, Photography, Writing, & Videography.

Again, the HenderBalz Blog, says it best!

Check it out, My Friends, Check it out:

My Own Little World Shopito!

I attack with gusto, even to the point of trying to sell my work, and then I give up…whether I have done well or not.

MAY I NEVER GIVE UP AGAIN…MY OWN LITTLE WORLD SHALL GROW!

———————————————————————————————————————————————————————-

100% FROM RECYCLED MATERIALS…

AND IT LOOKS GOOD!

UPCYCLING AT ITS BEST!

From How To – Wreath

AND DOES NOT SMELL!

SUPPLIES YOU WILL NEED:

– Toilet Paper and/or Paper Towel Rolls (lots of them)
– Old Magazines
– Glue Gun
– Scissors
– Spray Paint
– A paper plate

START CREATING!

From How To – Wreath

1) CUT ROLLS!

Toilet Paper rolls can be cut into 5 pieces. They do not need to be perfect or the exact same size.

The paper I buy seems to stick to the roll at the end, and taking it off is the hardest part of the whole thing!

2) START DESIGNING WREATH!

From How To – Wreath

Start to lay pieces around the plate.

From How To – Wreath

Get your design down.

From How To – Wreath

3) GLUE PIECES TOGETHER!

From How To – Wreath

4) START YOUR MAGAZINE PAPER FLOWERS!

From How To – Wreath

Tear out pages of magazines, I go for the most colorful. I cut each page into 3 strips.

4) FOLD STRIPS OF MAGAZINE PAGES.

From How To – Wreath

Fold them in the width that you would like your flower to be. Honestly, they do not need to be the same size…I just fold them up, and used the glue gun to keep the edges down. I have done it without gluing them down…saves some time.

5) ROLL YOUR FLOWERS!

From How To – Wreath

Just start rolling. I glue down the last edge of a strip and then the beginning of the next edge strip. And you can make them as big or as small as you want!

From How To – Wreath

6) LAY OUT WHERE YOU WANT THE FLOWERS TO BE ON YOUR WREATH.

From How To – Wreath

Do not glue yet!

7) SPRAY PAINT YOUR WREATH.

From How To – Wreath

I picked yellow, which worked well on that white paper, but did not come out that yellow on the brown paper rolls!
So pick your color wisely, or test it. Or you can just go plain…I have another piece hanging in my living room with no color!

From How To – Wreath

Let Dry!

8) ATTACH YOUR FLOWERS!

From How To – Wreath

CONGRATS!

You made yourself a Garbage Wreath! Made art and saved stuff from the landfill!
———————————————————————————————————————————————————————-

Stuff made from free things!

Okay, made with free things…and cheap stuff I bought for under $1.00!

From Twigs and Things

VINTAGE FRAME AND COOL BRANCHES!

From Twigs and Things

TWIGS, TWINE AND A GLASS…

From Twigs and Things

AND YOU GET YOURSELF A CANDLE HOLDER AU NATURAL!

From Twigs and Things

A BOOK, TWINE…

From Twigs and Things

AND CUTE THINGS….

MAKES FOR A NICE LITTLE  TABLE DECORATION!

From Twigs and Things

IF I CAN WRAP, BUNDLE, BUNCH IT…I WILL!

———————————————————————————————————————————————————————-

I make things.

I make them from other things, such as…

Antique stuff, vintage what-nots, old do-hickies, divorced fragments, unwanted morsels, and plain ole’ garbage bits & pieces.

LIKE THIS:

From Product Photos

AND THIS:

From Product Photos

AND THIS:

From Product Photos