Before I talk about my Madrid Art Appreciation Education, I’ve been to Madrid, including El Prado, before…it was 38 years ago. Things change, I change, but my memories stay still.
The main thing I remember is a group of us from a Youth Hostel went to El Prado together and before we entered we got high. I did not get high a lot, but this is one of my favorite highs. High in an art museum is a whole new world.
This time I searched El Prado and it’s countless old paintings for the one that had me sit still for a long time, a long time ago. Me and a hostel friend stared and talked about it for what now feels like an hour. We did not let things escape us at the time. Now, I fear some of it escaped my memory because even though I found that mesmerizing piece, I was not enamored like I was as my 22 year old high self.
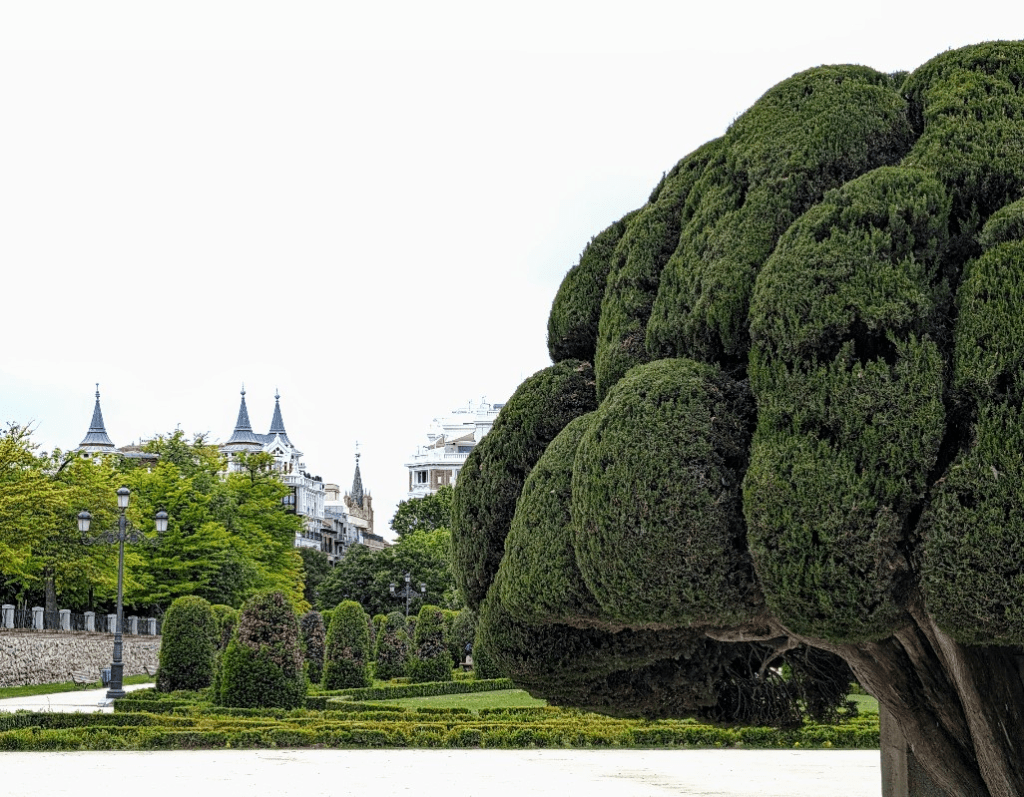
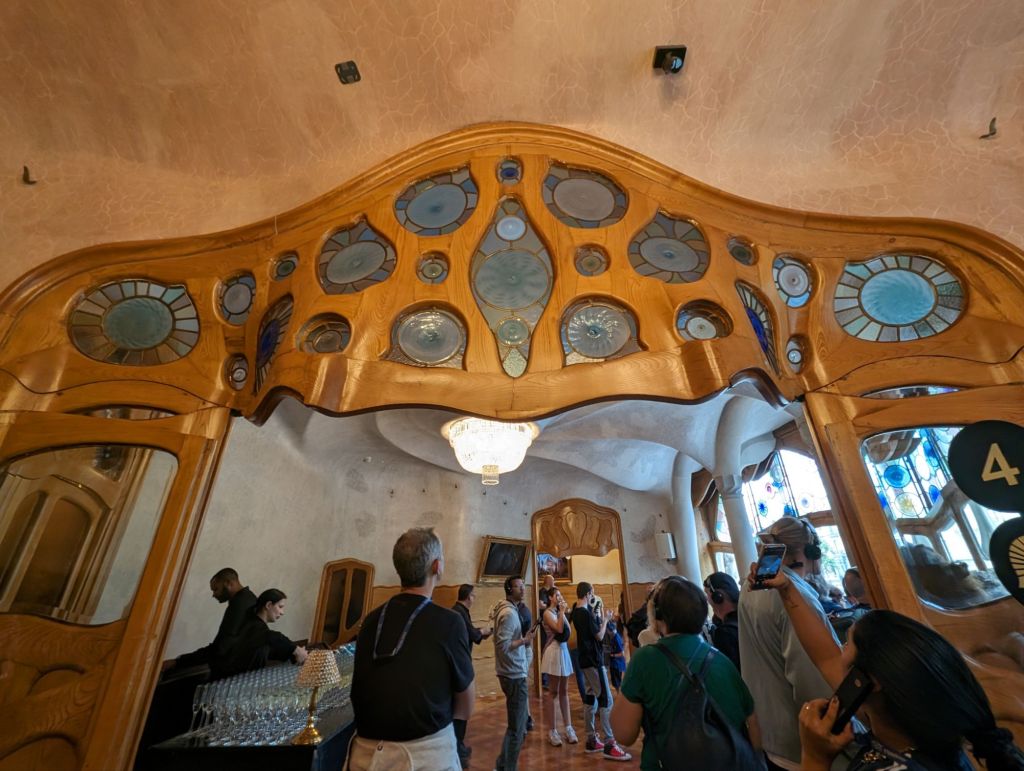
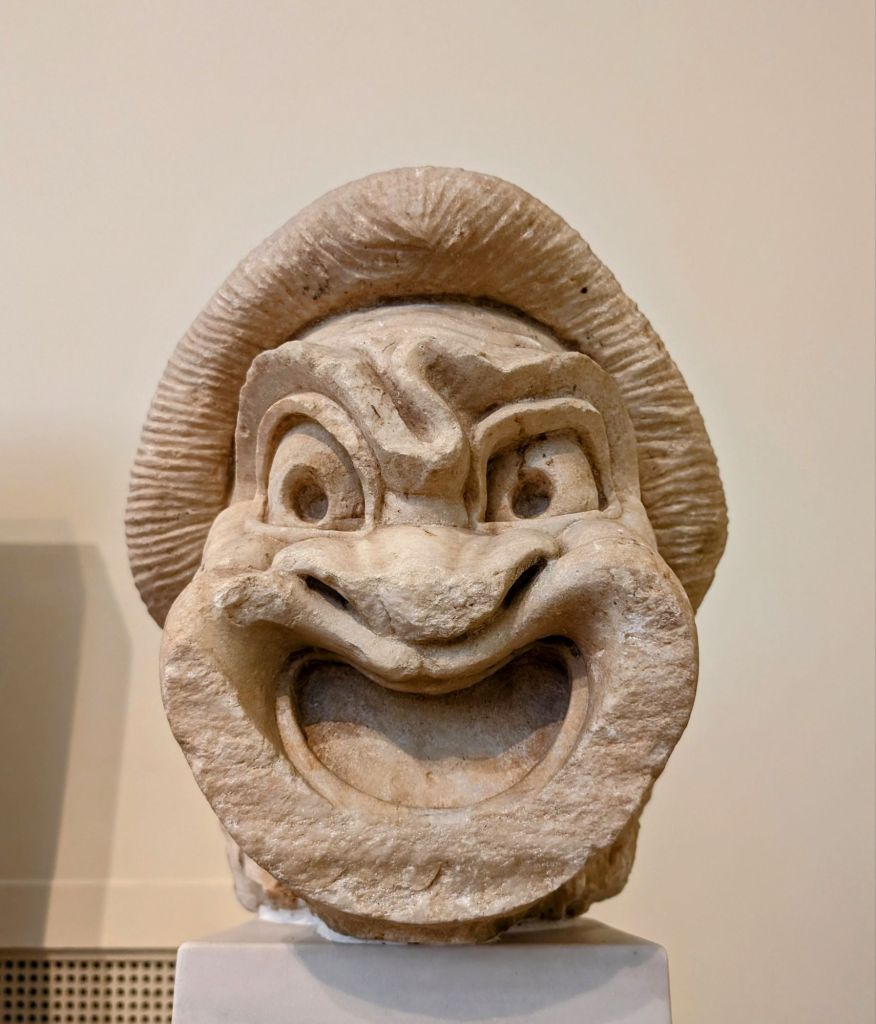
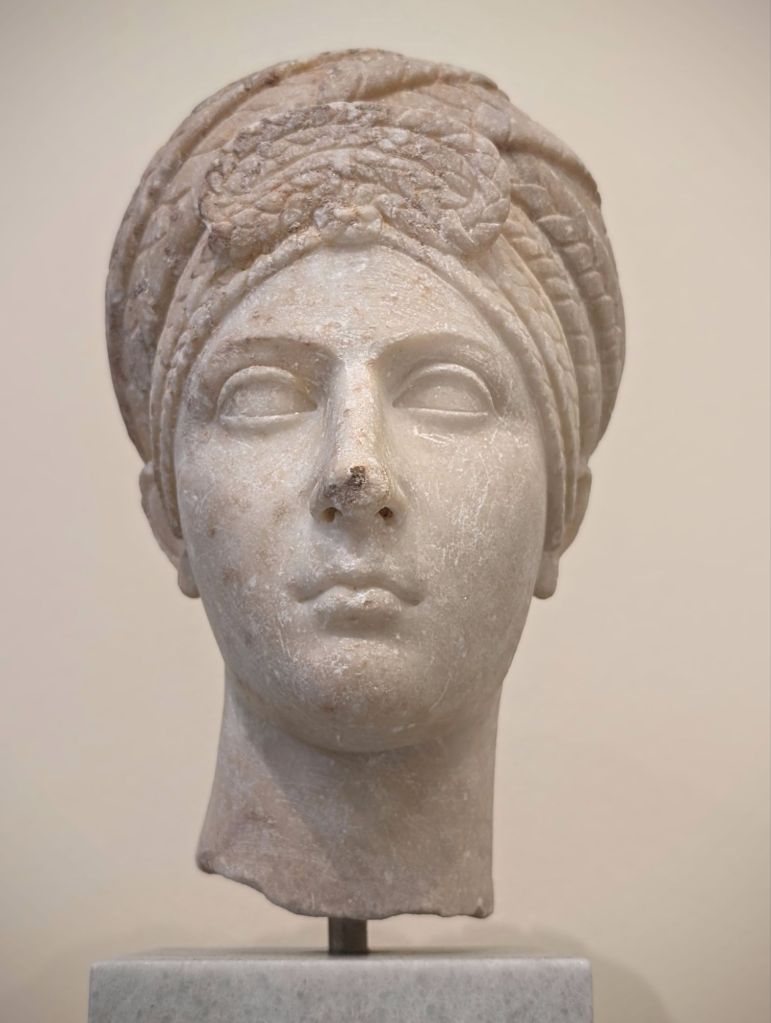
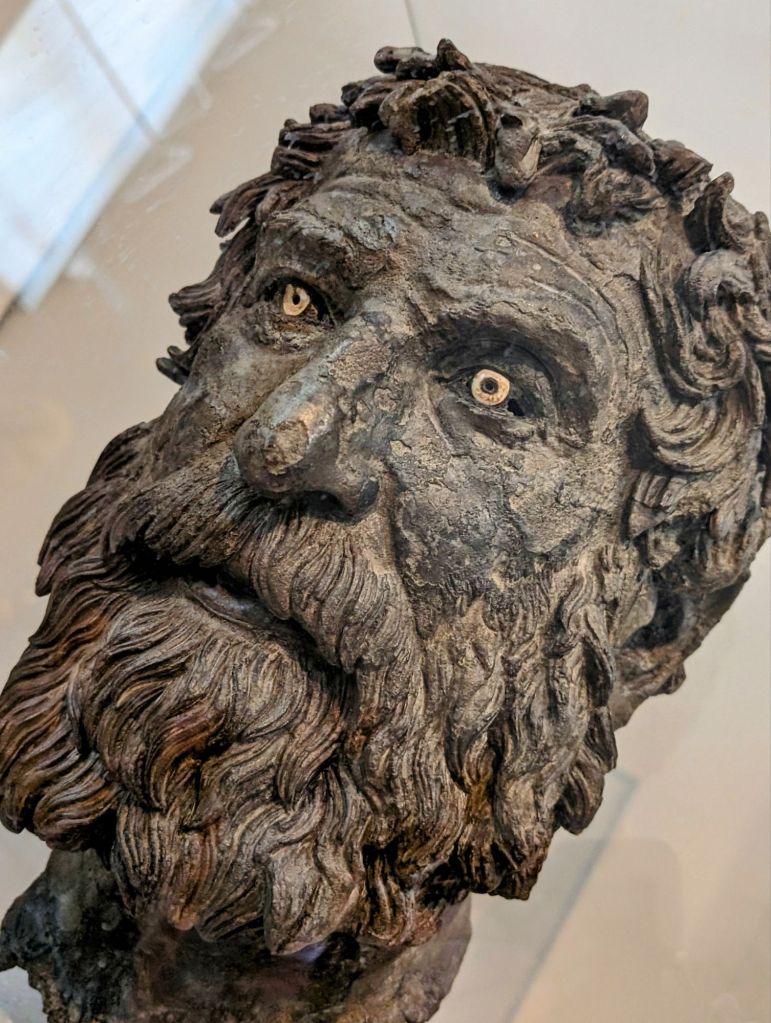
Now back to what the 3 art museums taught me, this time in Madrid. I learned a lot about myself, a bit surprised. I’ve always thought I was a lover of all art from all time periods, but I’m telling you I am so loving modern art way more than the old stuff. I still admire the old art, but honestly sometimes I love the workmanship and skill that went into making the elaborate frames on those pieces even more than the art. Sooo…El Prado bored me a bit this time. The Thyssen and Reina Sofia was so much more my jam. I learned upcycled art is not a new thing. I learned Picasso, Dali and Miro did so much more than what we see all the time. They were multi-faceted geniuses. My favorite art experiences this time in Madrid, Even though I was not high this time, I sat dumbfounded and mesmerized when one of Calder’s huge outdoor mobiles slowly danced with the wind. I felt lucky.
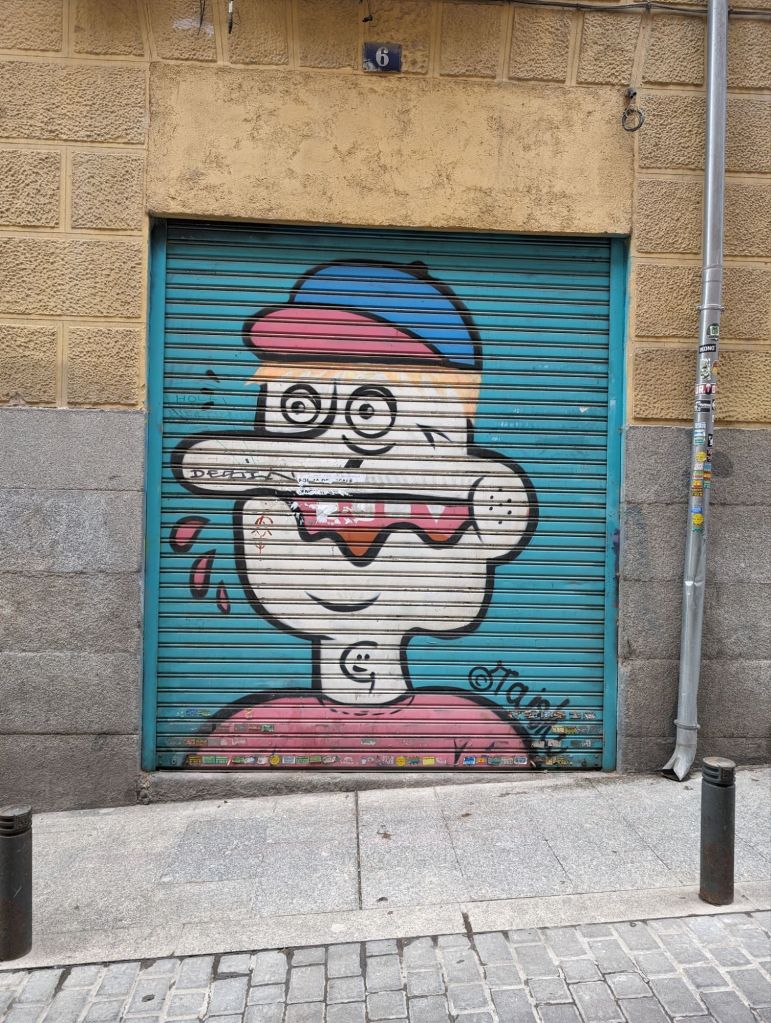
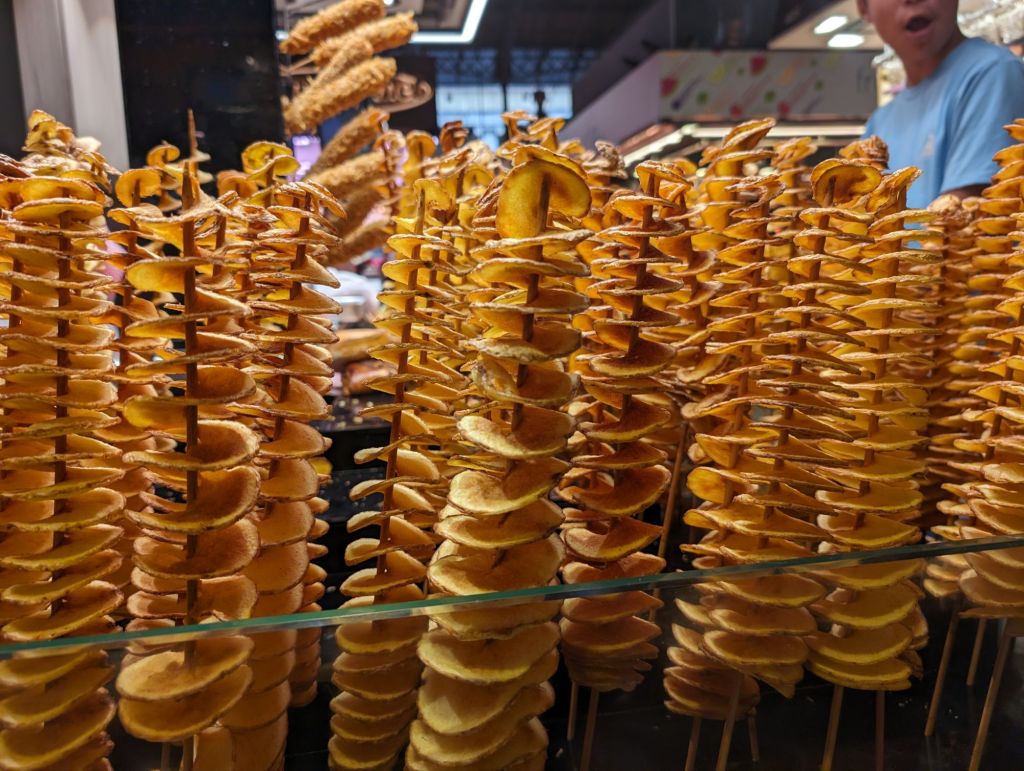
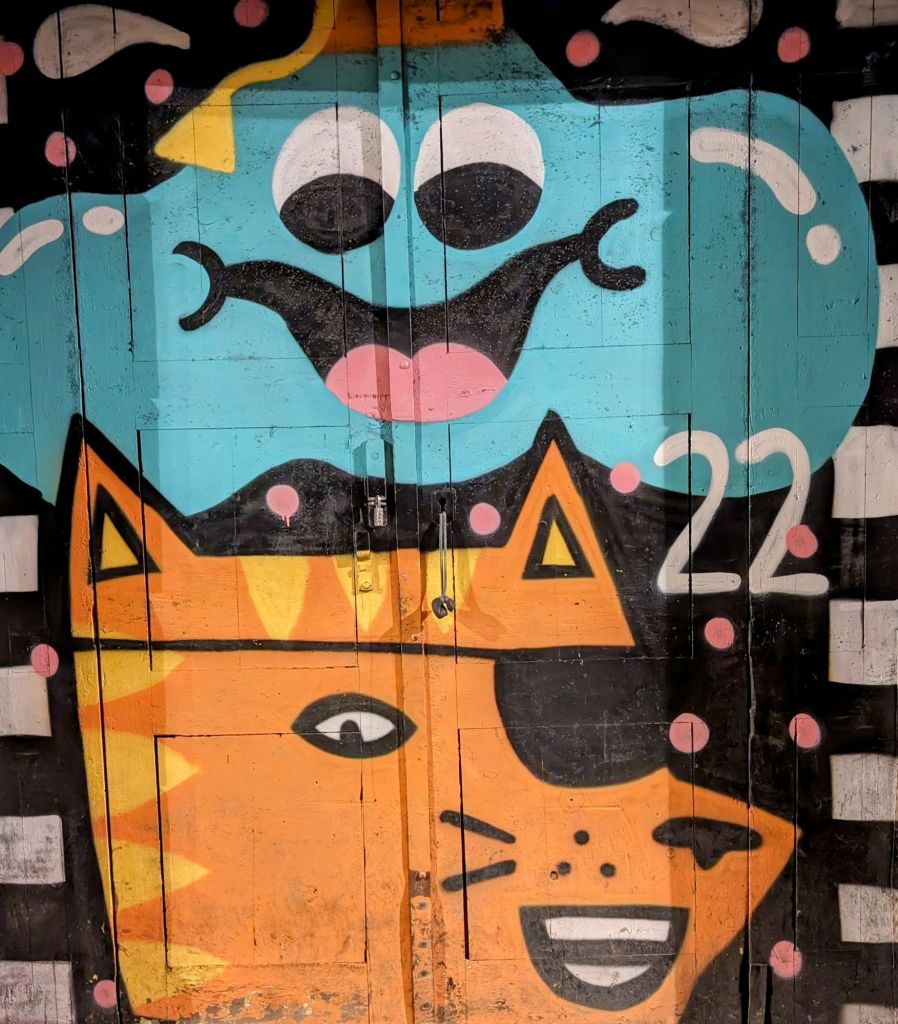
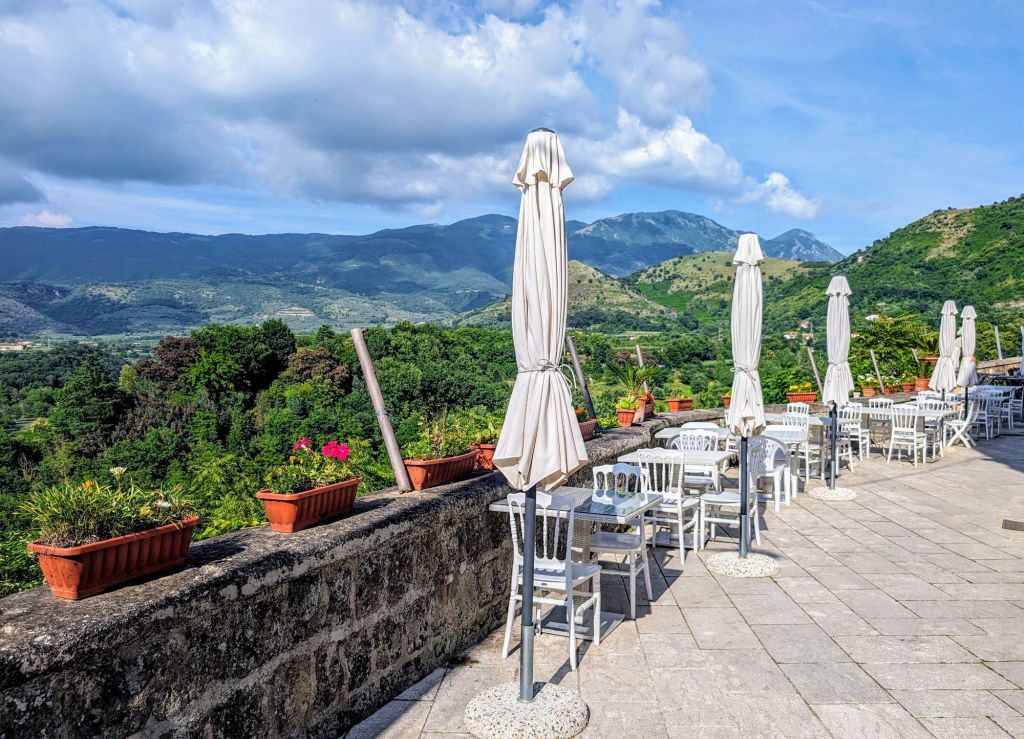
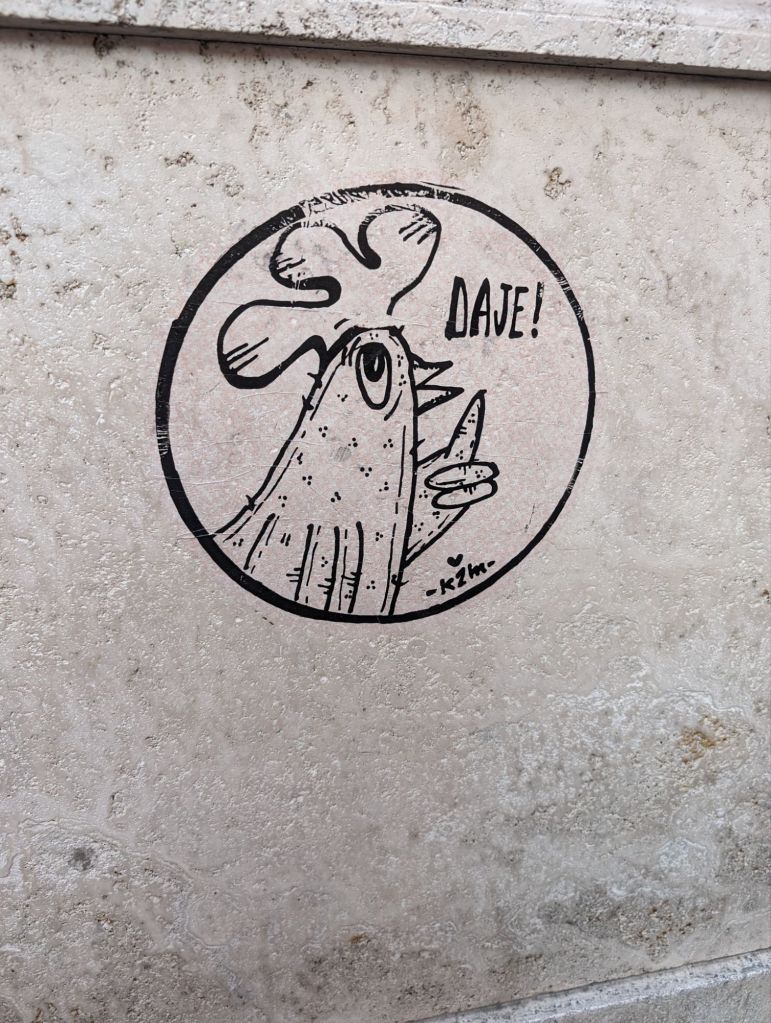
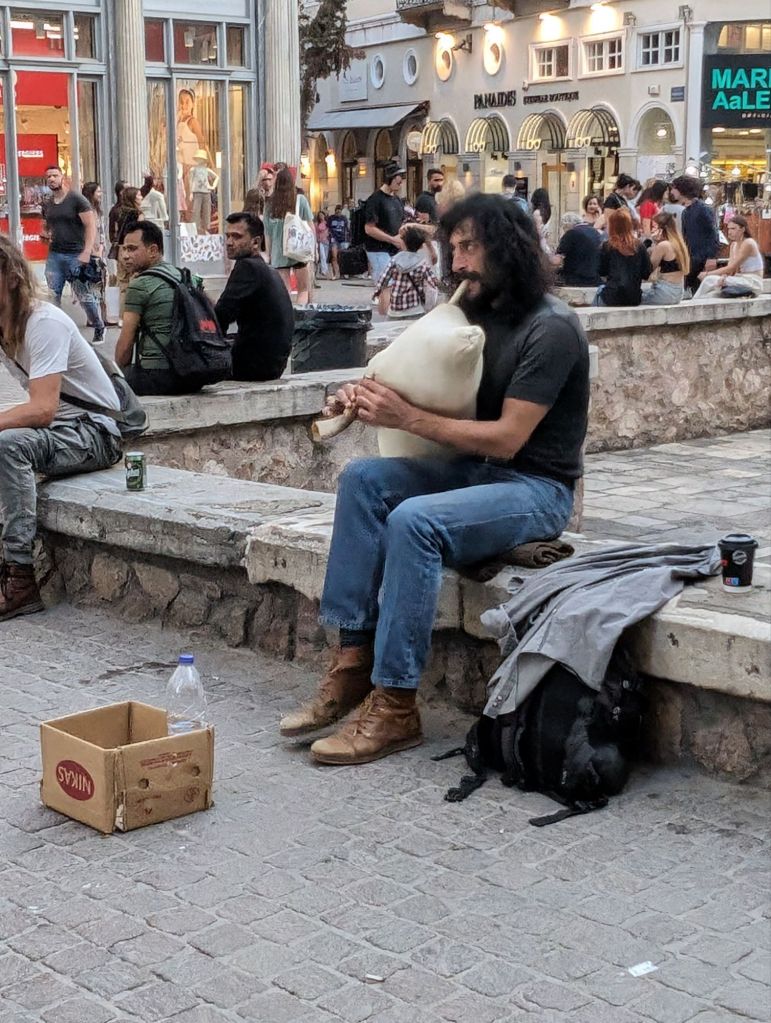
Of course Madrid is so much more than just its museums. Who wouldn’t love countless book stores, tapas, music, sangria, cafes, murals, graffiti and the people.
Not to mention funky little bars like Tupperware and La Via Lactea (The Milkyway)! It’s always good to get out of the tourist area and into where the locals go.
I was waiting to post this until after we went back to Madrid at the end of our trip, but at the last minute Jim decided to not go back to Madrid, and to see more of Spain by driving from Barcelona, stopping in Zargoza for a couple of nights before our flight back home. That trip, and blog post, will be the last of our Southern Europe Adventure!
Once again I thank you for visiting MY GNOME LITTLE WORLD!
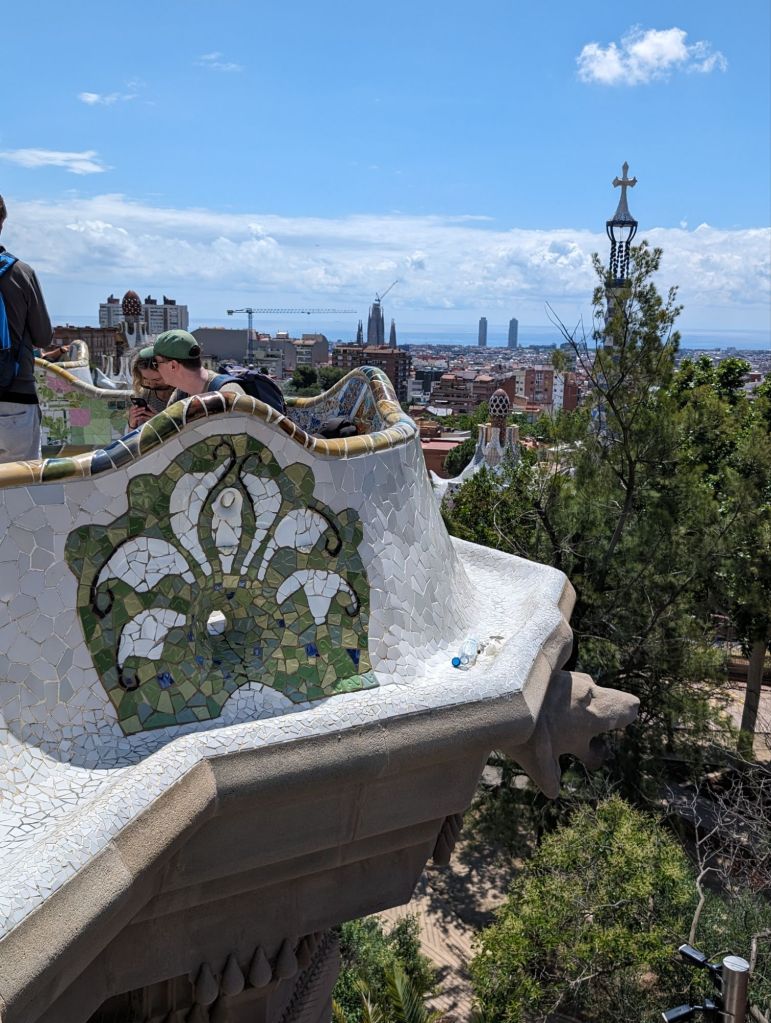
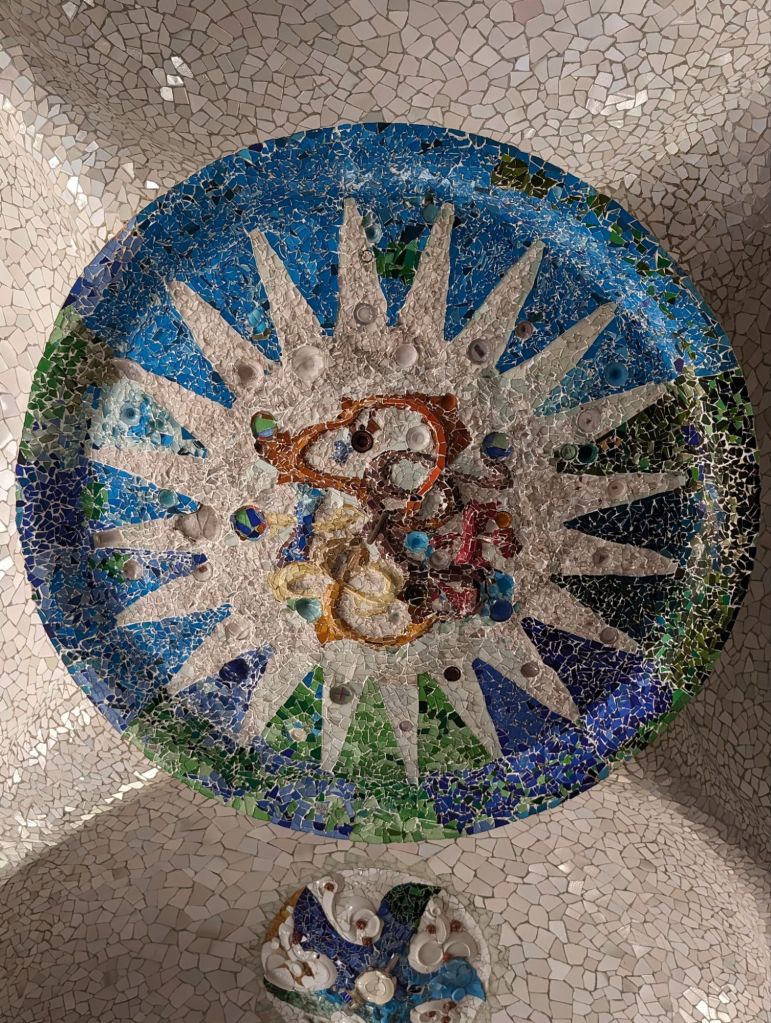
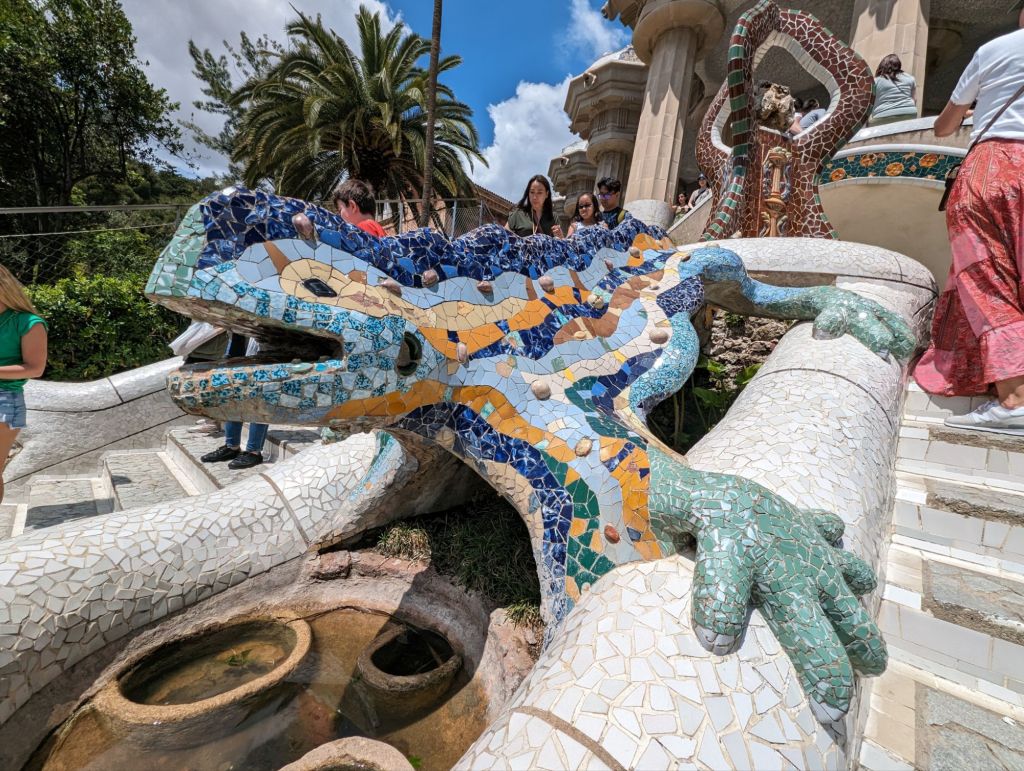
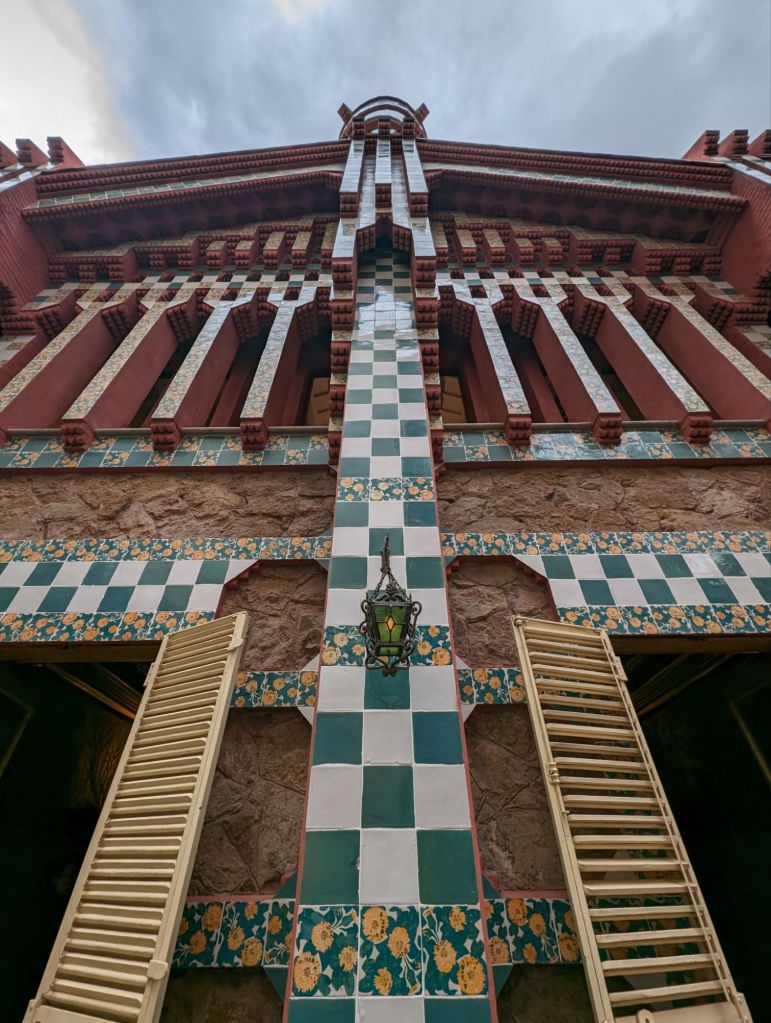
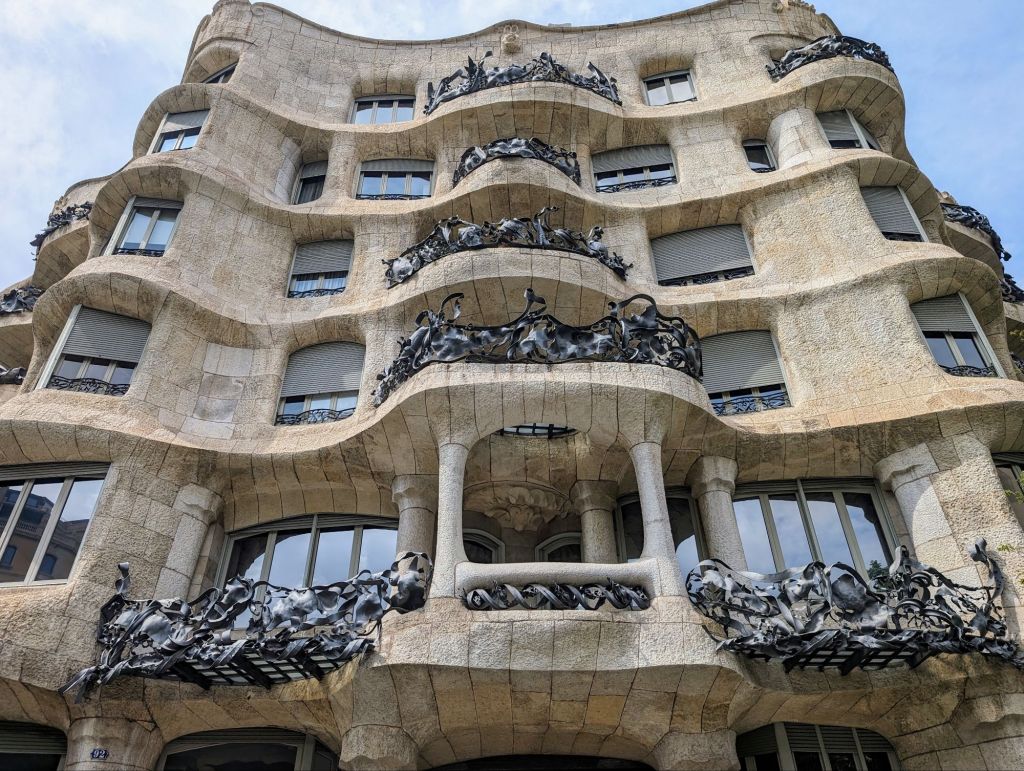
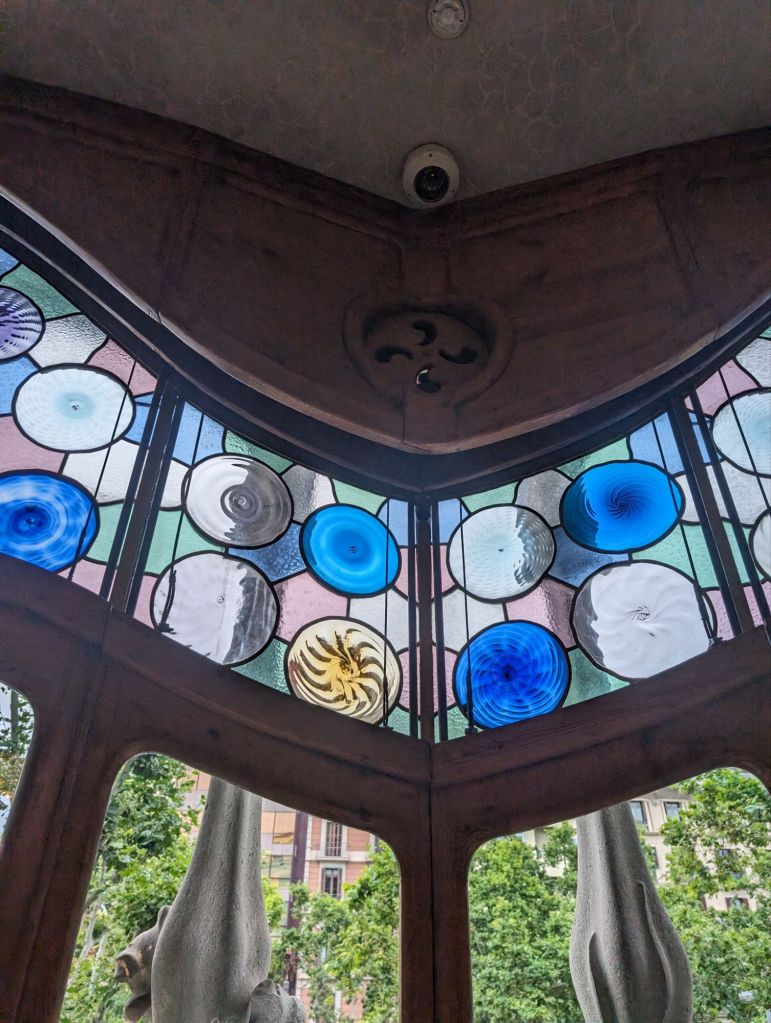
I saw 3 of the Gaudi buildings in 1986 and have been a fan ever since. His buildings may have instilled the love of all architecture that I have had all my adult life. I was only 22 when I saw his curves, spires, tilework, and flare to be different for the first time. I felt them all deeply within, although I only got to see them from the outside. Back then people were actually living in them.
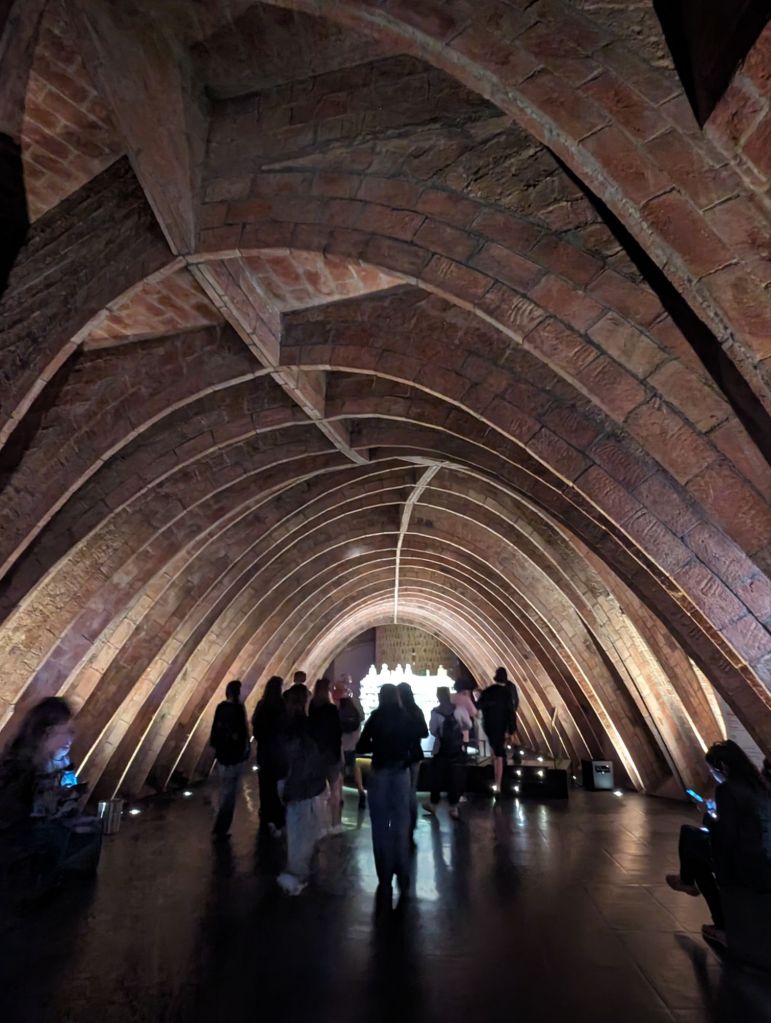
They are the love of the city now. There are 7 Gaudi locations in Barcelona that are now in the Unesco Heritage Convention, and I dragged Jim to 6 of them.
Barcelona is a great city on its own, but I do think all the Gaudi locations up the tourism several notches. It was crowded and we were there at just the beginning of the tourist season.
Barcelona is more than just Gaudi, it’s the City by the Sea, it has a fair, it has beautiful old churches, it has a Gothic area, it has La Rambla, it has food markets, it has great dining, it has a flea market, it has palaces, it has beaches, parks, art museums, and it even has other great architecture.
Did we see ALL of that, no, because I was on a Gaudi mission. But in between Gaudi buildings we got around to see the city. It was very rainy so we opted for “hop on hop off” bus transportation, which was a first ever for us. The open topped (when it was not raining) double decker bus showed us how big the city really is. We also saw a lot more than we could have if we didn’t use it. We saw the sea and beaches, we saw the views from the top hillside parks, and we saw architecture from the top of a double decker bus, which put us at eye level with stuff you cannot really see from the street.
We also ate the yummy food, walked a lot, window shopped, ducked into The Gothic area, rambled down La Rambla…and we looked and we saw and we definitely experienced!
We did a last minute change and instead of taking the fast train back to Madrid we, by we I mean Jim, decided we were going to drive to Madrid and go on the last adventure before the end of our trip. That will be coming up next. I’ve slowed way down on posting our trip, but I will finish!
After a few hours getting lost and contemplating death in Pompeii, we headed to Sorrento where the streets were packed with people, scooters, cars, lemon covered and flavored everything, and yes, happiness.
We found a spot to park, which was miraculous, so it was a sign to stop, explore and eat. Although it was hot out we opted for a table outside, but in the shade. We love people watching!
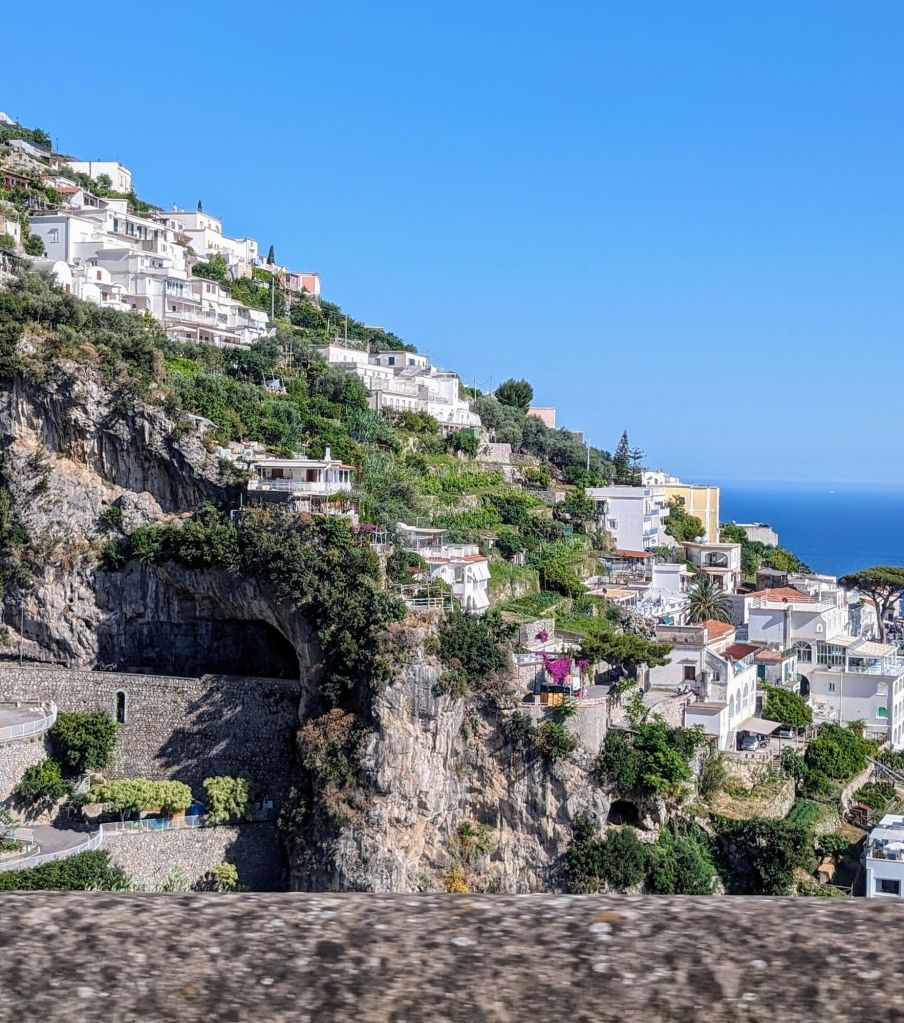
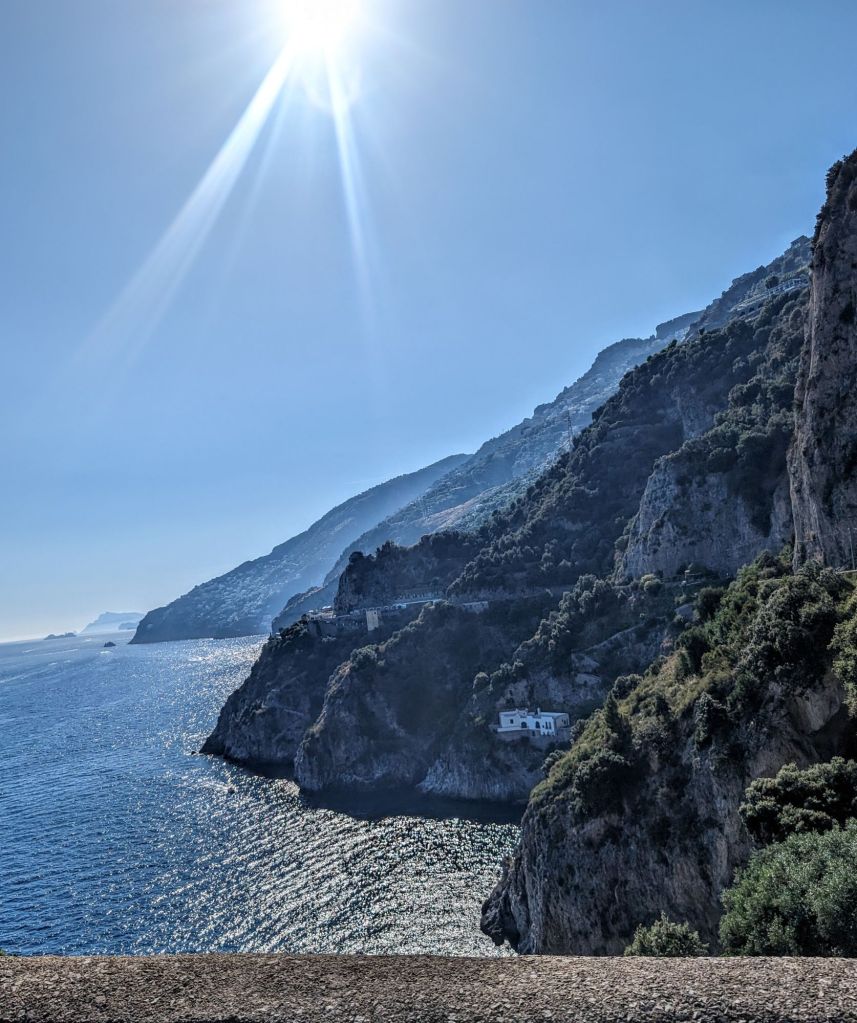
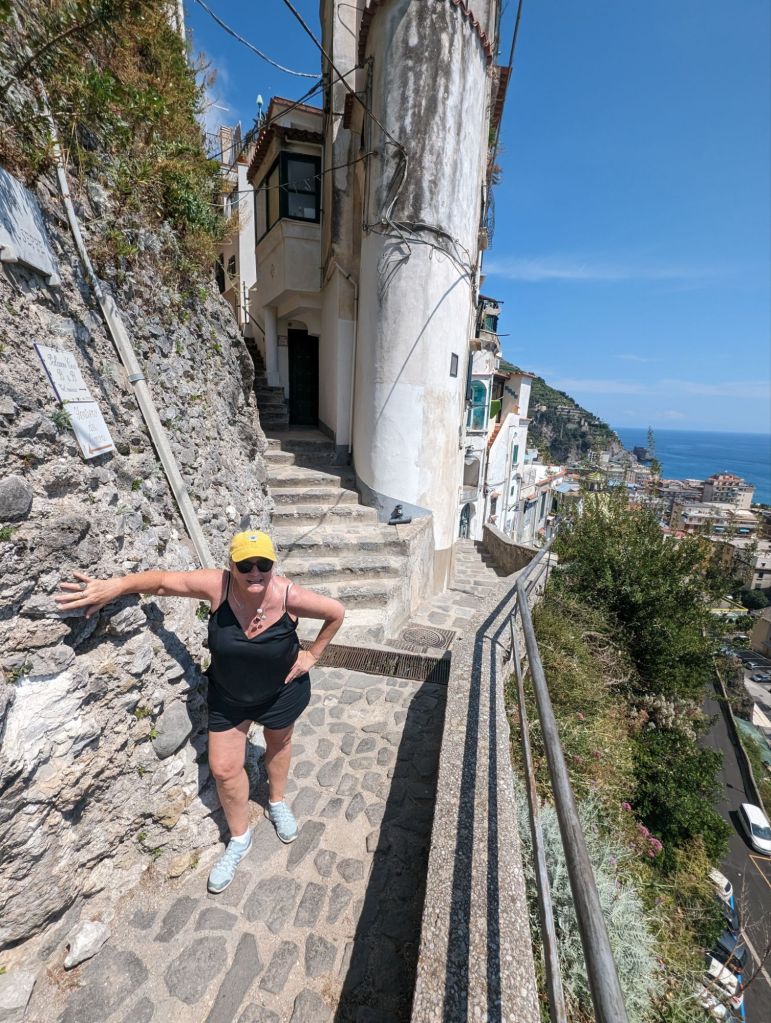
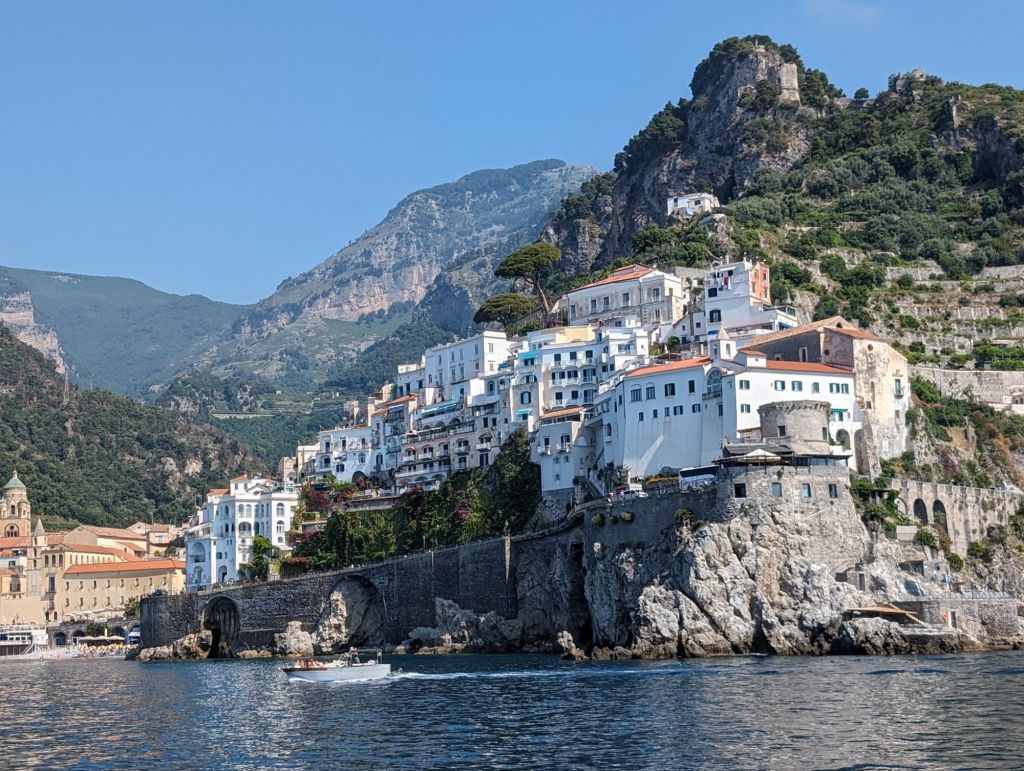
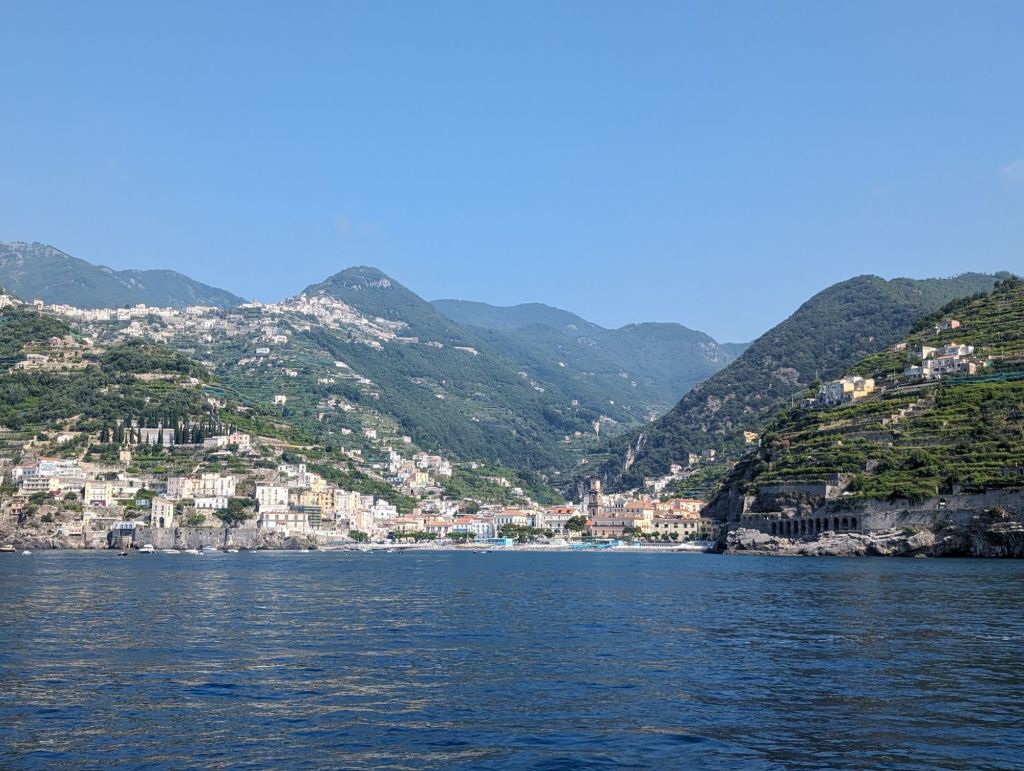
After lunch things got scary, for me at least. I picked one of the most southern towns on the Amalfi Coast to stay in, so we could drive through all the towns on the way there. The drive to them, through them is what roller coaster horror stories are made of, but if so beautiful!
Jim, I think had a blast driving the road, well at times. The other times either his nerves were shot from scooters passing him up on roads barely wide enough for two cars, much less the mass amounts of huge tourist buses going both ways. And let me talk about the people walking on the side of these roads with no sidewalks. I literally saw a family slam their bodies against the cliff wall as a huge bus went by. I was not going to walk that road, nope not me, not ever, especially married to Safety Jim!
But with all that said, it was fun for us. Yes, I learned my tummy gets a bit squishy when looking straight down at the beautiful coast line on a very high cliff road in a moving car. The wonderful scenes made me look! The beauty upon beautiful stacked up on beauteous is mind boggling. My photos do not do it justice.
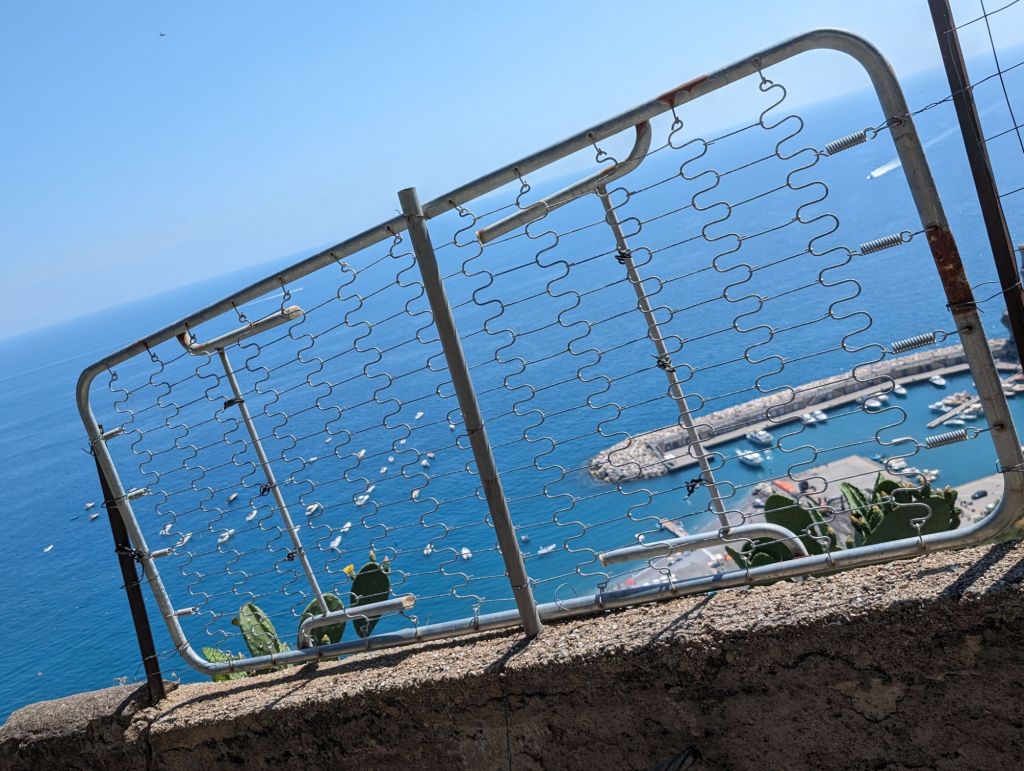
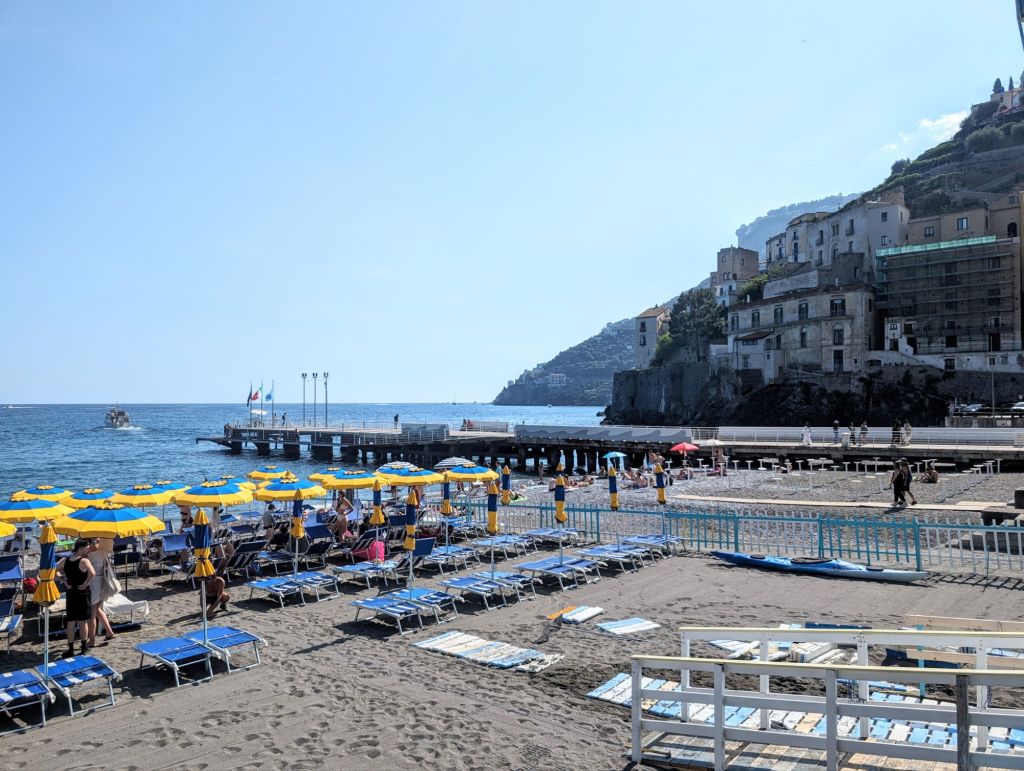
Even though most of the Amalfi Coast is situated with towns that climb down the cliffs, ours, Mairoi was all basically at sea level. There was defiantly a good slant downward toward the water, but our hotel was at sea level. Mairoi is a small town, but with everything one would need to vacate their for a weekend, week or on a month long holiday, especially since there are cheap ferries to all the towns along the Amalfi Coast.
Our first full day in Mairoi started off with a good breakfast at the hotel over looking the sea, and then we got to laundry. Not our favorite part of the trip, but a necessary one. We found if we barely wore something, or did not sweat much in…it could be worn again, but not the underwears and socks. We became very good at washing them out in the hotel room sinks and either hanging them about the room and if we were lucky, the balcony.
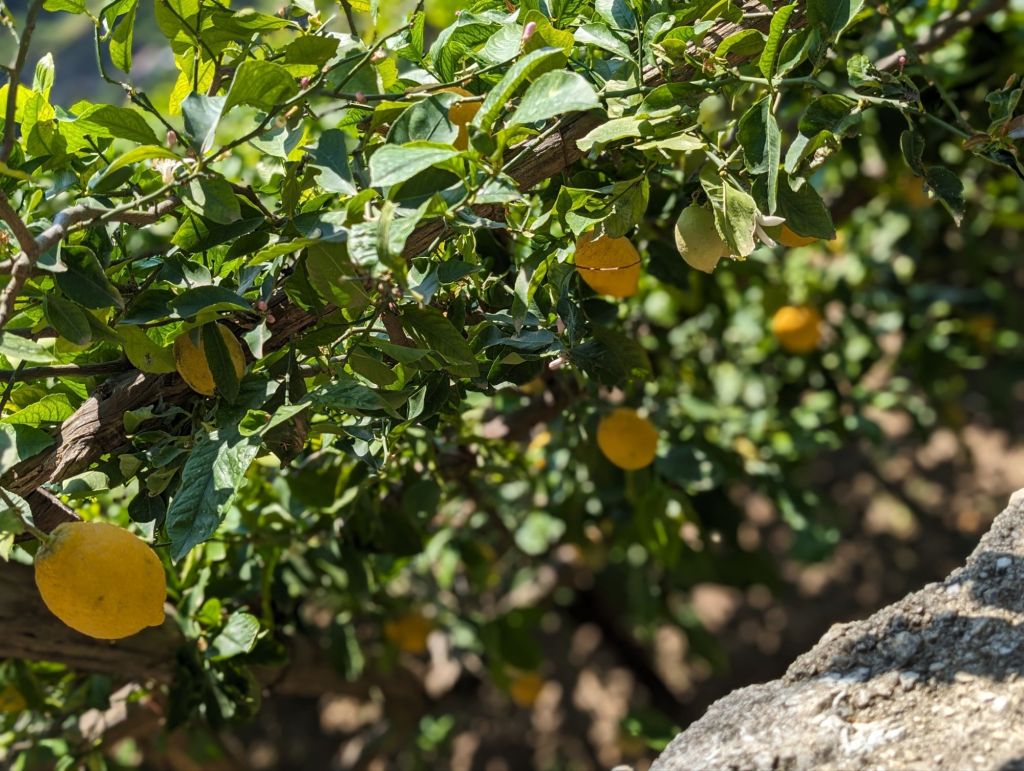
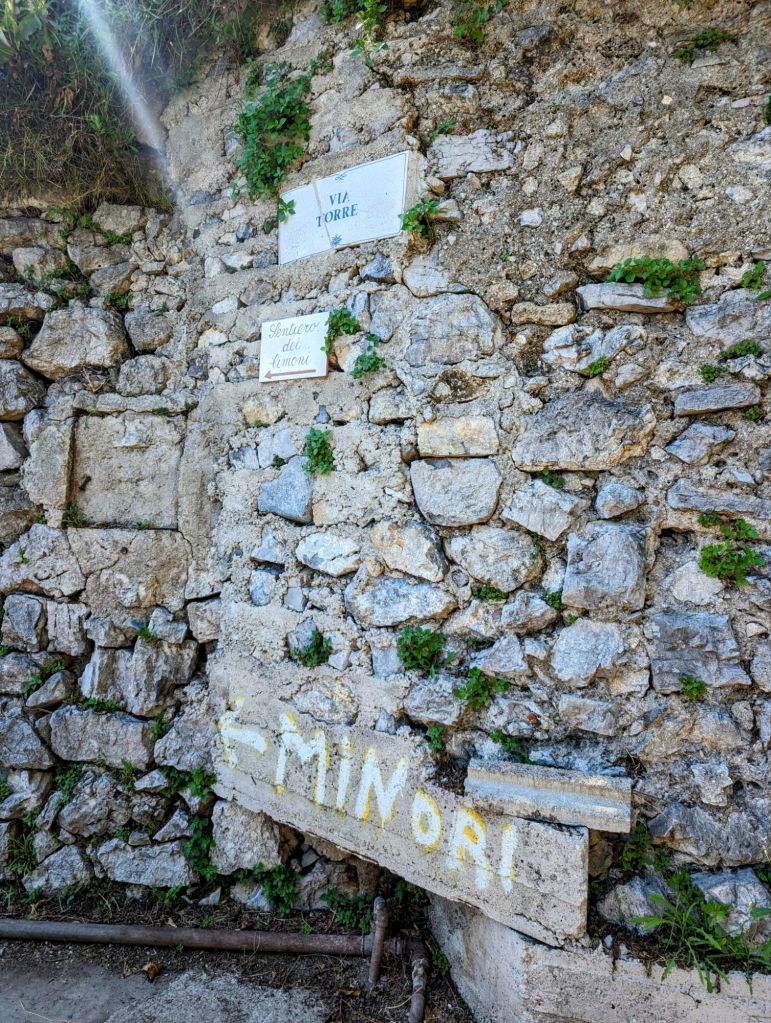
The funny thing about this day is although we decided to stay in at town at sea level, we also decided to go on the “Path of Lemons” which is path of over 1000 steps over cliffs raising up as high as 525 feet above sea level between Mairoi and its smaller neighbor town of Minori. One town is small and the other is smaller.
The best idea we had that day was to stop in an over the top wonderful bakery on our way to find the trail. We gave ourselves treats, yummy delicious, sweet sugar filled treats! And yes we did it before the hike. Don’t judge us!
Although all over the internet says it only 2.2 mile / 40 minute hike and good trail, they did not mention the heights we had to climb up and down to do it in the middle (yes, we left at 2pm) of a hot day. Again, it was a workout like most of the trip’s activities had been, but it was worth it.
The views, the lemons trees growing on cliffs with trellises is amazing, the views of the towns and the sea wonderful, the mom and daughter selling lemon water along the trail adorable! And the town of Minori was worth it too.
After we got to the back of the town we started to make our way down to the water and in search of something to drink. The town is medieval in its architecture, so we were looking all over the place. One place caught our attention, in the back of a dark business we saw an old guy pouring something into bottles, ah, limoncello. Of course, and they gave away free samples. It called to us, I mean, isn’t that what one does after a steep 1.5 hour hike over a cliff? Well, in Italy it is, at least for us. It was a tiny taste and we bought a little bottle of our own.
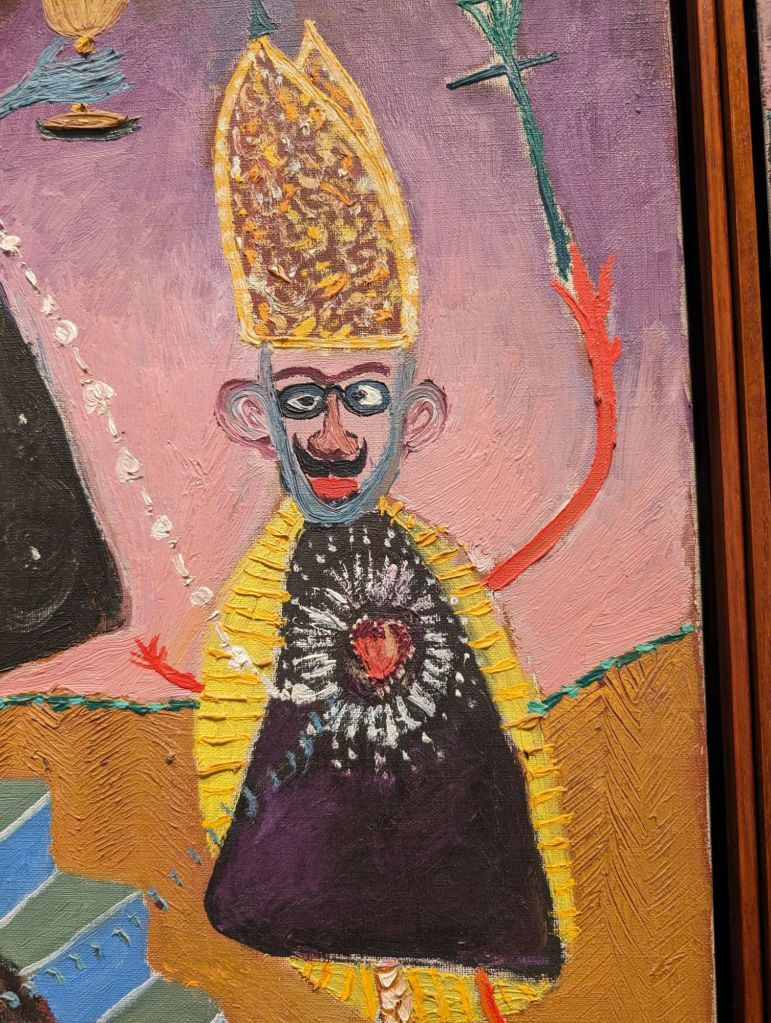
We then headed for the beach again, and again, I was stopped in my track. A bishop maybe, maybe someone higher in the Catholic religion was surrounded by at least 3 photographers walking up the steps of a cathedral. I had to take a photo too, I never got a photo of his face to try to see if I could find out who was this mystery man of religion. But I was there for it. Jim wandered ahead looking for something to quench his thirst.
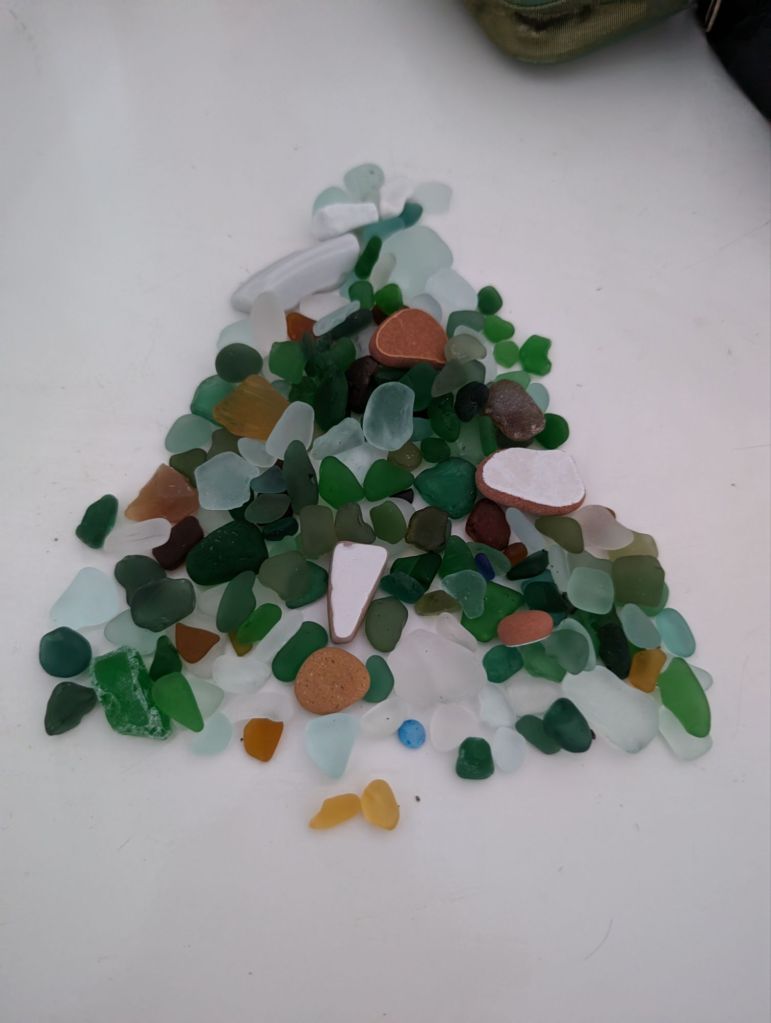
After that we found out about the ferry back to our town as we were not going to climb over that cliff again. We ate at the beach and I did a bunch of sea glass hunting while we waited for the ferry. We were also entertained by two guys working on laying down a wood path on the sand. When on holiday, chilling, you notice the little things. It was quite a nice afternoon and ferry ride back.
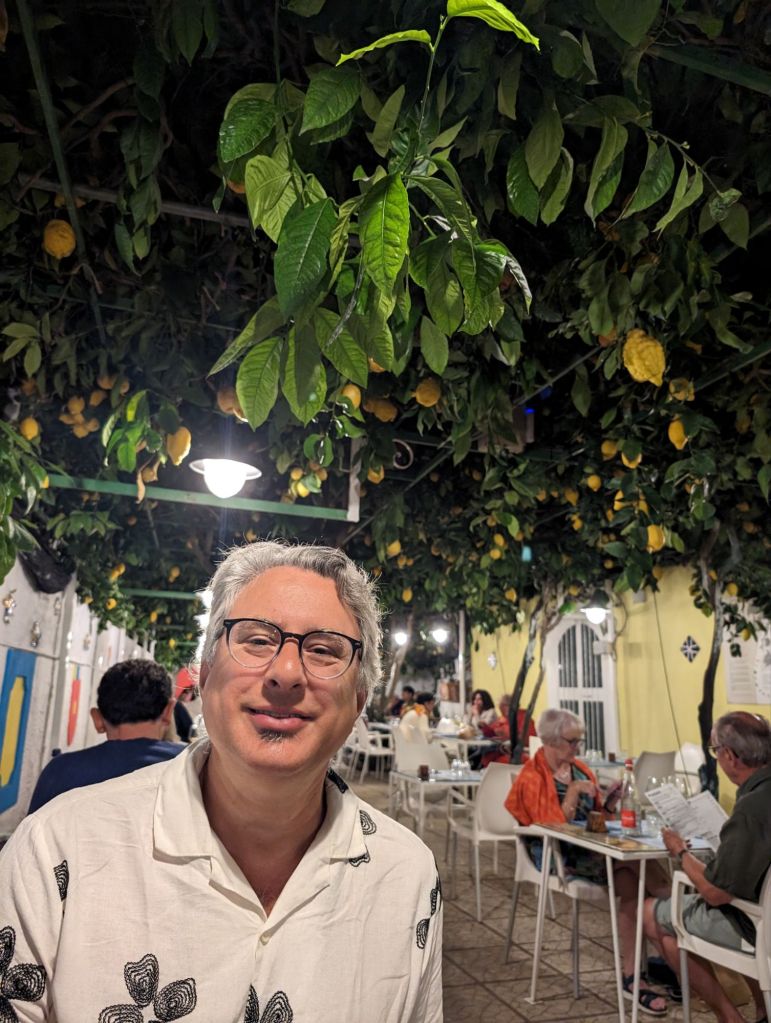
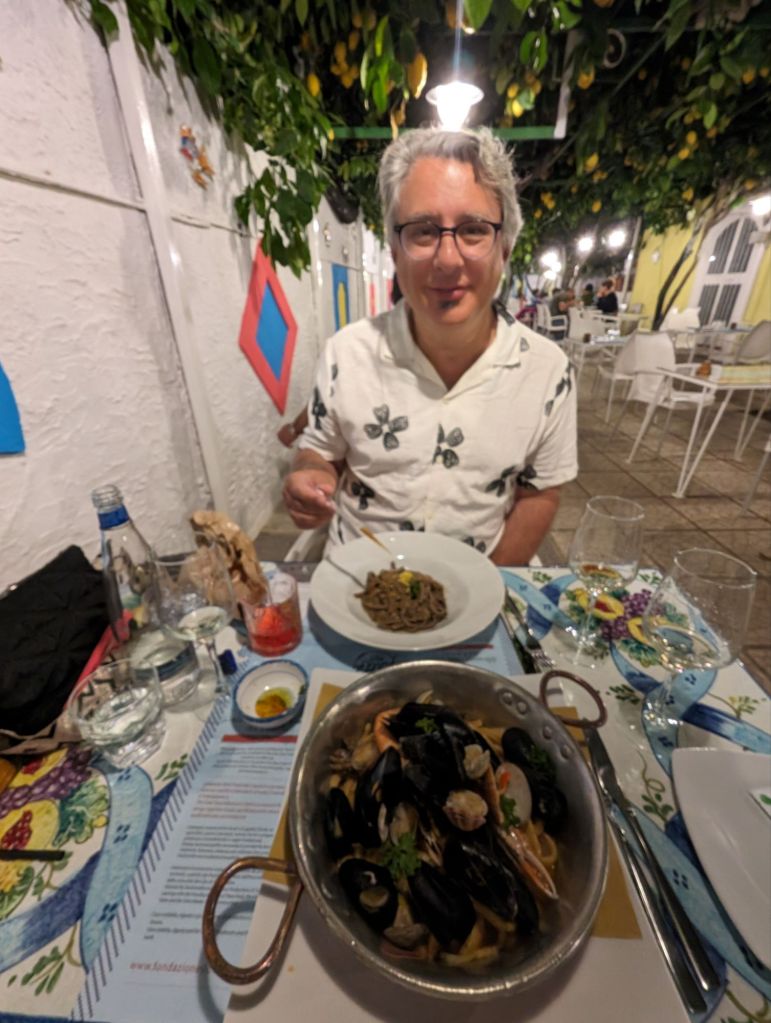
We showered and got ready for dinner, and a nice dinner under lemon trees we had.
The next morning we opted for an early ferry to the town of Amalfi. After wandering the streets and checking out the beach, we found an activity to do.
A tour of an ancient paper making factory. They made paper out of old material! They even rerouted the river through town to go into the factory as it was used to power the machines that were still there. One ancient and one super duper old. I even got to make a sheet of paper after the mashing/mushing part of the material was done from a large vat of material pulp. Very cool for us nerds.
After that it was time for a meal and I do think this is where I found my now beloved cocktail. An Amalfi Spritz, similar to the well known Aperol Spritz, but put limoncello in place of the Aperol. What a wonderful idea, and an even more wonderful taste in my mouth! Again we sat outside, the streets were packed with tours, cruises and vacationing people for our viewing pleasure.
We ferried back to our town, showered and changed for dinner on the rooftop restaurant and bar at our hotel, which also had live music. Our last night in Italy.
Italy, you so did not disappoint. You exceeded our expectations! Between Rome owning up to giant history with huge buildings, my own family history coming to life around Sant’ Agata di Goti, being so bowled over by the magnitude of Pompeii that we got lost, and now, the overwhelming beauty of the Amalfi Coast.
We will be back! For me, I’ll be back sooner than the last time I visited. I went to Florence and Sienna in the summer of 1986, right after I graduated from college on a 2 month European holiday. That trip is what set my love of travel. That and the road trips we took with Mom when we were kids.
To explore unexpected paths, adventure through land and history, see beauty beyond imagination, experience from another’s viewpoint, and learn, constantly learning. It’s in my heart, my bones and it’s part of my fiber. I met my match in Jim. I’m crazy thankful for the experiences in my life.
And I appreciate you taking a gander through some of them here in MY GNOME LITTLE WORLD!
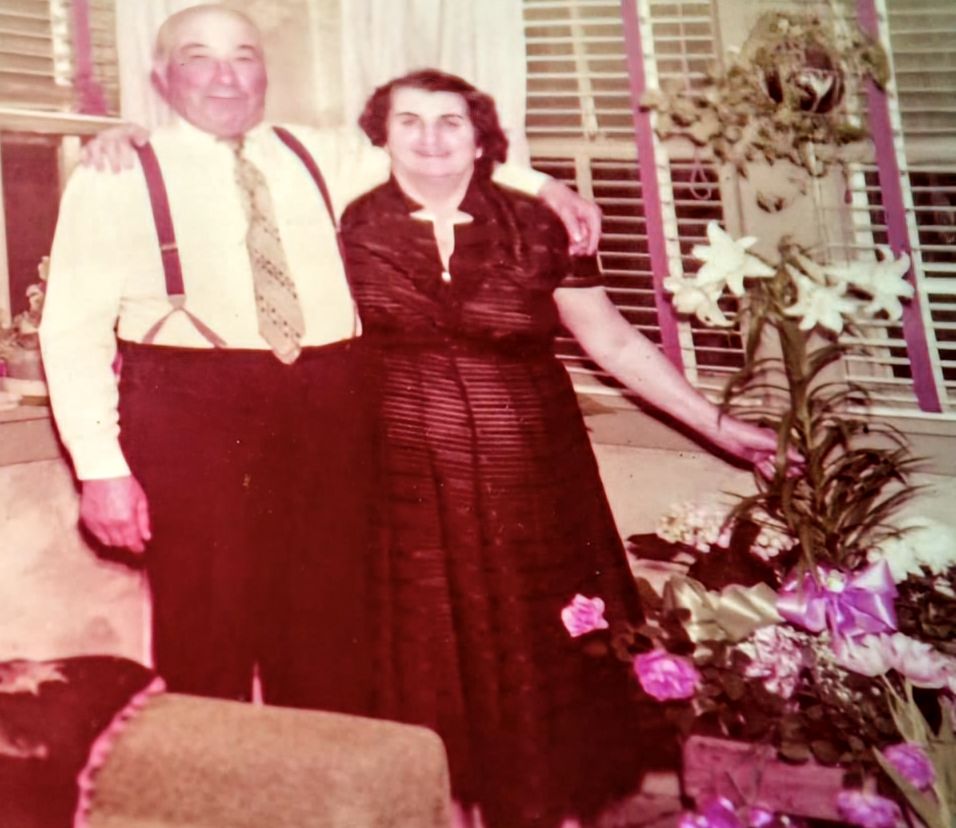
Yes, everyone knows I’m Italian. Okay, speaking of truth, I’m only half Italian. Well, according to Ancestry I’m only almost half (48%) Italian. Let me correct that and to be exact, I’m almost half American Italian. And I can thank my father for that.
We were raised knowing we had family in Italy. My grandparents had even gone back to Italy. I thought regularly, but I learned they did not. I have heard different versions of their story. Were they myths and legends?
For many people who have immigrants for parents or grandparents, we think about meeting our family back in the “old” country. Some people actual do it. My Uncle George, my father’s twin brother, and his wife did that once. Their story stuck in my mind, and Jim’s too. So it has been in the back of our minds to go where Grandpa lived in Italy.
The MythThe LengendThe Man!
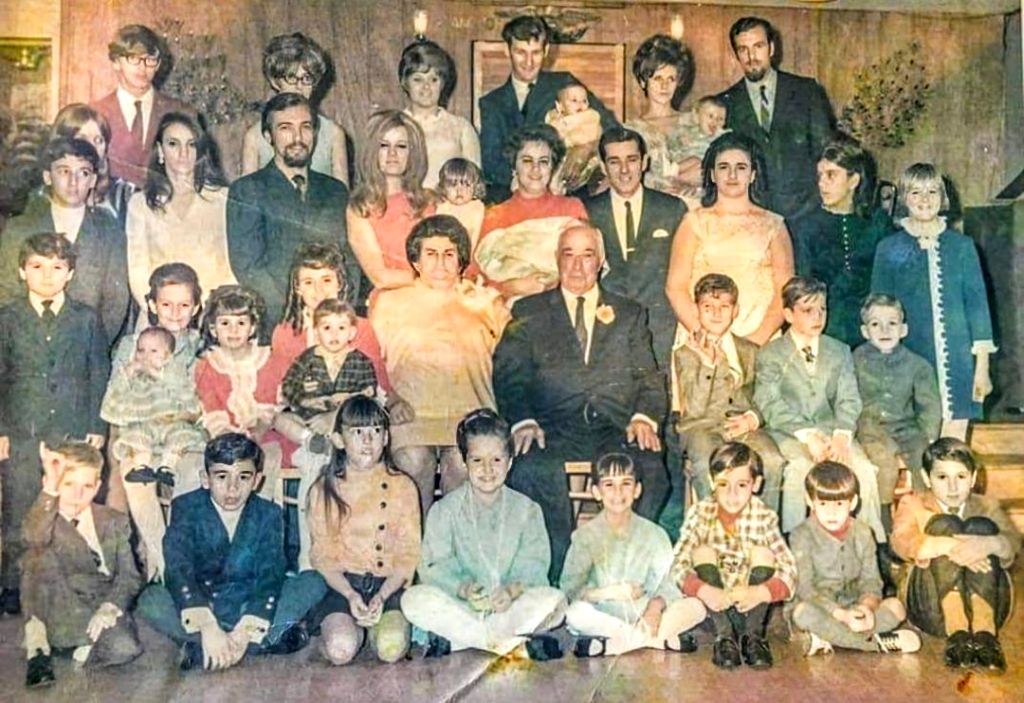
On that journey, 9 years ago I started a family FB page called “Balzaranos of the World Unite”. People joined, from all over the place. Yes, many from my family here in the States, but from other countries and lines of the family. Information rolled in, people share their genealogy research info, some posted old photos of family, some shared screen shots of documents and some just like posts they saw.
With all this in mind, a trip was planned for my 50th birthday year, but it never happened. I just turned 60 and again we planned, but again there was a chance it would get cancelled due to illness in our family. Once they were on the mend and stable, this trip was decided on last minute. And we decided last minute to go longer too, so I had 6 weeks of constant adventures to plan out in one month. Unfortunately, I didn’t think to reach out to people on that FB “Balzaranos of the World Unit” page regarding our Italy leg of the trip, until I literally got to where my grandfather grew up, Sant ‘Agata di Goti.
So, the evening of our arrival to Sant ‘Agata di Goti I messaged a person that grew up in the area, and who I talked to (through the Internet) before. I knew she no longer lived there, but I put out a last minute effort message to her to see if there was anyone she knew that could meet up with me.
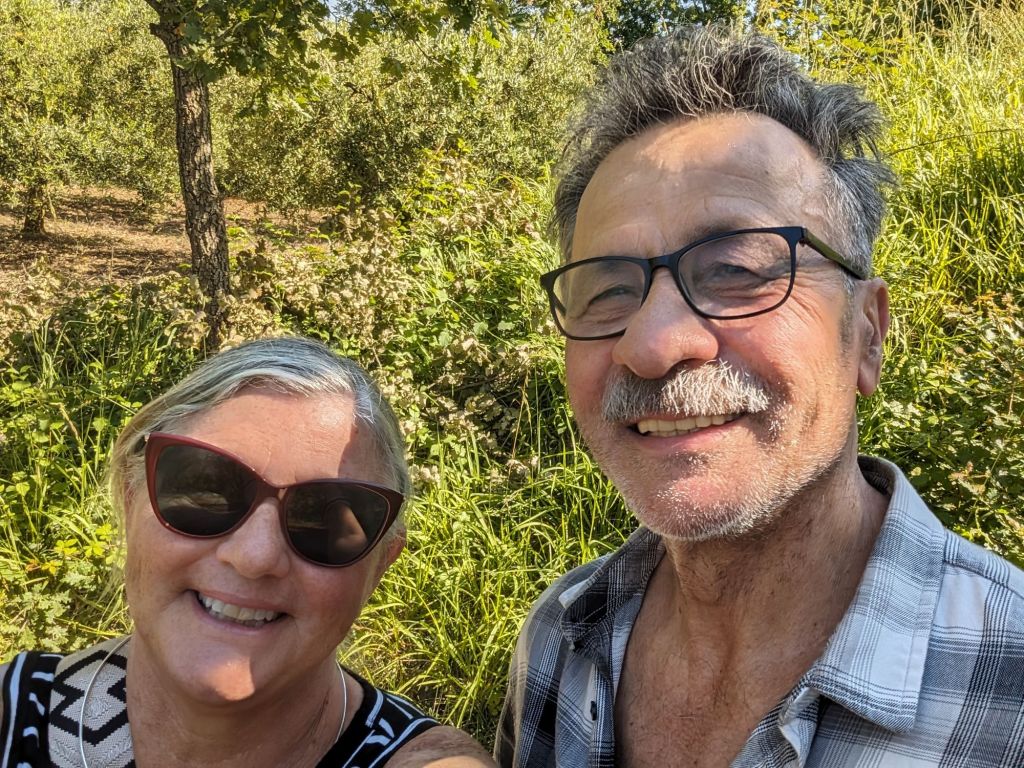
Fortunately, she not only, thankfully, came through, her Father did, and he is a hero in my eyes. Just writing this warms heart thinking of Paolo. He opened his arms, his heart, his home and his family to Jim and I. I tear up now thinking about our time with him, as I teared up many times that one day. Yes, we only met with him for a day, and it now seems like much much longer. And mind you, we did not speak each other’s languages too! Translation apps were our friends.
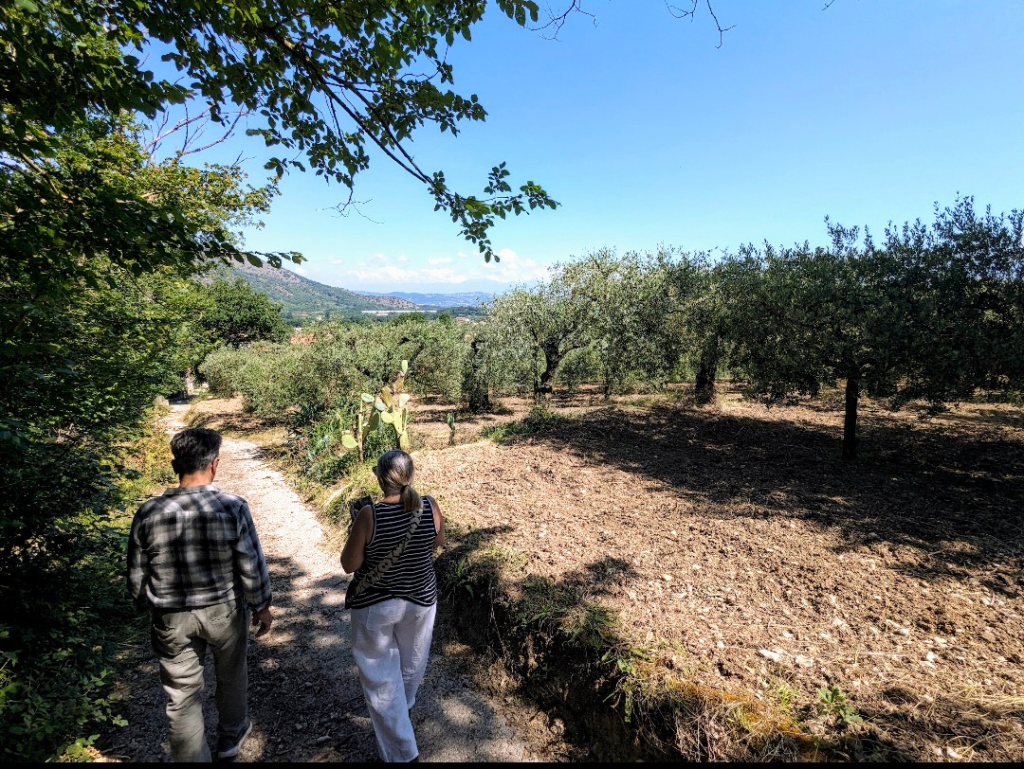
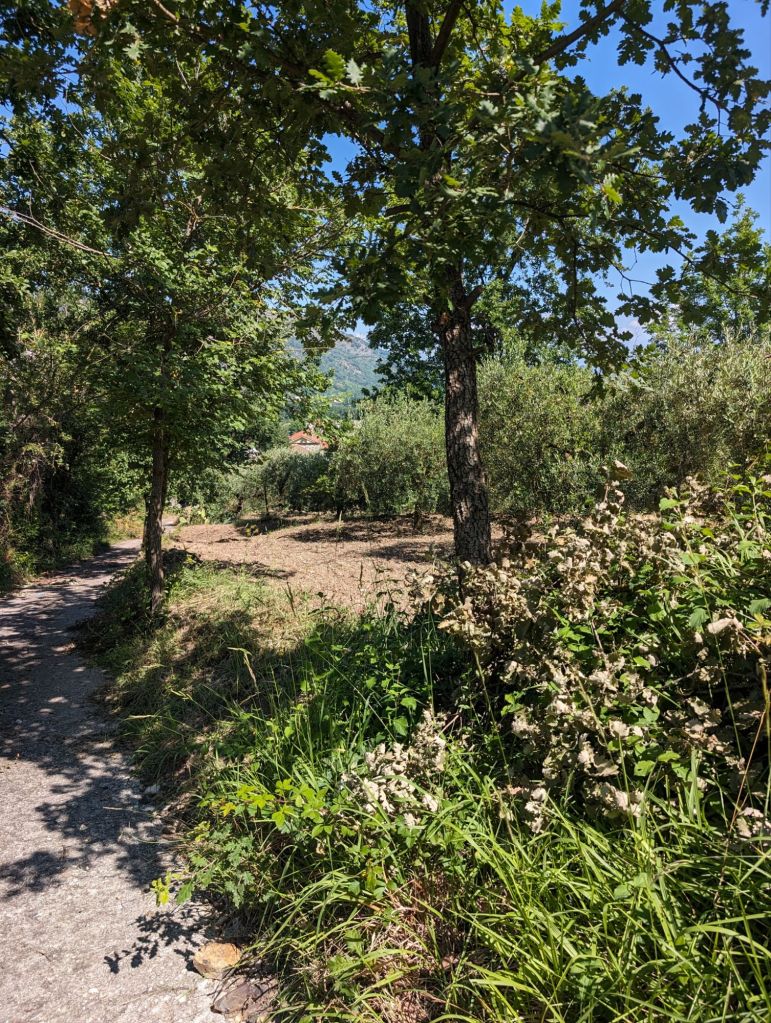
We met up with Paolo in the village of Bagnoli which is the part of Sant’ Agata di Goti where Grandpa lived. First, Paolo was not an 80 something year old guy, he looked around my age and nicely dressed. We “chatted” about family, and at some point I asked him, if we were at my grandpa’s childhood home. We were not, so he drove us to another part of the village not far away, parked the car and then led us up an old destroyed road into an olive tree farm. Paolo stopped and showed us where the house once was.
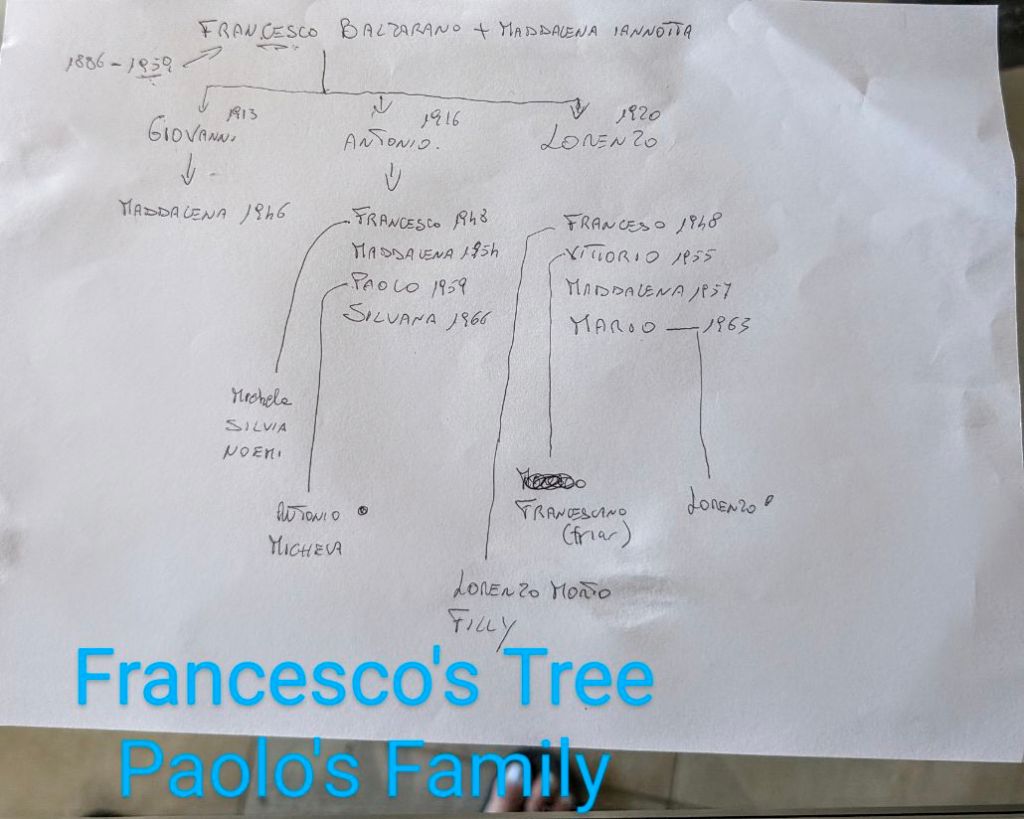
It was torn down. I don’t know why, he doesn’t know why, but there it no longer stood. We’ve both heard different stories about my grandfather’s family, but first let me explain how Paolo and I are related.
My great grandfather, Pasquale and his grandfather, Francesco, were brothers. There were many years between them, with Pasquale, my great grandfather, being much older than Francesco, Paolo’s grandfather. I just saw on Ancestry that Francesco may have been a half brother of Pasquale’s but there was nothing to back that up. So many stories, different stories, some match up, some do not.
Paolo told me that his father, Francesco, was close to my grandfather, his uncle, Lorenzo because they were close in age. Paolo grew up hearing stories of Lorenzo. Paolo’s knowledge of the family is that Pasquale took Francesco to the U.S., but then Francesco went back to Italy, married, stayed, and raised his family. More of what I know of the Balzarano history later.
Back to our day with Paolo and his family, my “new” family. After we saw where Grandpa’s childhood home used to stand, he took us to his childhood home. It was huge, because he said his father kept on adding on it so his family can live close together. It sounds like my grandparents. They owned a big home with at least 2 apartments on the property and I recall family did live in them. Paolo now owns his family’s home and he has plans to bring it back to life, which I love. I mean, the great memories I have of my grandparent’s home are precious, it would be great to still have a place to go to where those memories could come alive again, and dance in my heart.
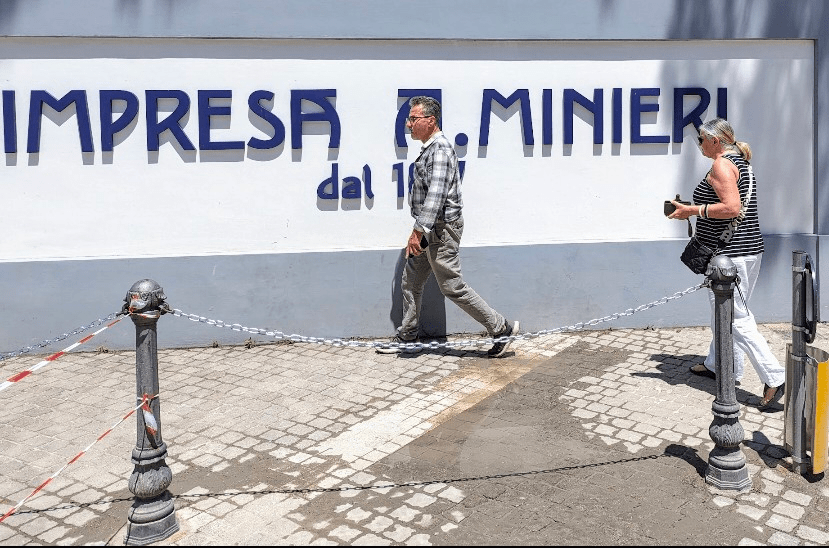
After seeing Paolo’s childhood/family home, he invited us to his home for lunch. We followed him out in the country driving for around a half hour to where he lives now, Telese Terme. We drove through a large sliding gate into an area that seemed like a business, and then it hit me. I was besides myself, I knew where we were. It was nothing to do with my family or our history, it was only from me doing a google maps search of my last name in the area of Sant’ Agata di Goti. Around a year ago I found Balzarano Suidae. I reached out but never heard back from them. I suspected we weren’t related, but I was later informed their old website service was not good at all and they probably never got my message. Anyway, I could not believe it was Paolo’s business. I had just told my husband, that I wanted to look for it when we were there. And there we were!
Now a step back, the 3 of us went into Paolo’s home and that is when and where I really understood how we were related. My husband drew out a family tree connecting us and getting more information too. It felt good, it felt right. We are family. After that revelation, Paolo took us to downtown Telese Terme to see the sights, which led us to a natural spring located at one end of town. We sat and drank the fresh mineral water. Yes, Jim and I drink the water in most European countries…and we were fine. We continued to “translator app” chat and just relax, until it was time for a tour of Balzarano Suidae.
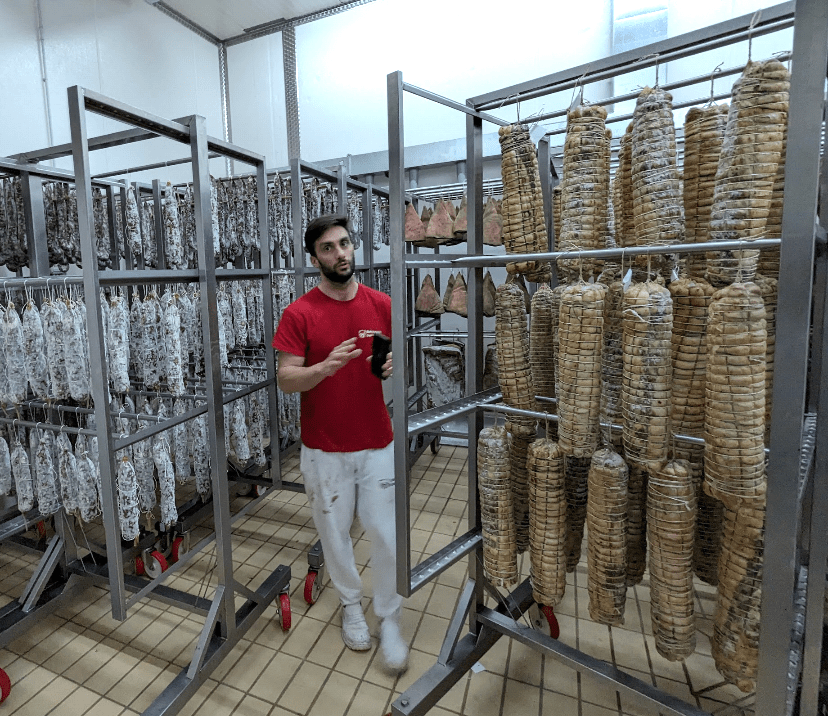
Paolo’s son, Antonio, who is his partner in the business, taught us all about what they do. Like I mentioned, it is a meat business, half is selling high end cuts of pig. Well, all of the business is all about the pig, only Italian pigs of maybe a certain variety. The other half of the business is curing meat and making of sausage, salami, prosciutto and the such. They do everything naturally and it is a very precise business. Jim was in heaven learning some of the details. I was when we got to do some quality control tasting! Yum, is not even a close description. I have never had such lean salami before! I so wanted to buy a bunch for everyone, but it’s illegal to bring it back. Bah. One day Balzarano Suidae will be famous in the United States, mark Antonio’s words, but first we have to work on the strict regulations for importing meats (without all the crappy preservatives and chemicals in them).
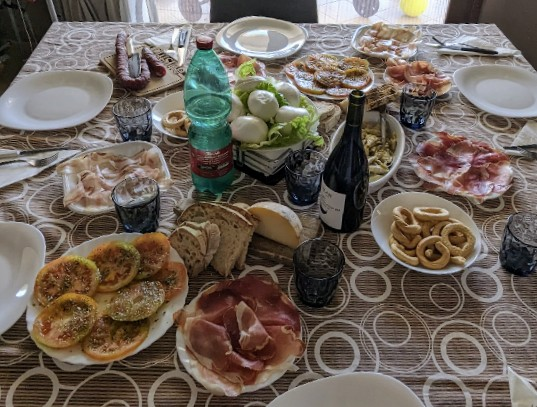
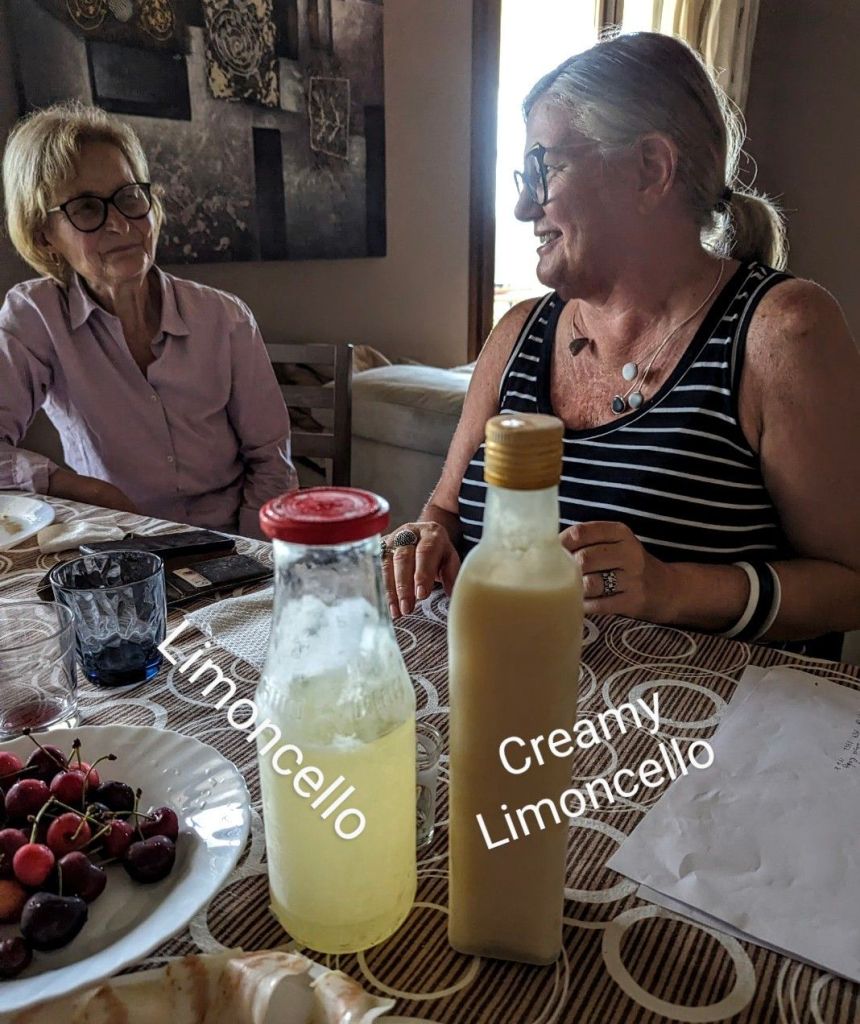
After that we looked through some photo albums, it was lunch time, and lunch it was. I was fooled once again in Italy. Secondo and terzo are real things, its not a lunch it is THE meal of the day. We sat down to a real charcuterie, not board, but a whole table. All their company’s meats, some cheese, tomatoes, olives and bread all over the place. Jim and I ate like fat Americans (and basically we are compared to my slender Italian family). Then I hear stuff going in on in the kitchen and out comes bowls of pasta. And that is when my memory kicked in of when I had a meal with a friends/family of friends back when I was 22 and in Florence, Italy. Our eyes got crazy wide, but of course there was a second course. We ate because were not going to be rude, and yes, it looked so very good too. And it was. Honestly, I am glad I did not go too charcuterie crazy, because after the pasta there was more food. Antonio did warn us though. At the end of the tour, he said, “You have had the American Hamburger, but today I will give you an Italian “ham”burger.” And he did, it was a patty of his quality ground pork. Yes, we ate it and it was delish! And so was the fruit they brought out next. Oh my happy full belly, but not full enough for a bit of homemade limoncello and creamy limoncello with some fruit. We also accepted espresso so we would not fall asleep on the way home. We felt more than just family, we felt special.
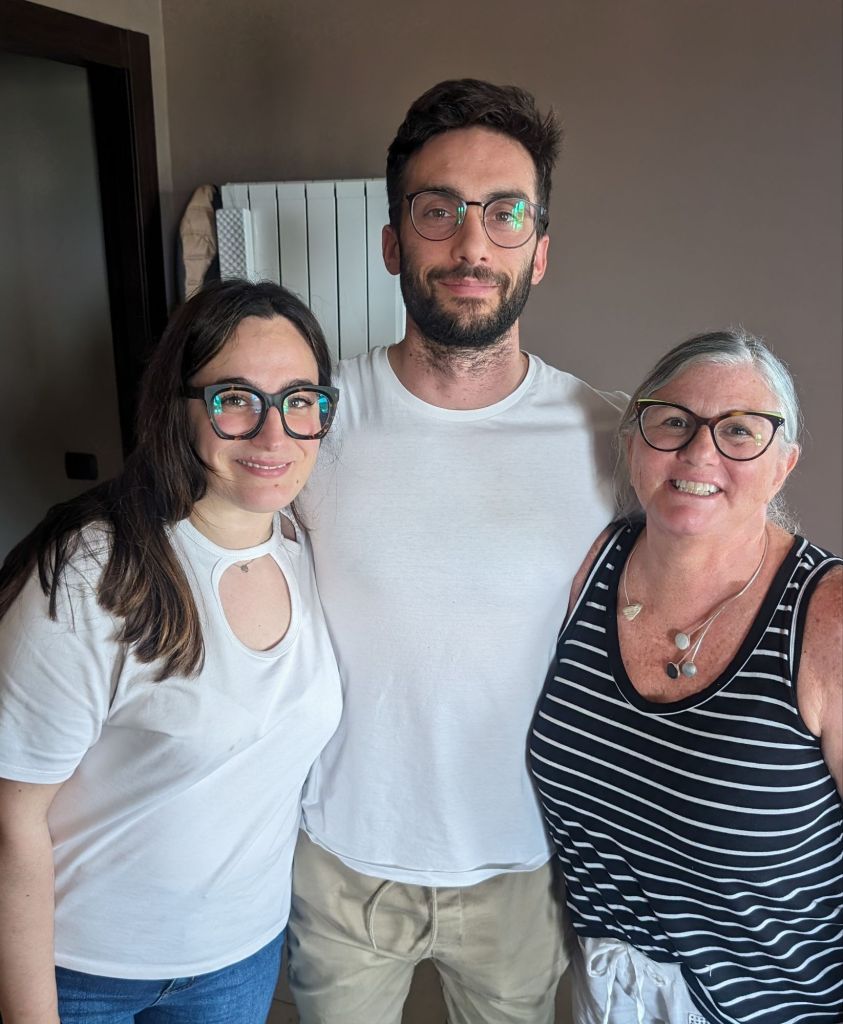
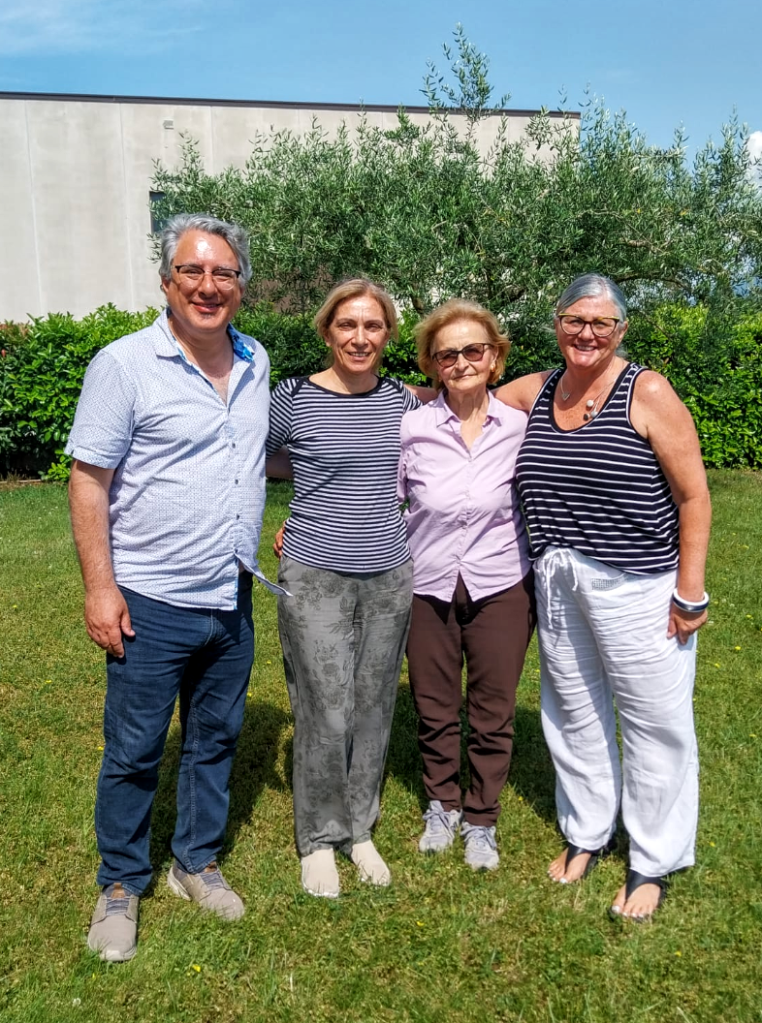
Wait, lunch was not done yet. It was not just the great food that made this lunch so special, it was talking and getting to know each other, the laughter and stories. Yes, there was a language barrier, but that does not stop Italians. Antonio, his wife Marta, Paolo’s wife, Noemi, and Paolo’s sister, Maddalena, are now my family. Technically they were already family, but they are family family now. By the way, they were not the only family I met that day, Michela, Paolo’s daughter (and the person that connected me to her father) called in on video, as well as Paolo’s other sister, Silvana. Oh, how even special this made me feel.
Maddelena remembered when my grandparents went to Italy. Antonio talked business with Jim. Noemi told me I look so much like a Balzarano. Marta helped translate. Jim’s was trying to figure out how to get Balzarano Suidae meats to the U.S. I was in the middle of it all, taking it all in, and Paolo filled everyone in what he and I had learned earlier that day about our family.
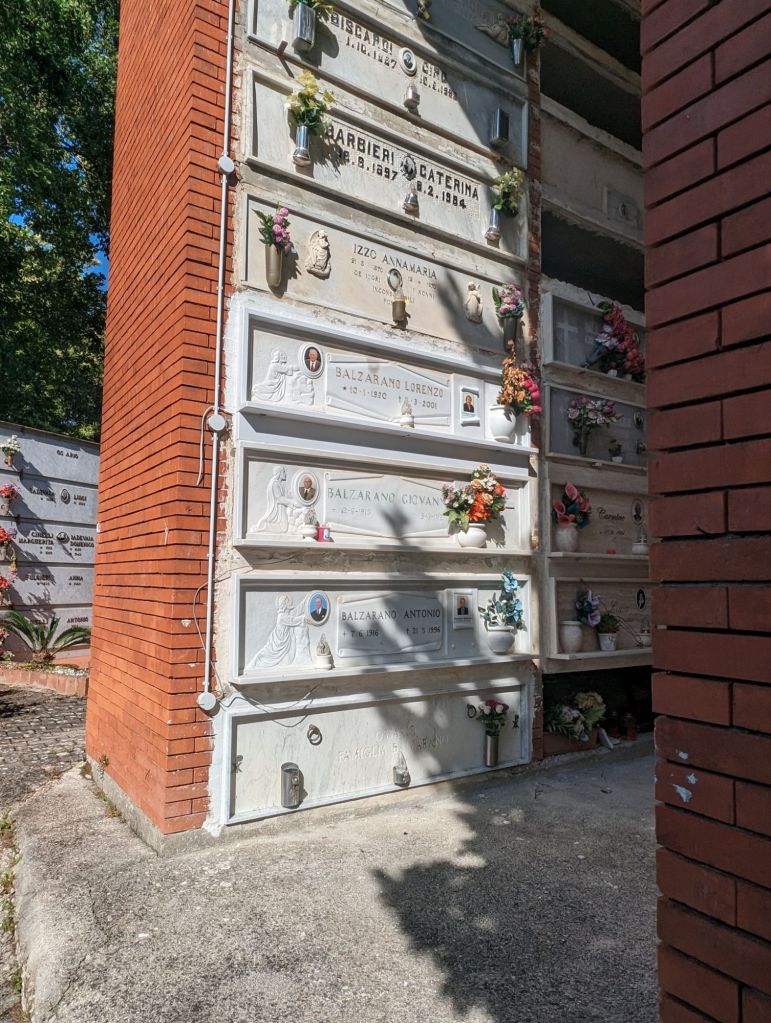
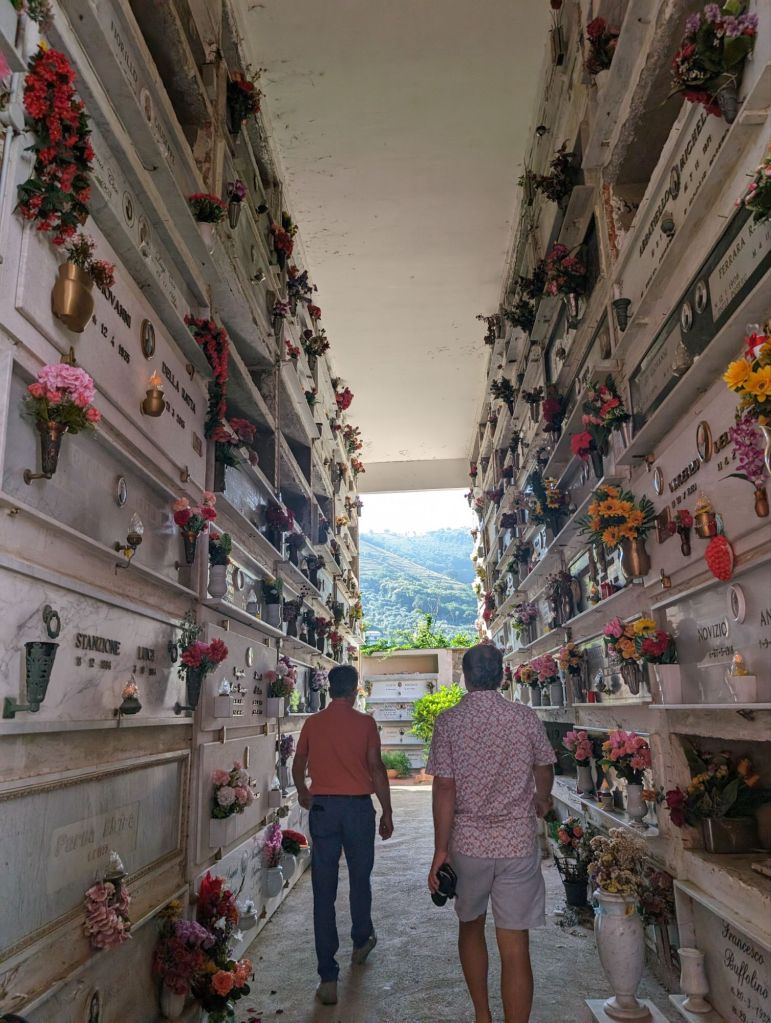
But there is more to learn. The next morning before we hit the road to the Amalfi coast, Paolo met up with us one last time to show us where our family is buried. We saw where his mother, uncles and father and even grandfather, Francesco was buried in a Sant’ Agata di Goti cemetery. But what about Francesco’s brother, Pasquale, my great grandfather? What happened to Pasquale? Paolo said that Pasquale went to the U.S. and thought he was buried there. My grandfather was born in Italy in 1896. So did Pasquale move back to Italy too? What is his life’s story.
Why didn’t someone, one of my grandfather’s 12 children, write things down? Even though I am thankful I got information from my Aunt Gladys and Uncle George, it was limited. My husband was frantically writing it down as they talked about family. I am happy I got this information and it helped, but at that time, I am changing lanes here, what I really wanted was more information about my Dad.
My father died when I was 4 years old from a freak work accident. I, nor my little brother who was born 3 days after my father died, have no memories of him. We asked siblings and my Mom, but I feel we would just get washed over responses.. Yes, everybody loved him, he was handsome and the life of the party…but what about the nitty gritty of the man who made me. When I asked my Uncle, my father’s twin brother, it was too hard for him to talk about my Dad still around 56 years later. So I will never really know who my Dad was, but what I can do is try to find out more about his family and the past.
Although most of the family grew apart and all us cousins went our separate ways, I feel very connected to the Balzarano family. Maybe not the people per say (love you guys, you know what I mean), but the memories, the immigrant story, the personality, the connection to the “old” country, Italian New Yorkers imagery, and most of all the American Italian-ness of it all.
So getting to meet people in Italy, Balzaranos, my family, was something my heart needed. Knowing some of the stories of family back in Italy are actually true, and having someone to help me figure some of it out was what my always information seeking head needed. Speaking of figuring things out, I want to figure out Pasquale’s, my great grandfather’s, story. We have names of who think his children are, (Lorenzo, of course, Carmela, Victoria and Maria Carmina) and I think a name of his wife (Mariangela Rainone), but from there things are not clear at all. So if anyone wants to help me, please reach out to me on my FB page “Balzaranos of the Word Unite!”
Thanks Mom and Dad for bringing me here. I want our family to live on. It is into the future, but I want the past to come to me now. I want to learn. I want to know.
Thank you once again for visiting
MY GNOME LITTLE WORLD.
The travel Blog will continue with Pompeii, Amalfi Coast, Barcelona, and the Drive across part of Spain, including a stay in Zaragoza. And it will go back to mostly photos.
First off, this post is not about the Saint, but look her up. Second, this post was supposed to be about the town and my relations to it. But, the town itself needed its own post. And third, my story about how and why I went, and the relationship I now have with it, deserves its own post as well.
So while I think about how to do this rehabbed post, I give you these flowers I took photos of on the way there.
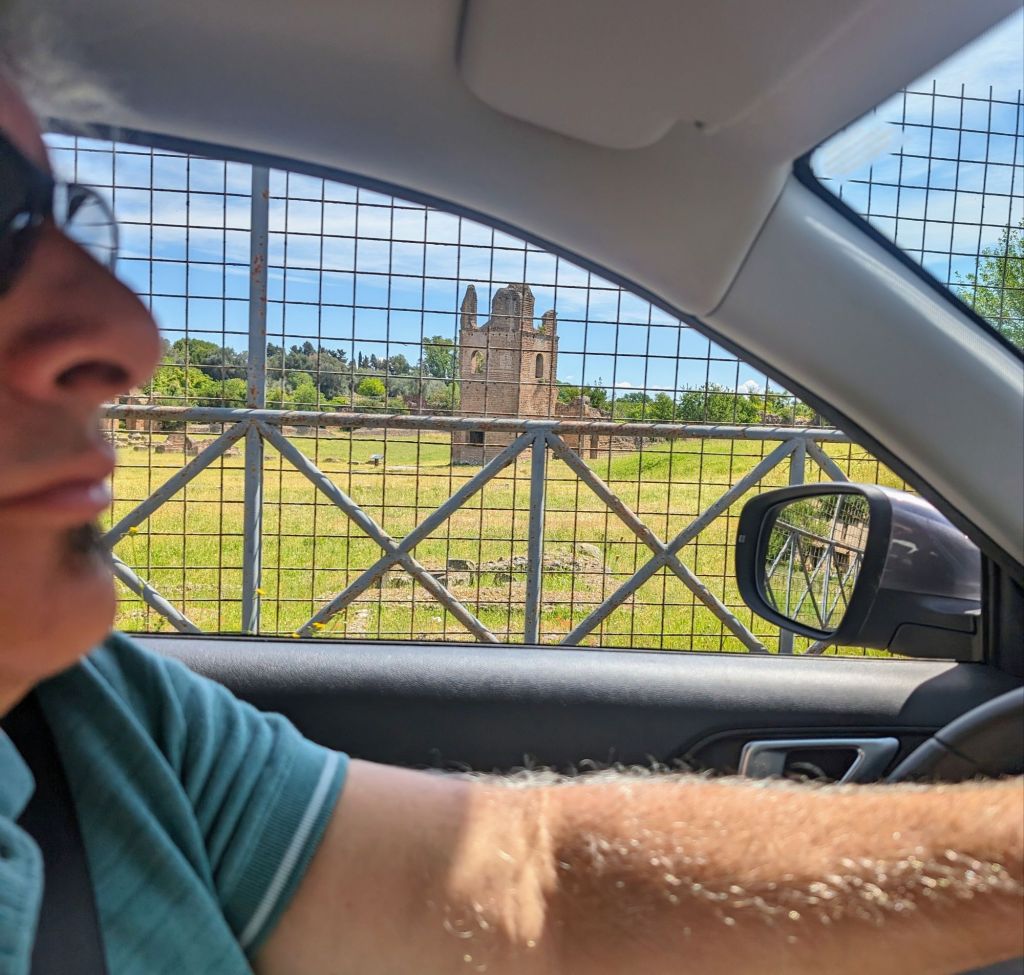
This part of our adventure started off on the Via Appia, The Appian Way. We left the city as they did 2000 years ago. Ok, not quite the same, but the road was so bumpy at times I don’t think it changed much.
By way of Via Appia we drove through catacombs (think dead people). Then into the open country side where we visited dead buildings (my new phrase for ruins) of what was once a huge Palazzo and property.
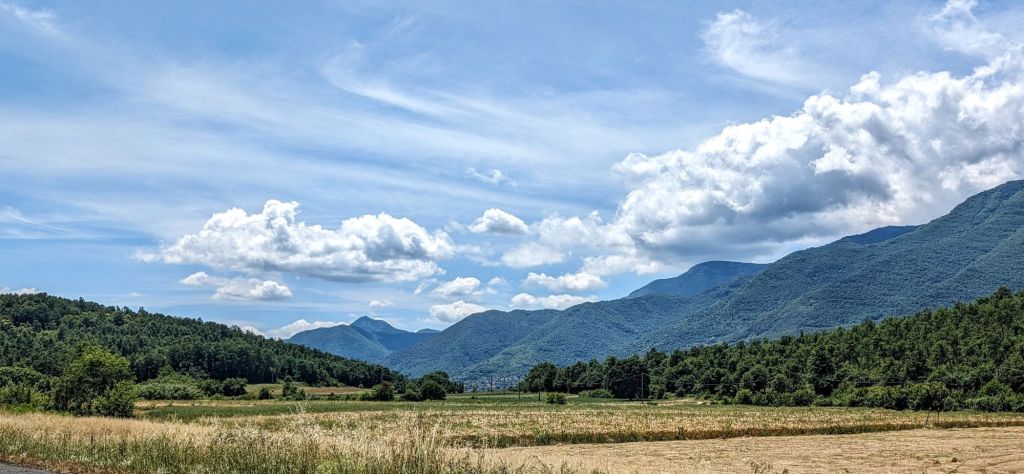
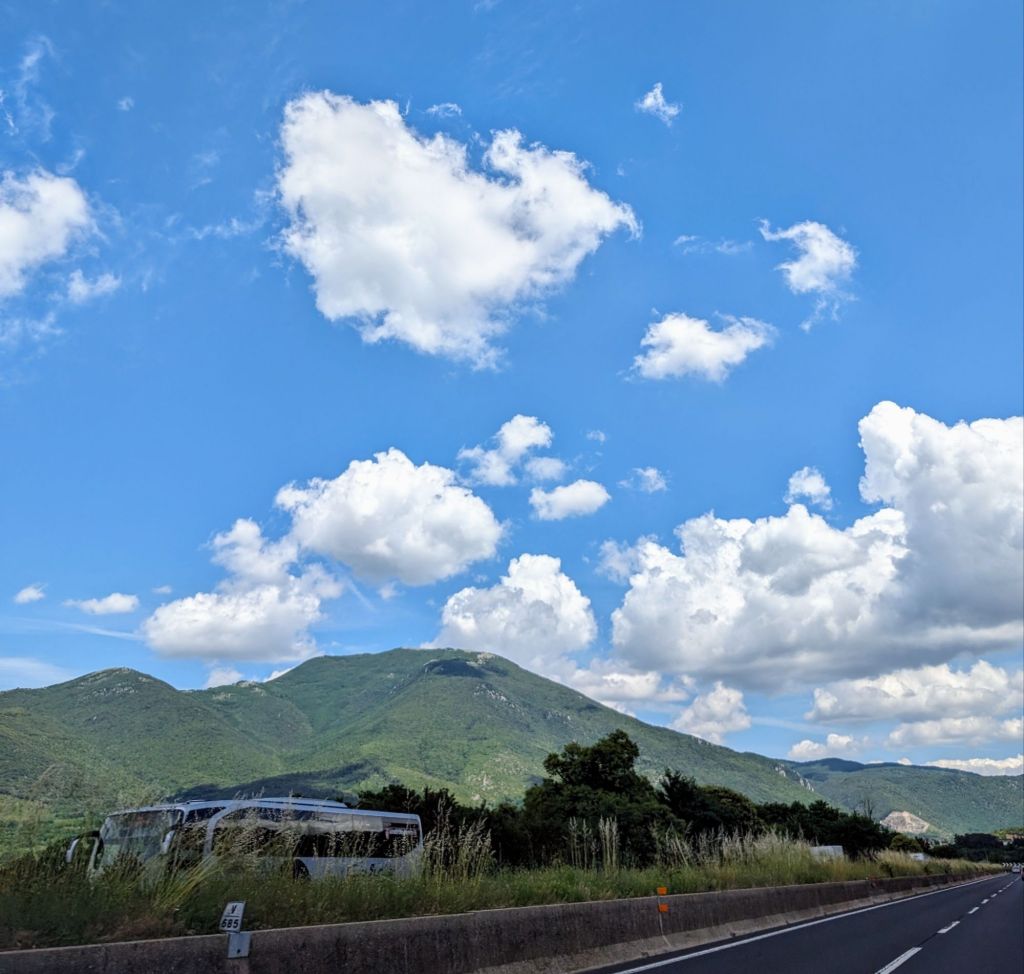
We found a smooth highway to scoot over to for our drive through the mountains & then a yummy lunch in the small village of Ceprano.
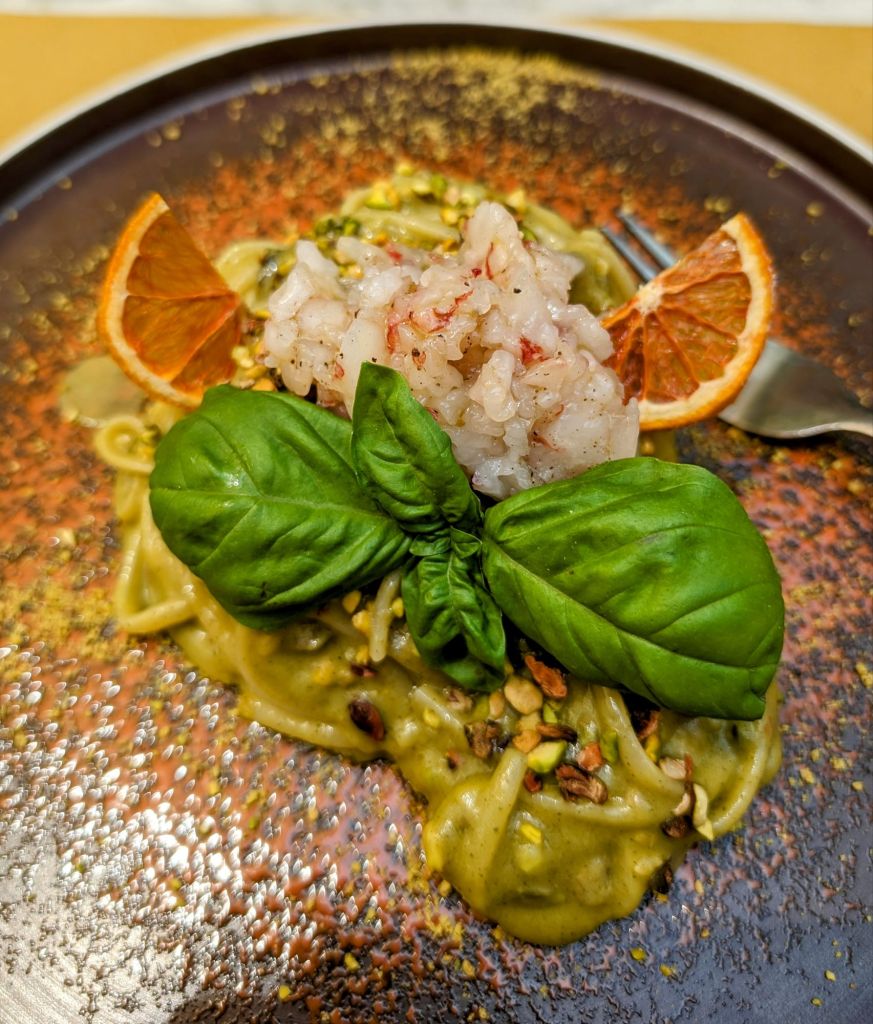
First I have to explain the dish above … One of my fav the whole trip. It’s pasta with pistachio sauce with shrimp tartar and basil on top. Yum.
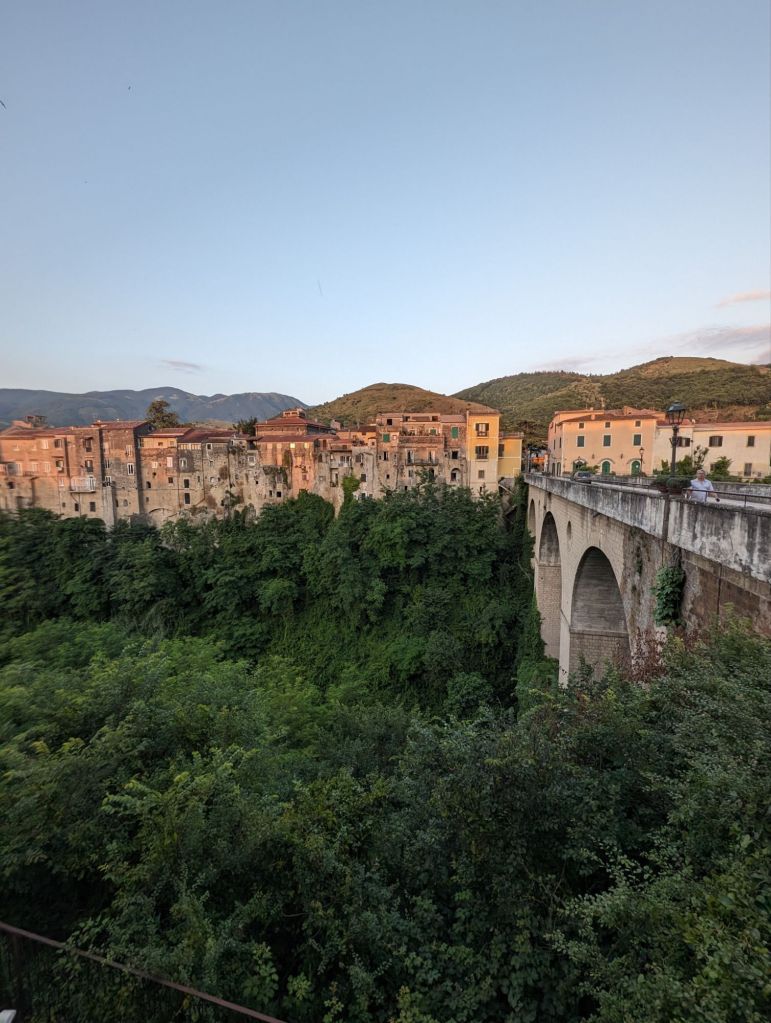
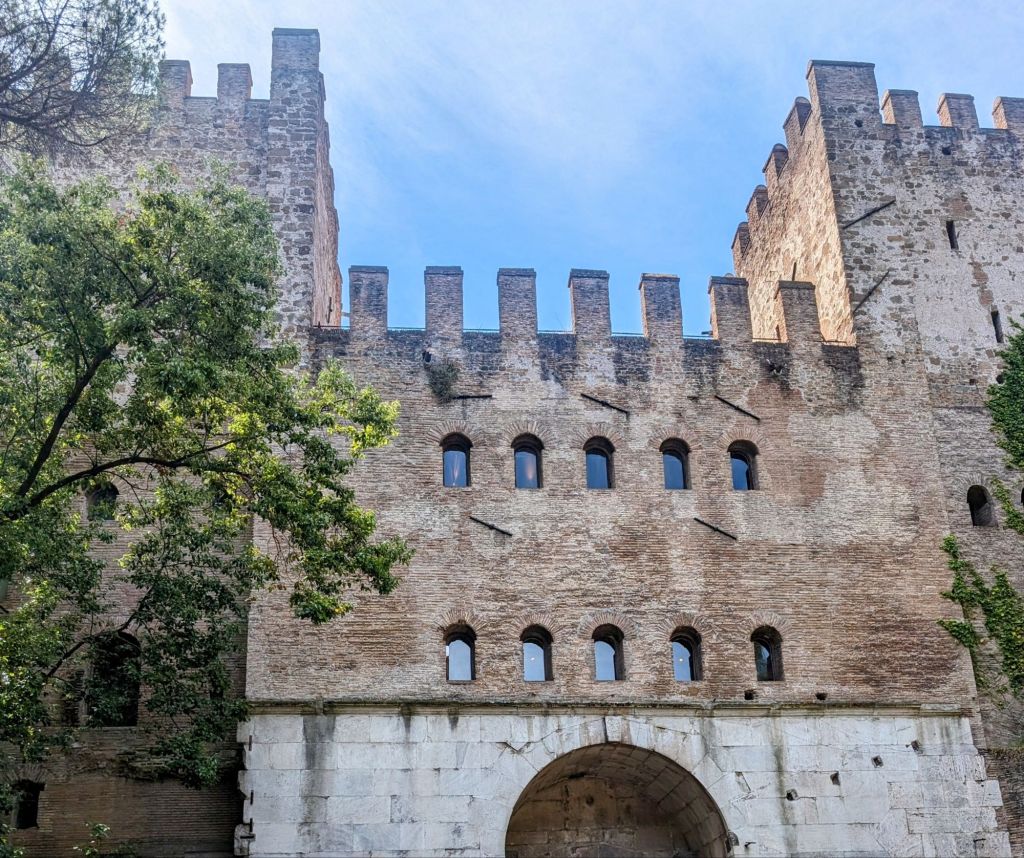
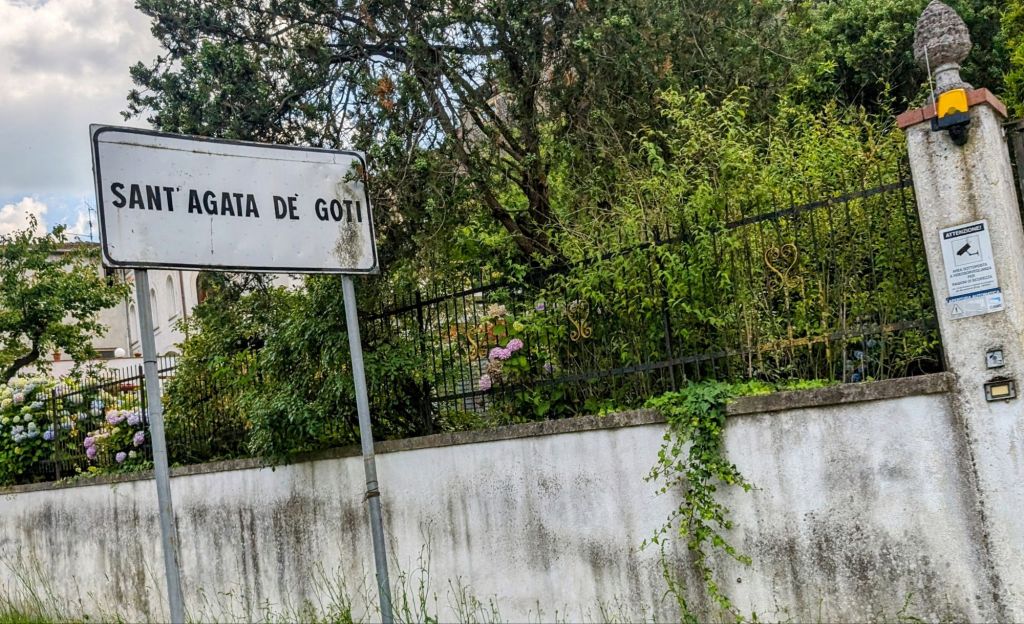
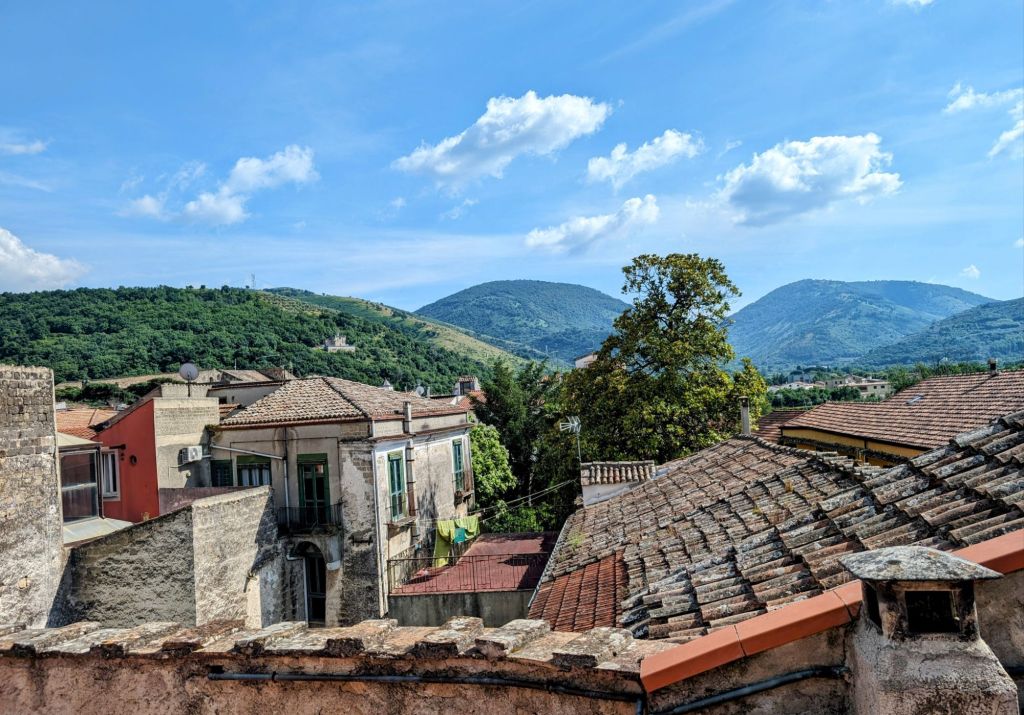
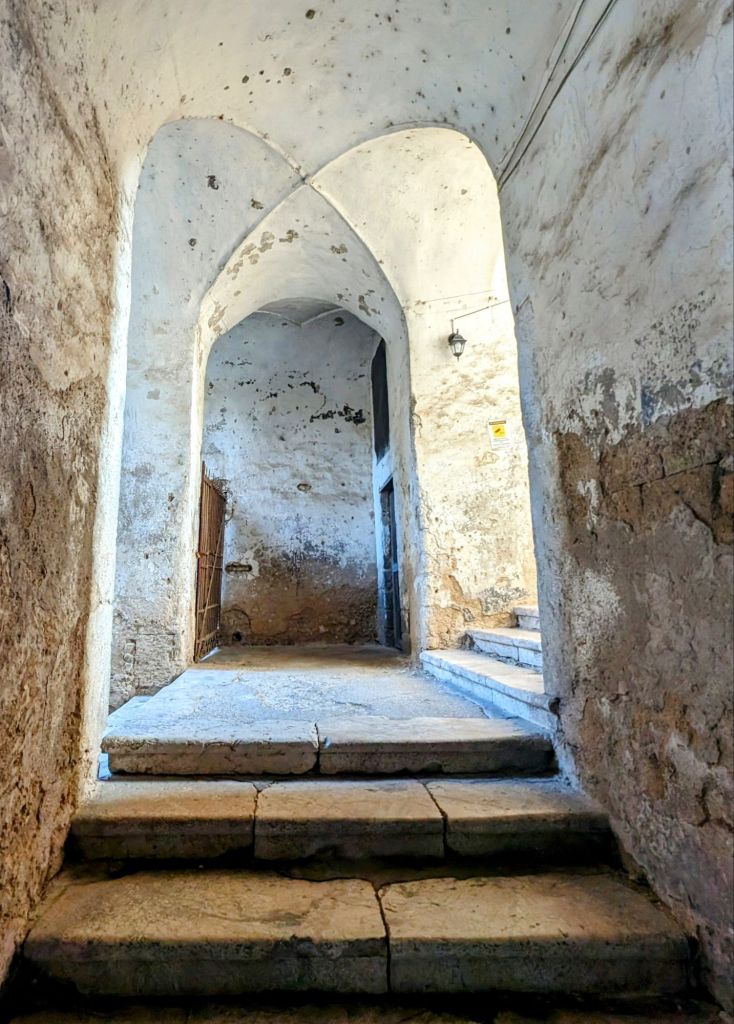
Upon arrival, the adorable Gothic town of Sant’ Agata di Goti that’s situated high on a rock surrounded by a river and a deep ravine, we sighed. It felt like home, like my past Italian life’s new body was back where it belonged.
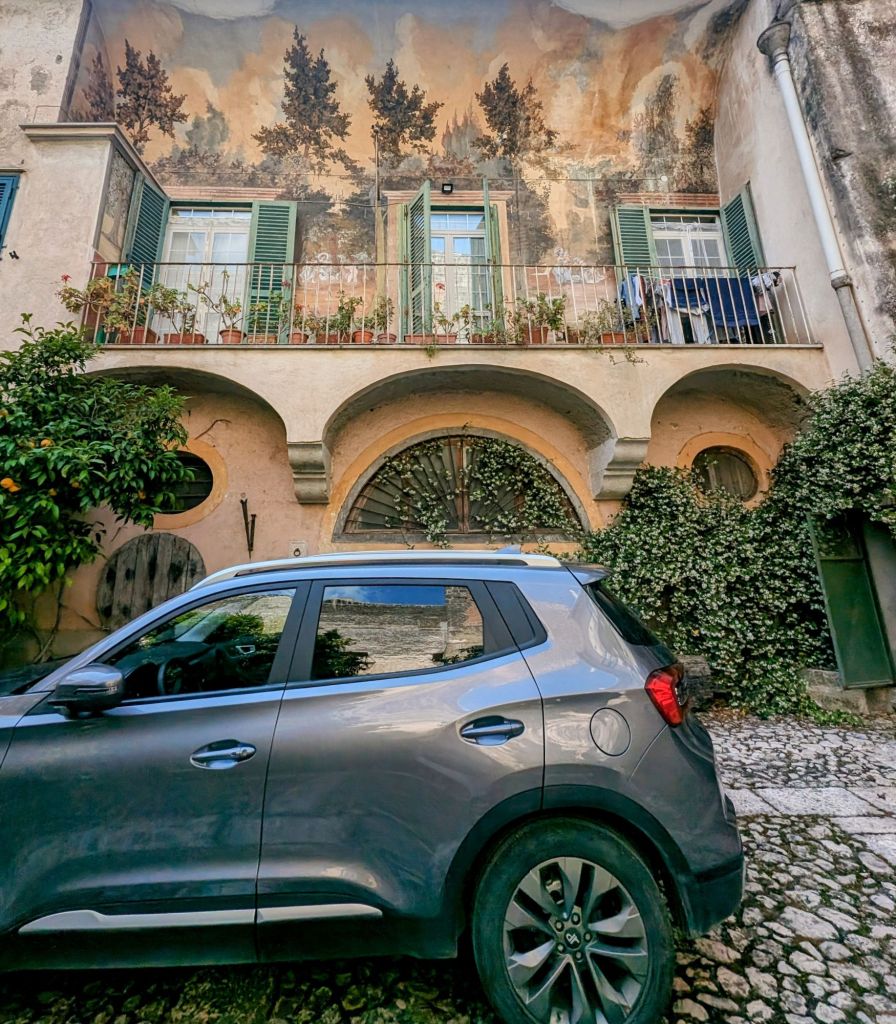
After we figured out how to get in our 1600s Rainone/Mustilli Family Palazzo Inn. By the way, I am related to the Rainone Family by my great grandmother. See, I told you there was more to the story.
Just think… We are in a 17th century family home/Inn in a room decorated like it’s the 18th century, writing on a 21st century device in a 4th century town. Mind blown.
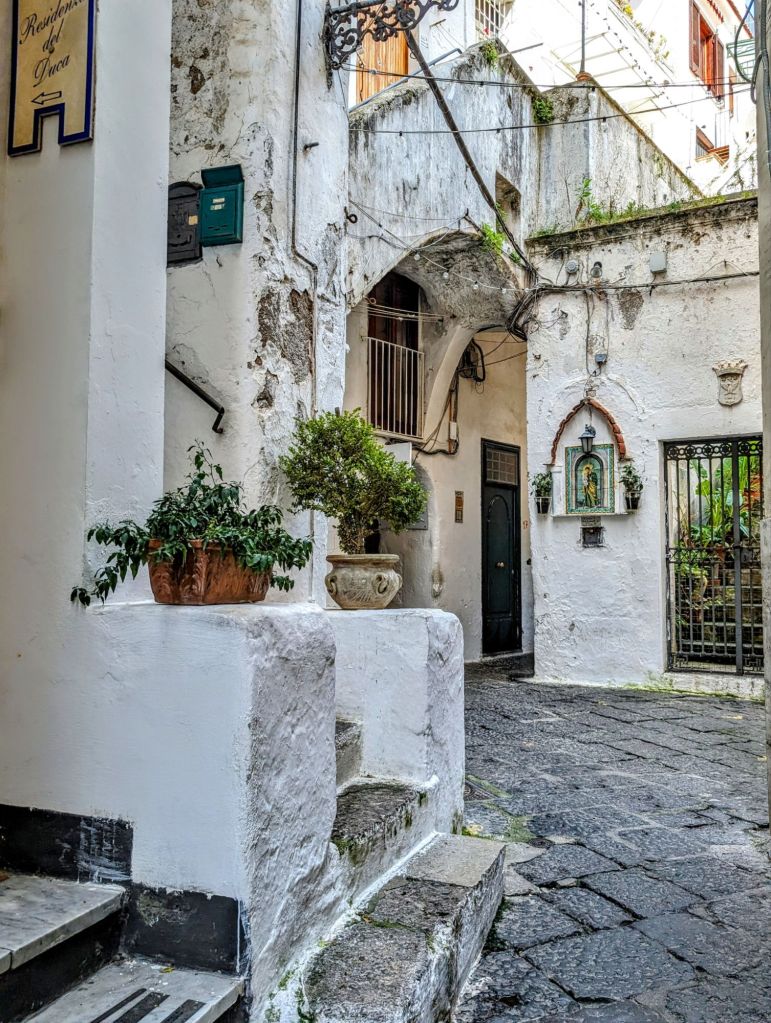
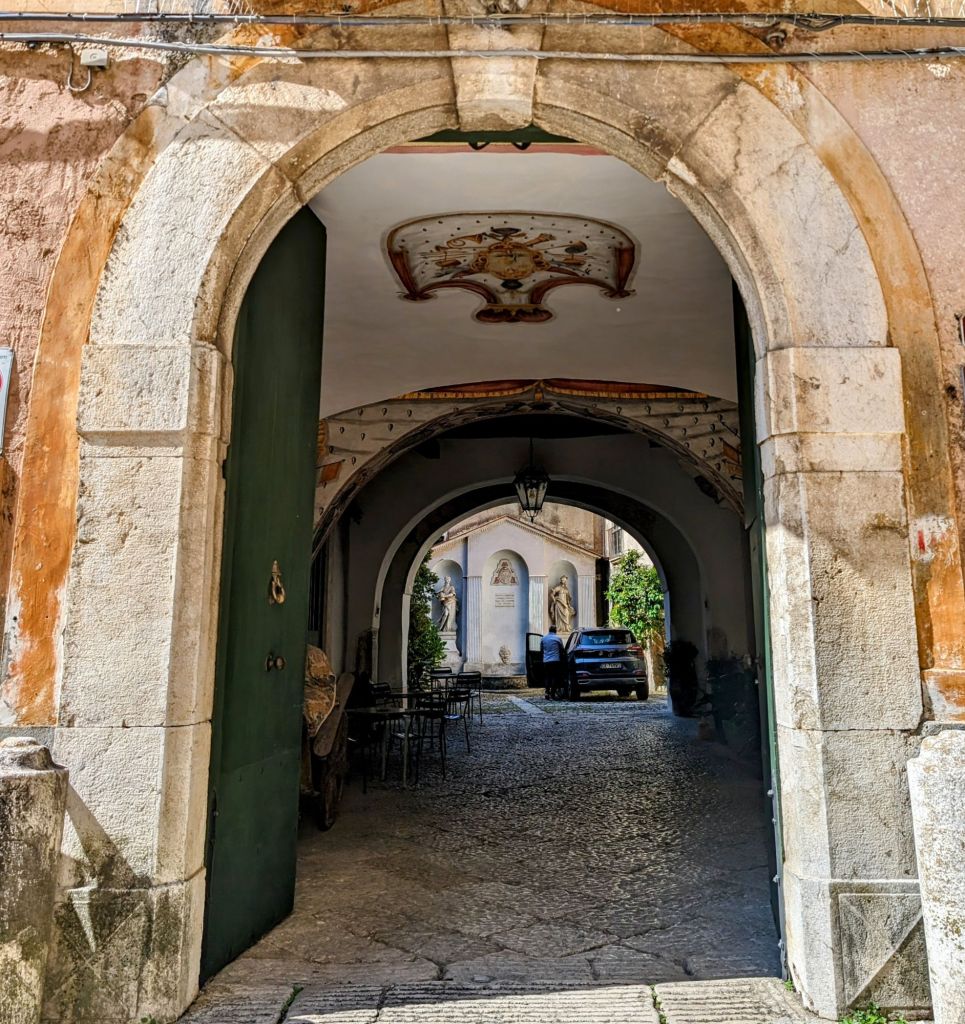
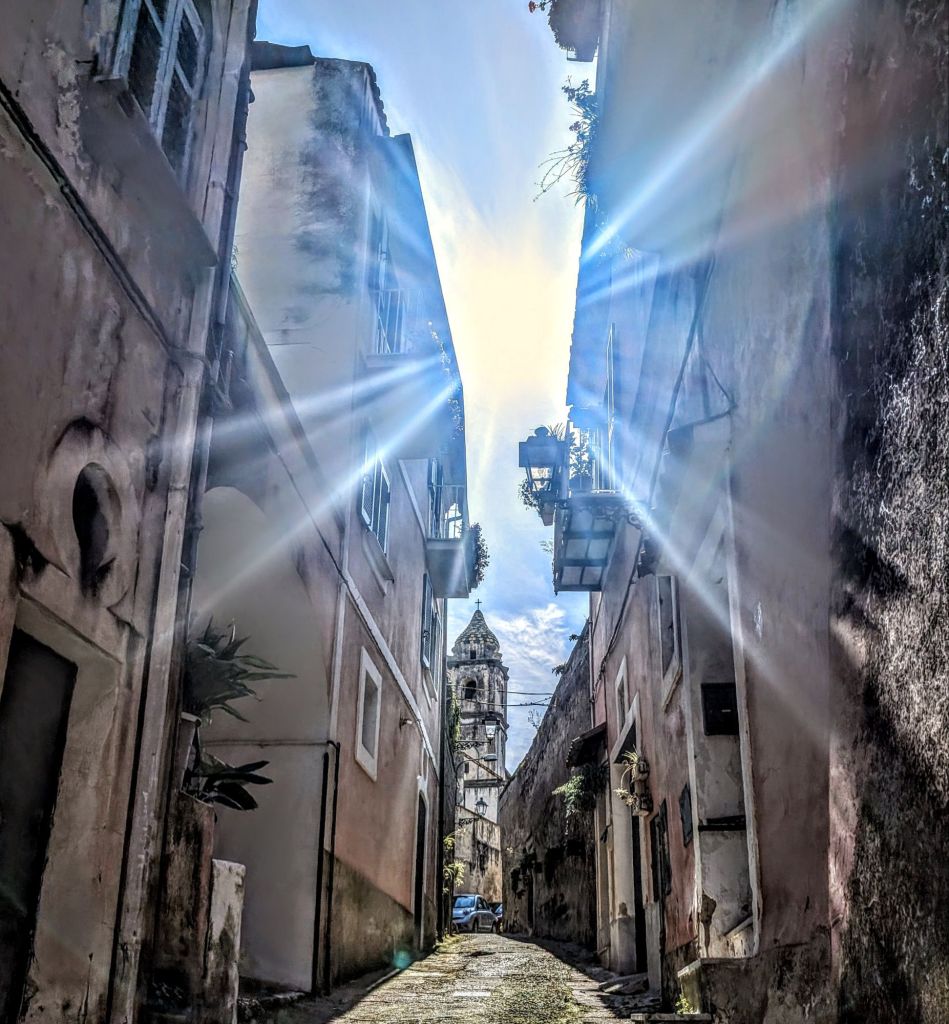
The town and tiny narrow streets, some barely big enough for cars others are not, are charming enough, but then you throw in views that don’t stop, and you get yourself a destination. Yes, Sant’ Agata di Goti is a destination, but thankfully enough it’s not an international hot spot…yet.
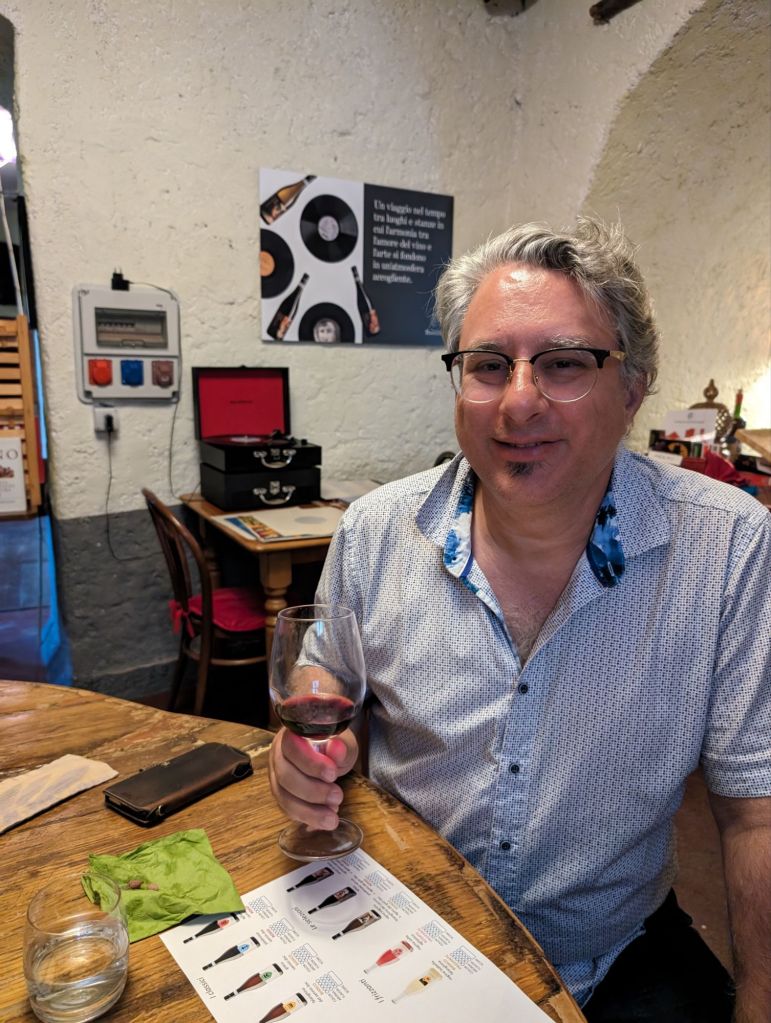
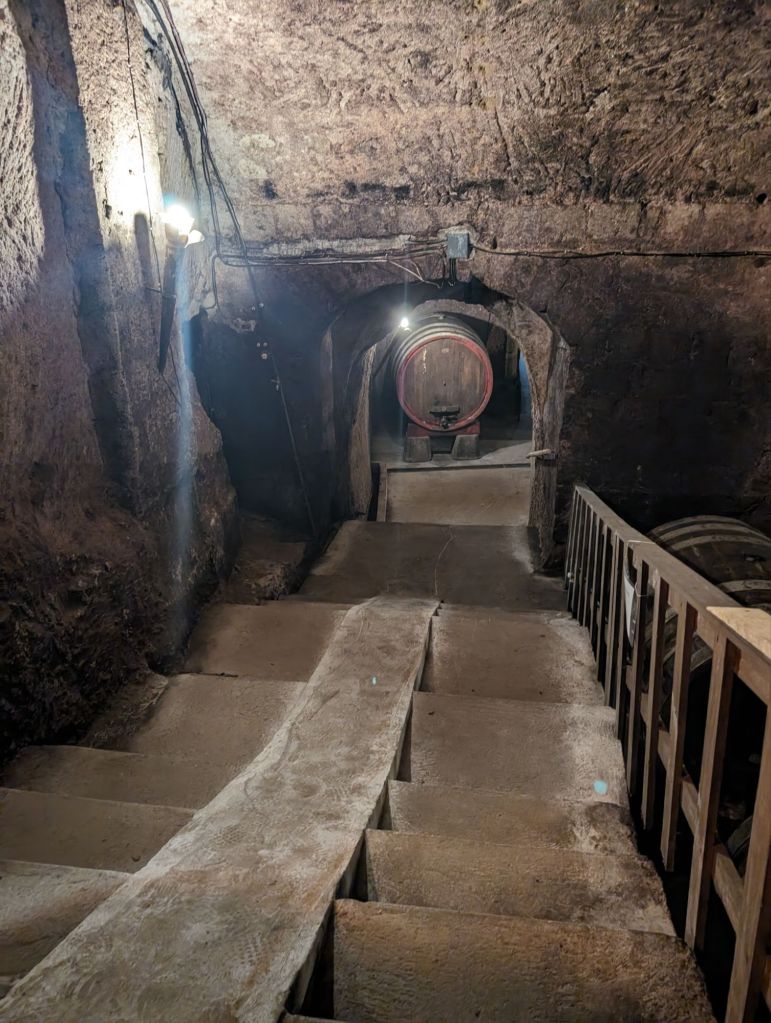
We walked around, had dinner, went wine tasting, and we even made our way down inti deep cold basements/excellent wine cellars.
Truly a beautiful place, but the real magic happened the next day.
The reason for going there in the first place was family. My paternal grandfather is from Sant’ Agata di Goti, specifically the area of Bagnoli. Did I have family left? If so, will I get to meet them? Will they think of me as family?
Thank you for visiting MY GNOME LITTLE WORLD and come back soon to hear about th magic I call “family.”
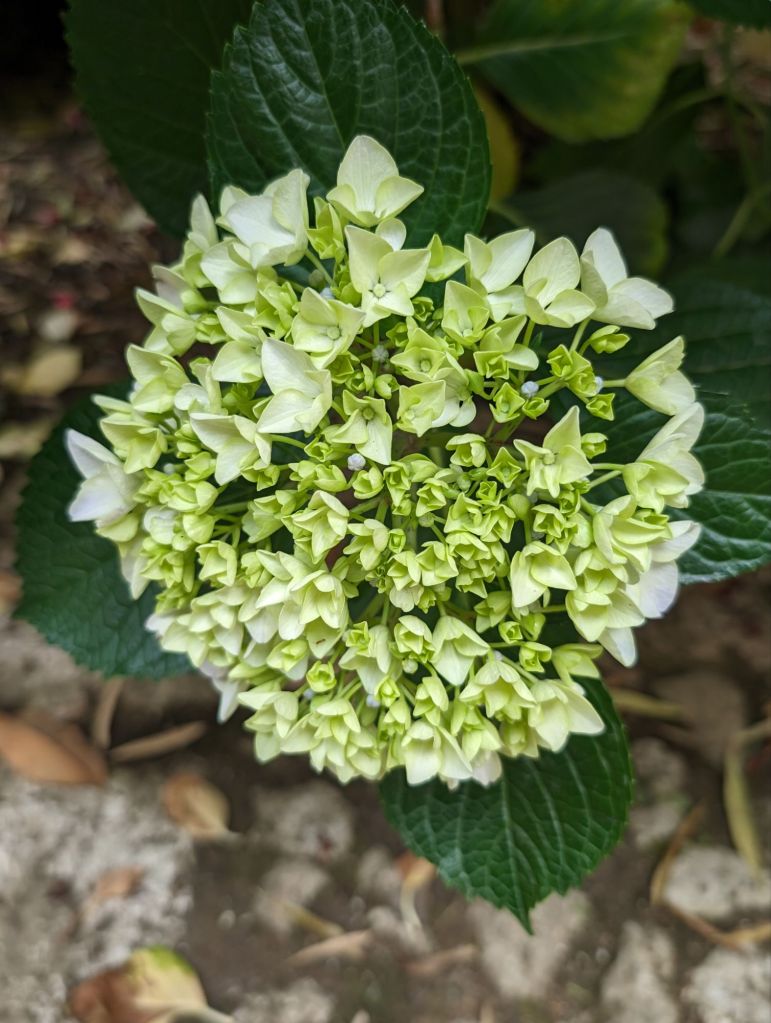
I have 3 favorite flowers. The first being a gerbera daisy. My Mother liked daisies, when I learned about gerberas they just made me smile. Another favorite flower is for its smell is gardenias. We had a plant in our yard growing up and my mother taught me to love its smell. The last one is hydrangeas because my maternal grandmother had a huge bush of them in her front yard and they always reminded me of her. All of my favorite flowers are family related. Sant’ Agata di Goti had hydrangeas and it is family related. So this is why I posted the photo. On a side note, on our first date, my husband brought me hydrangeas he picked from his own yard. He did not know my love for them. They mean a lot to me.
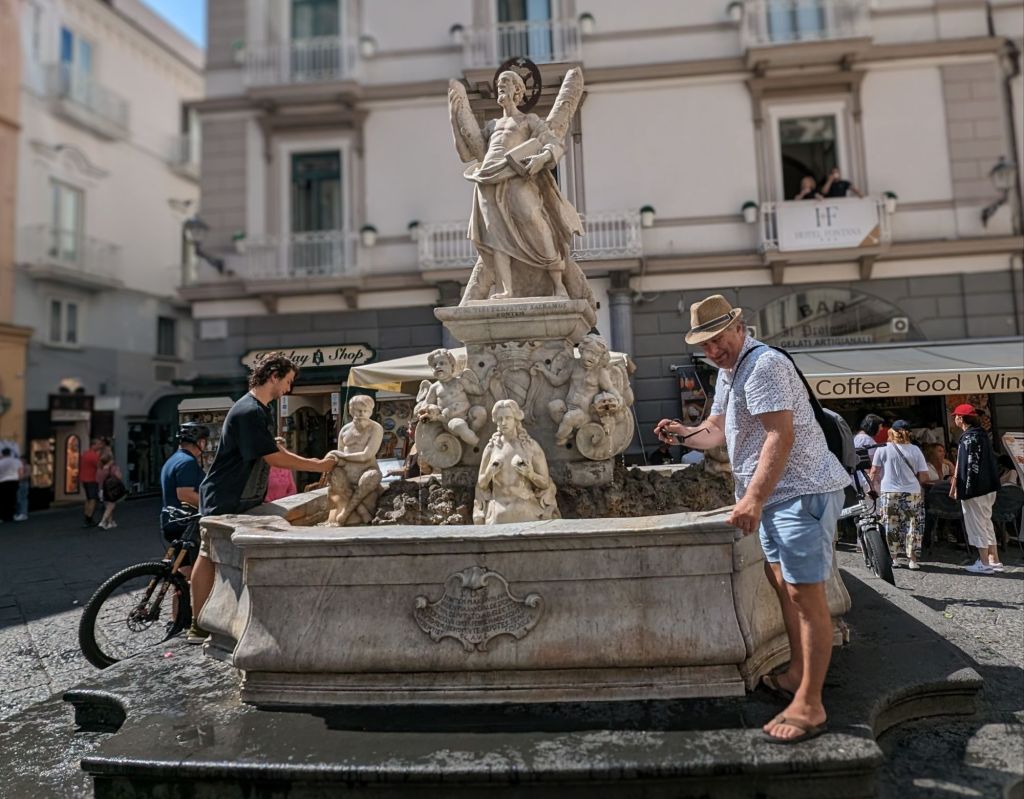
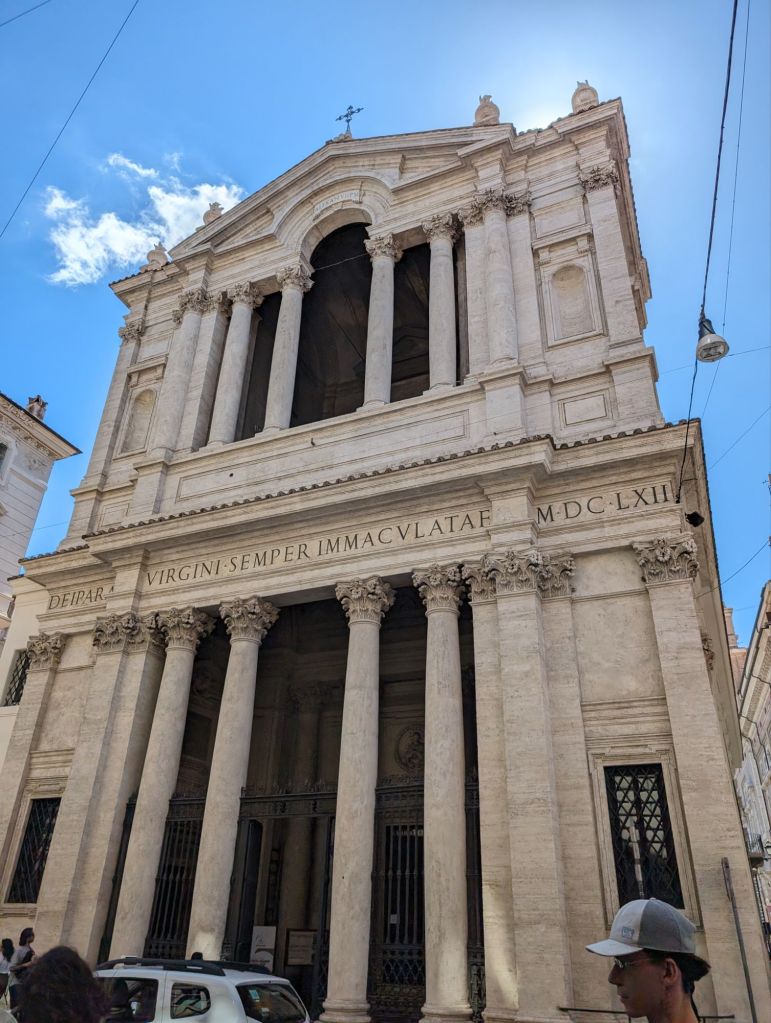
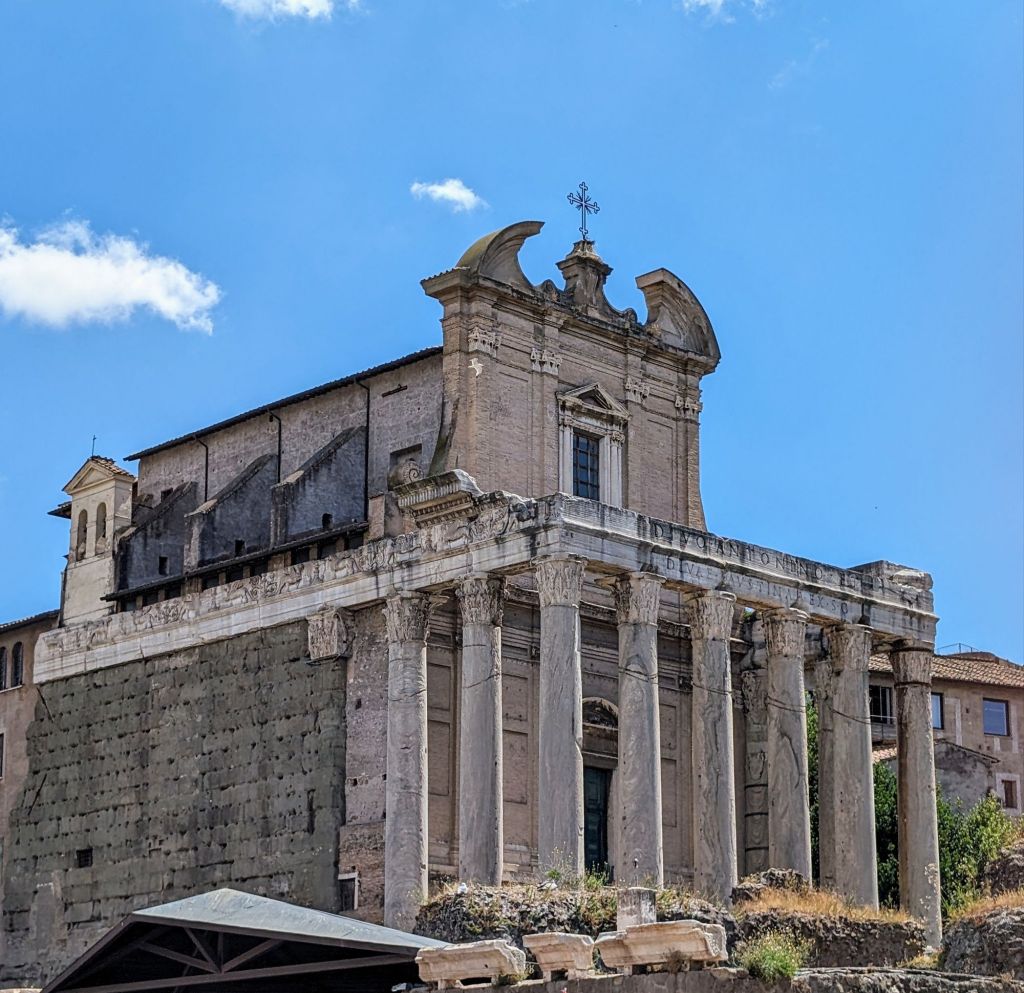
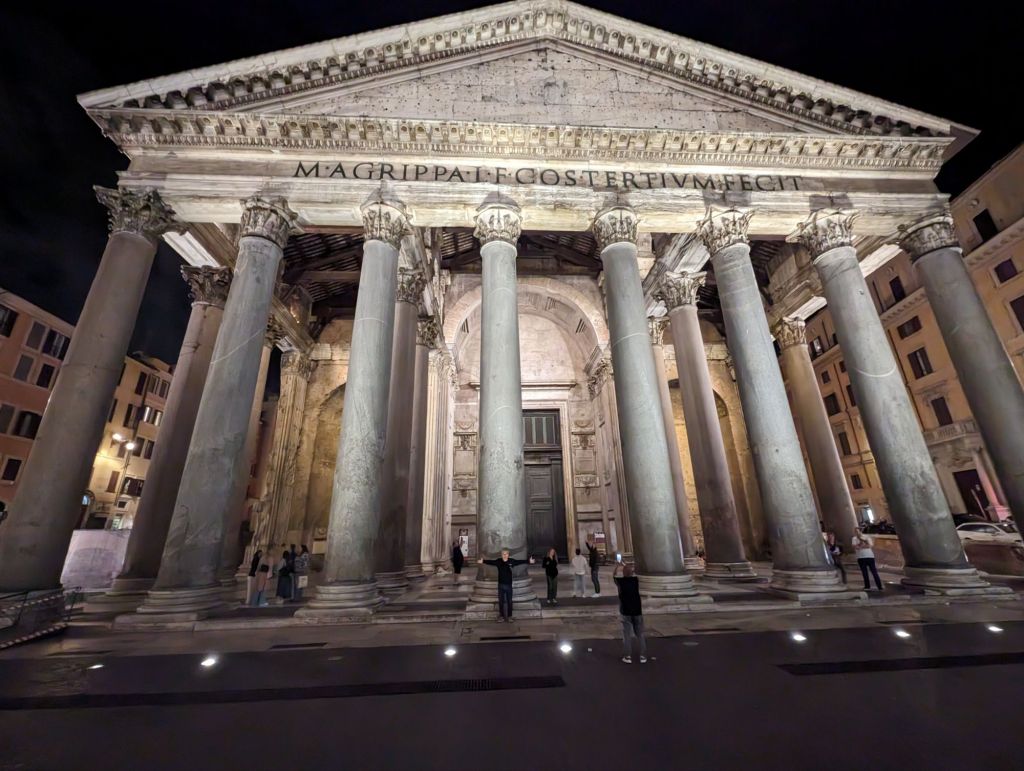
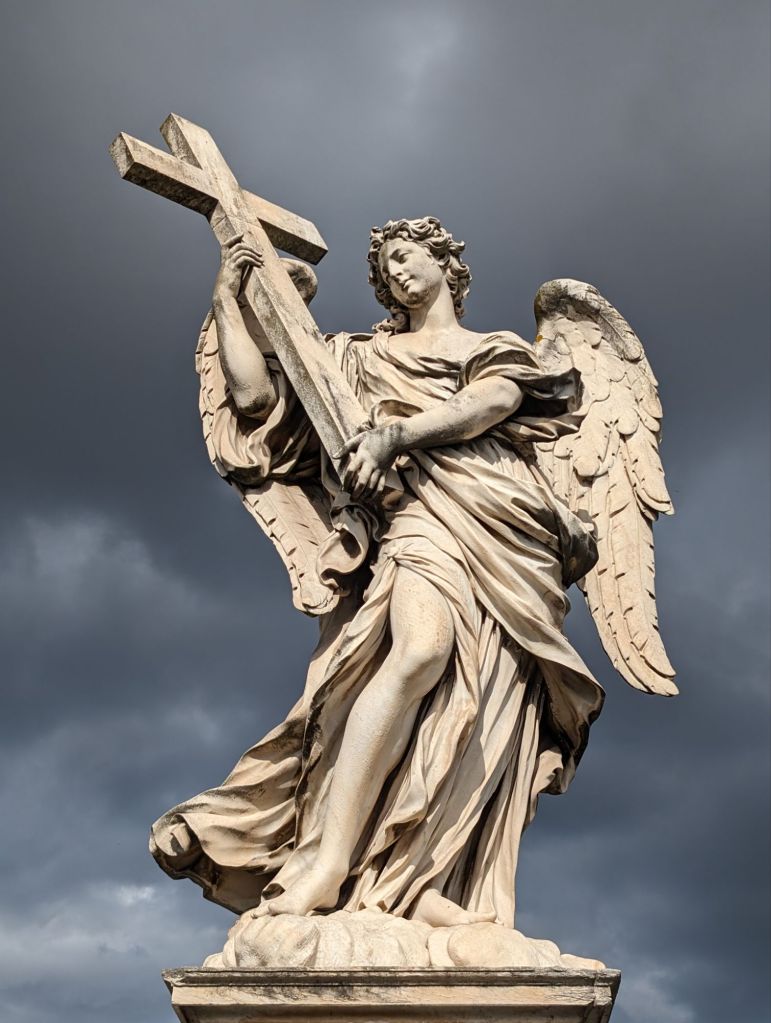
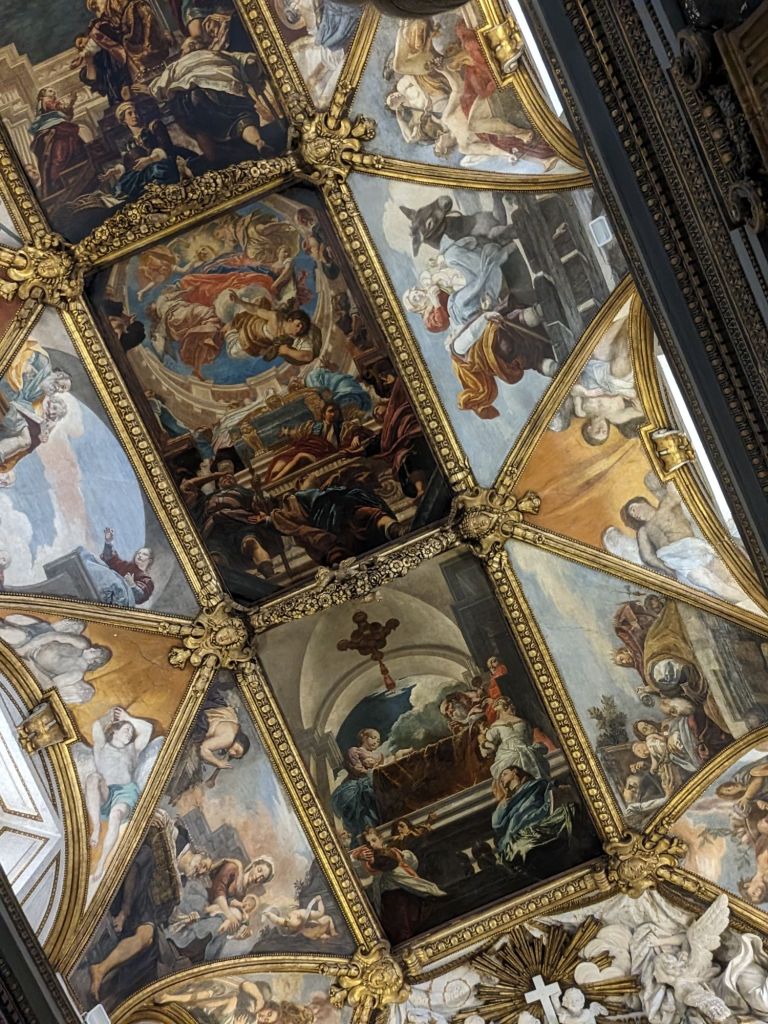
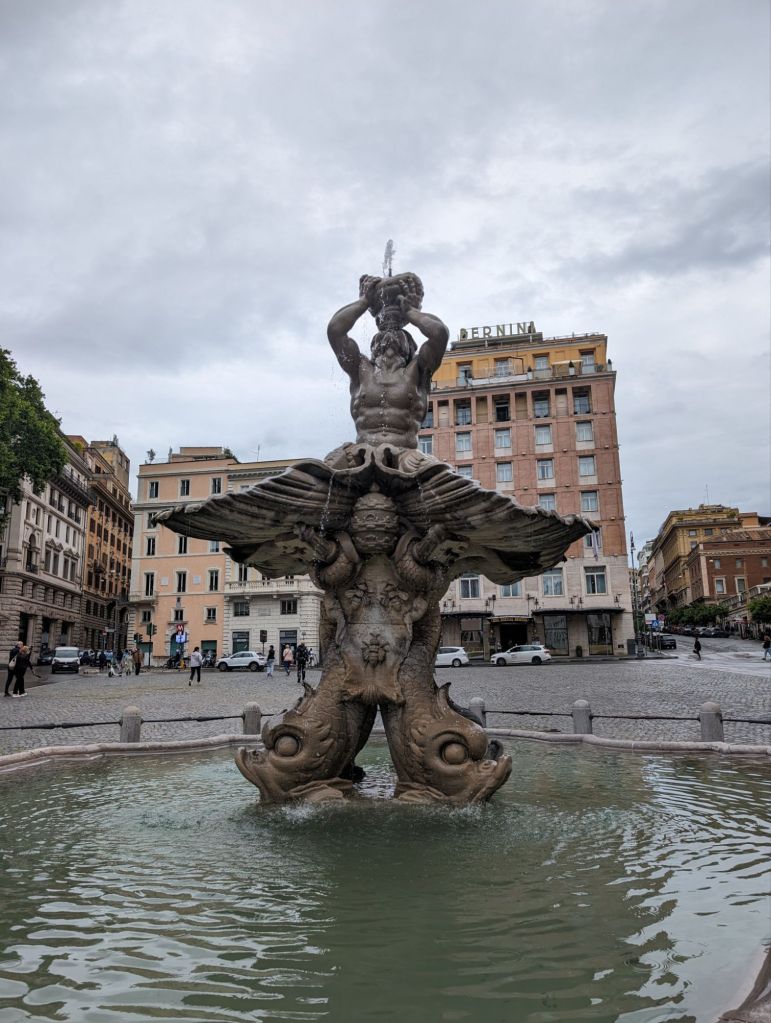
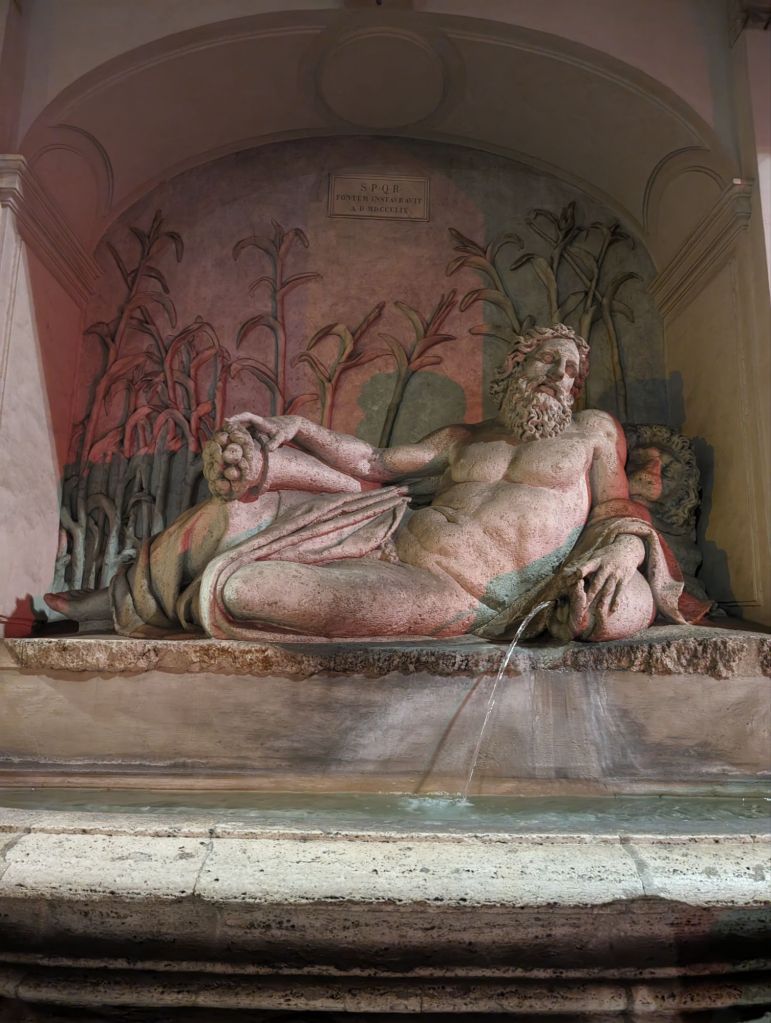
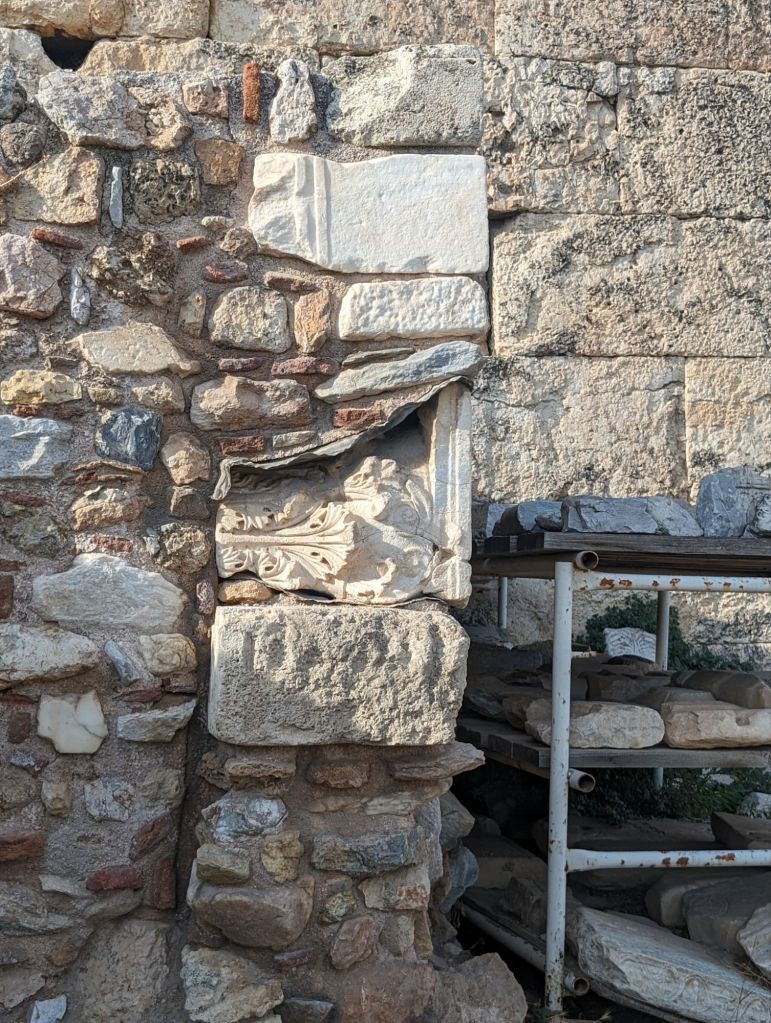
Buildings. They have tons of giant, huge, humongous old monuments, ruins, government offices l, churches, palazzos and fountains. It’s a city of oversized pundaka-buildings. And I loved each and every one of them. A bit tired from walking up and down to them and around them though.
Rome is a city of history. It was its own empire. Julius Caesar, Hadrian, Trajan, Nero, Caligua, Constantine, all had to have more more more. So the bigger the building the better, I guess. But the art work, the skill and workmanship of them all is still to this day amazing.
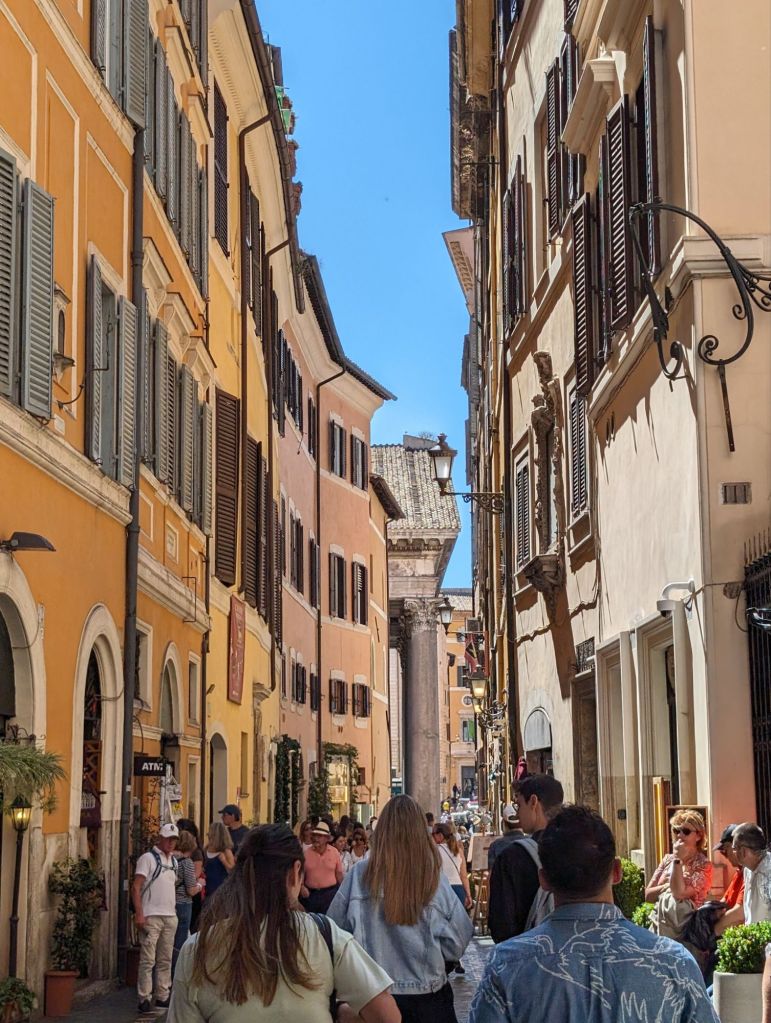
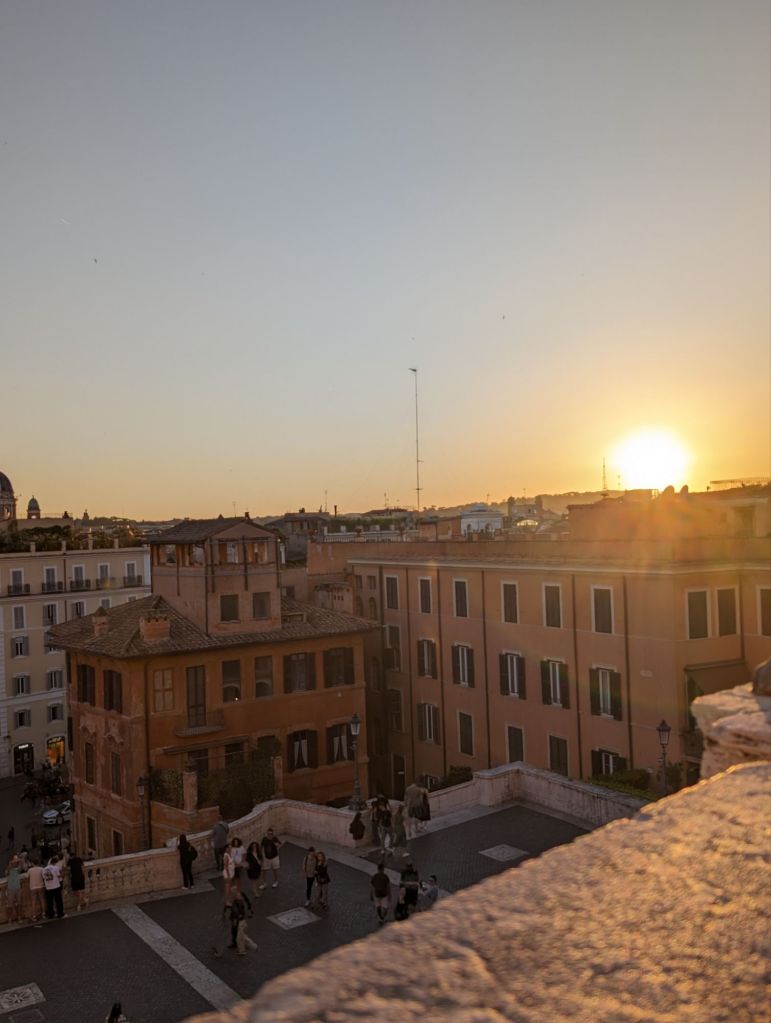
And then there was just the time we spent wandering around the streets in awe and enjoying everything. Wandering is a nice way to say getting lost on the way to or fro. But we don’t think of it as “lost,” we think it is an addition to our journey, an extra adventure, and/or life leading us to explore.
This post does not truly relay Roma to you. You are dwarfed by giants, but feel at one with them. You are surrounded by beauty and feel so yourself. You are home in a way only an ancient city can welcome you.
Until next time, Roma, we have so much more to see. Would love to get to know you better.
Speaking of getting to know someone better…the next post is about getting to know long lost strangers. Family from my grandfather’s home.
Thank you for joining me and MY GNOME LITTLE WORLD along this travel journey.
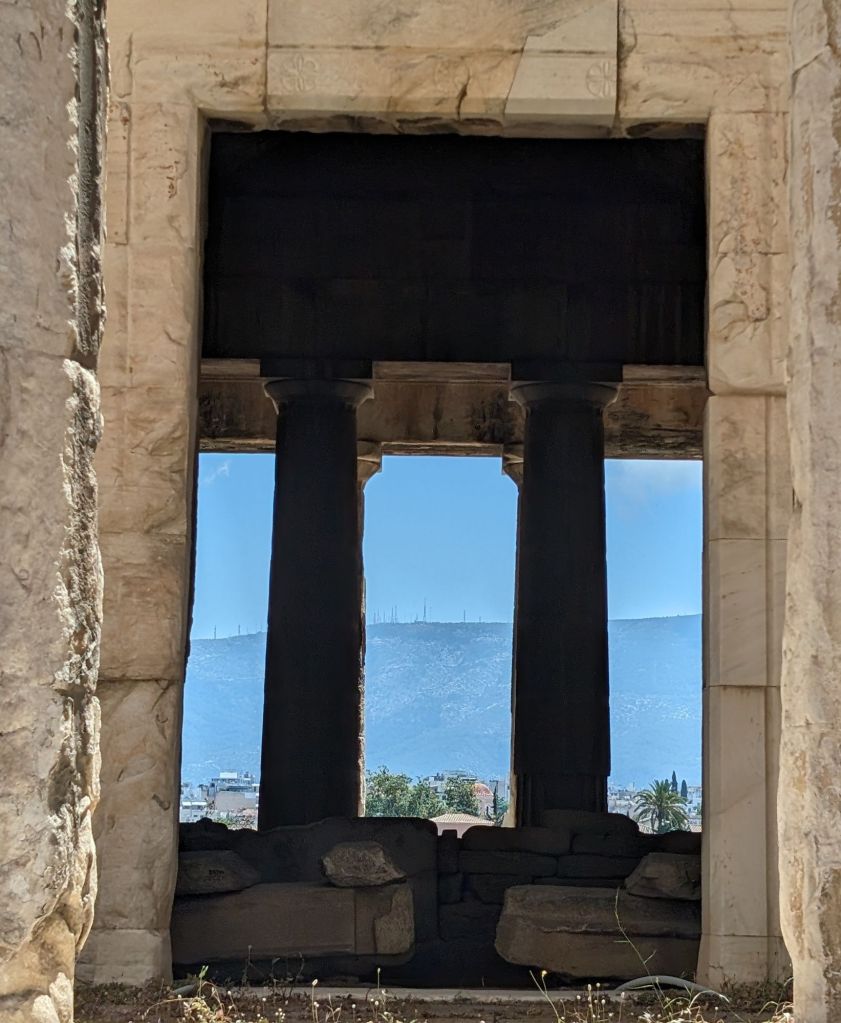
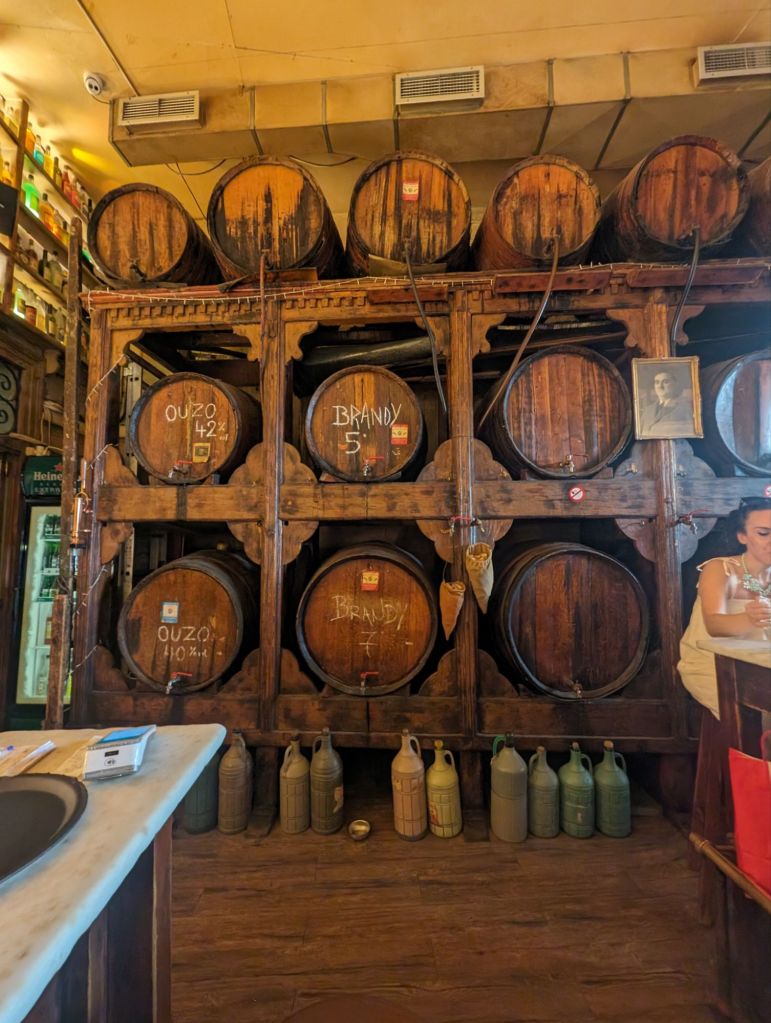
Ok we did drink in Athens, but that is not what I’m talking about when I say “Twist”.
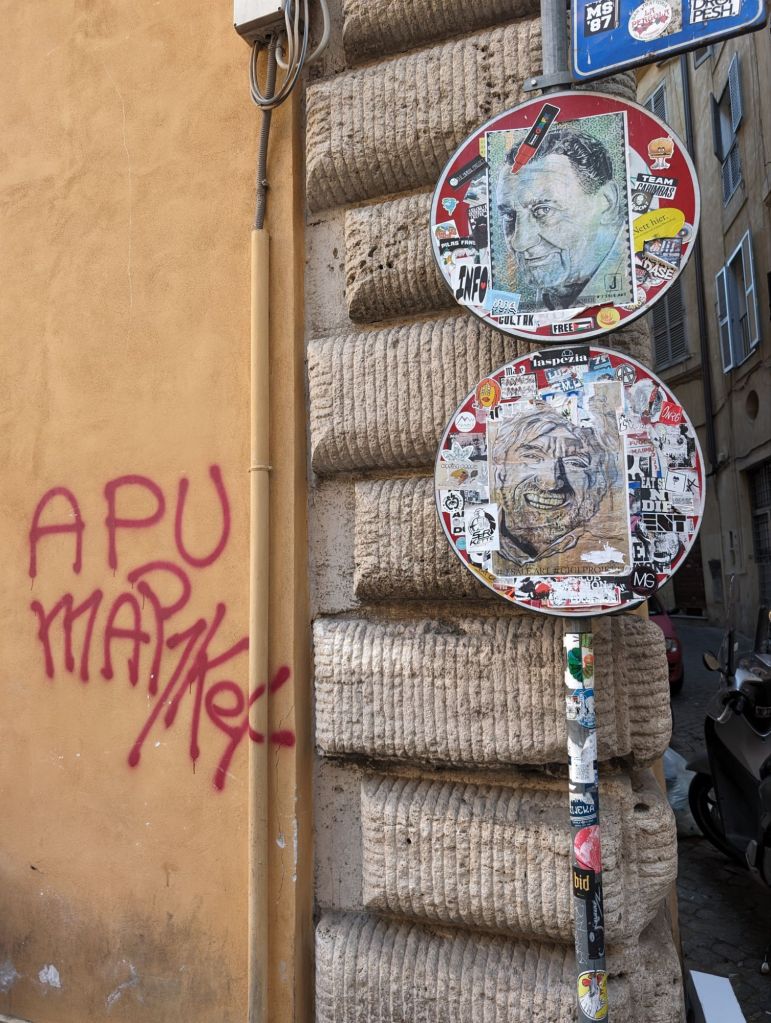
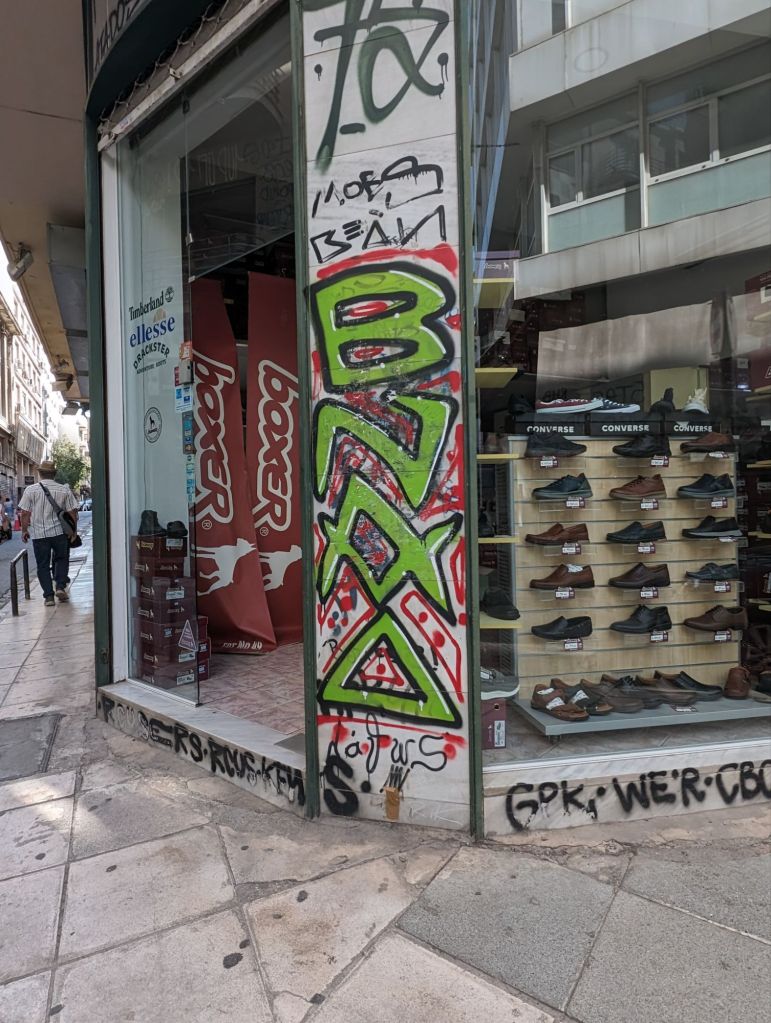
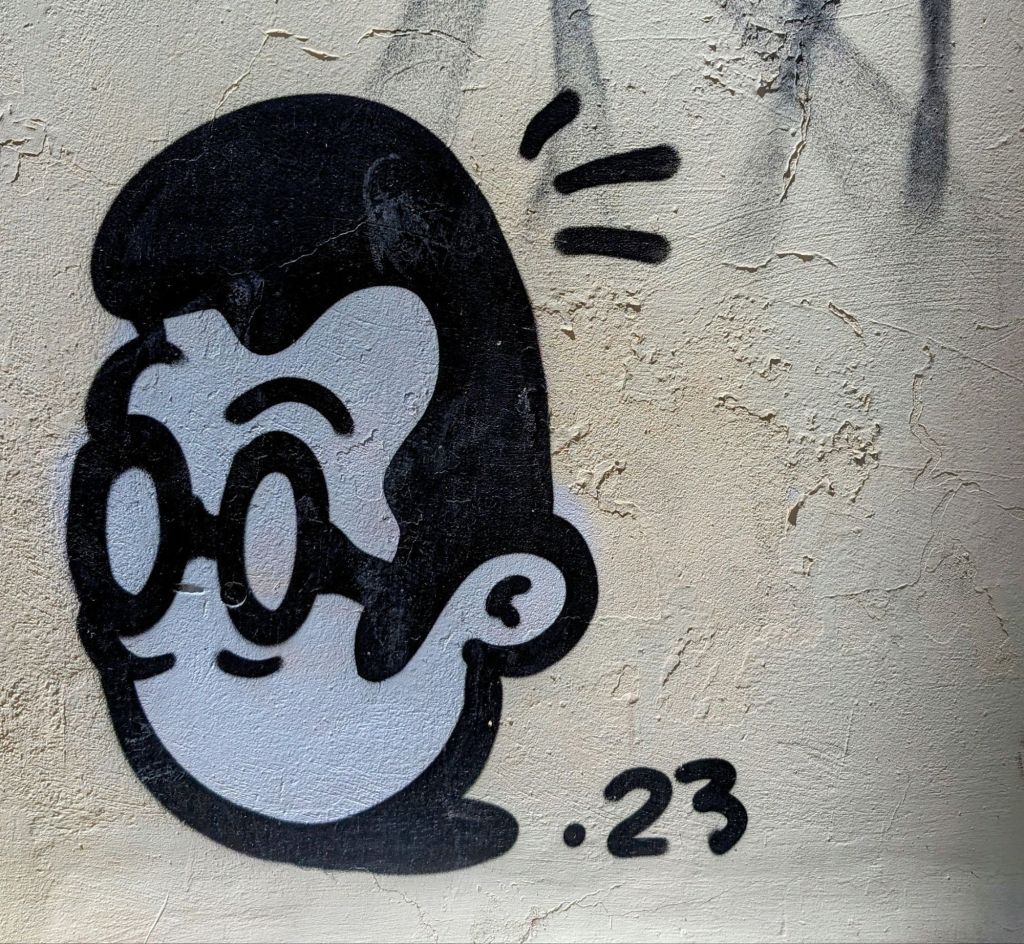
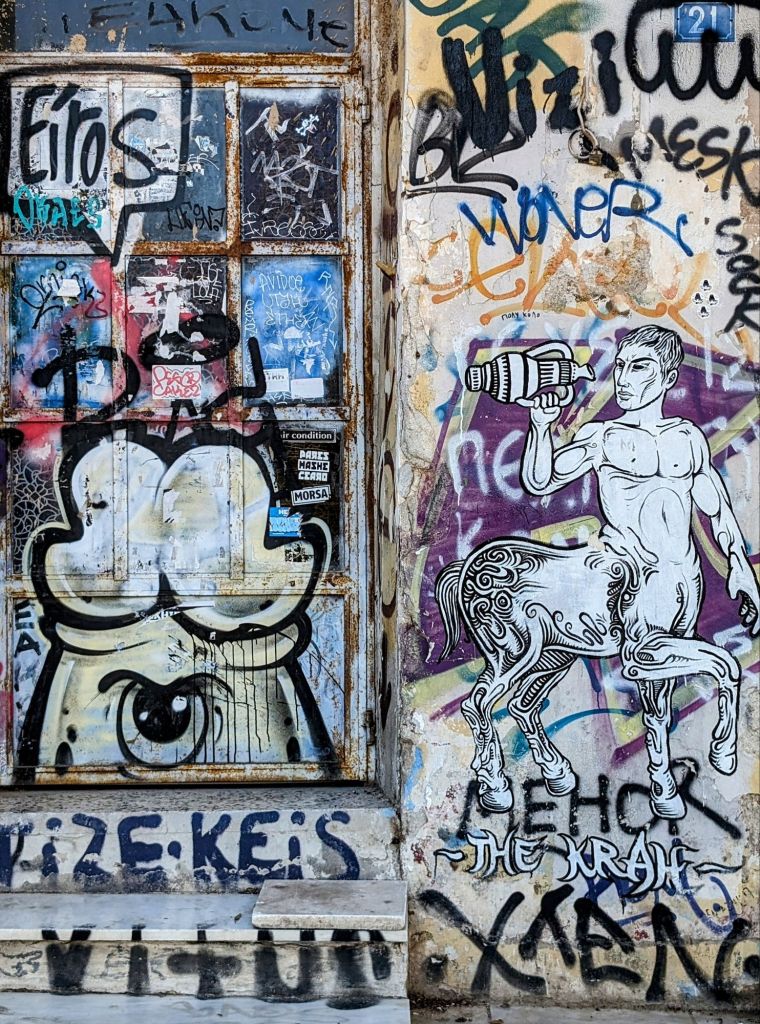
The ruins are scattered about as much as the graffiti.
Every move you make, every step you take, no one is watching you, but you may run into a ruin.
Well, that is a lie, I may be watching you from one of the many sidewalk cafes!
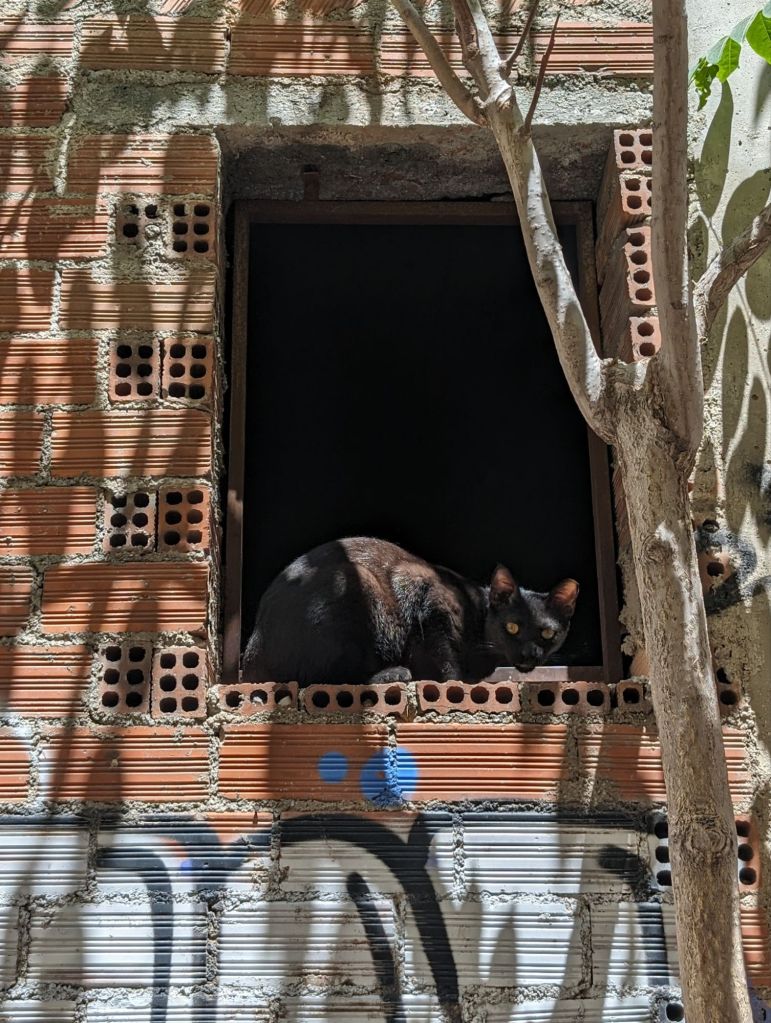
And splattered in between and around there are sprays of paint. Graffiti, mostly tags, some political statements, and fortunately some art as well. It makes an already chaotic scene even more busy for the eyes. I will gladly say, I did not see any graffiti on any of the ruins.
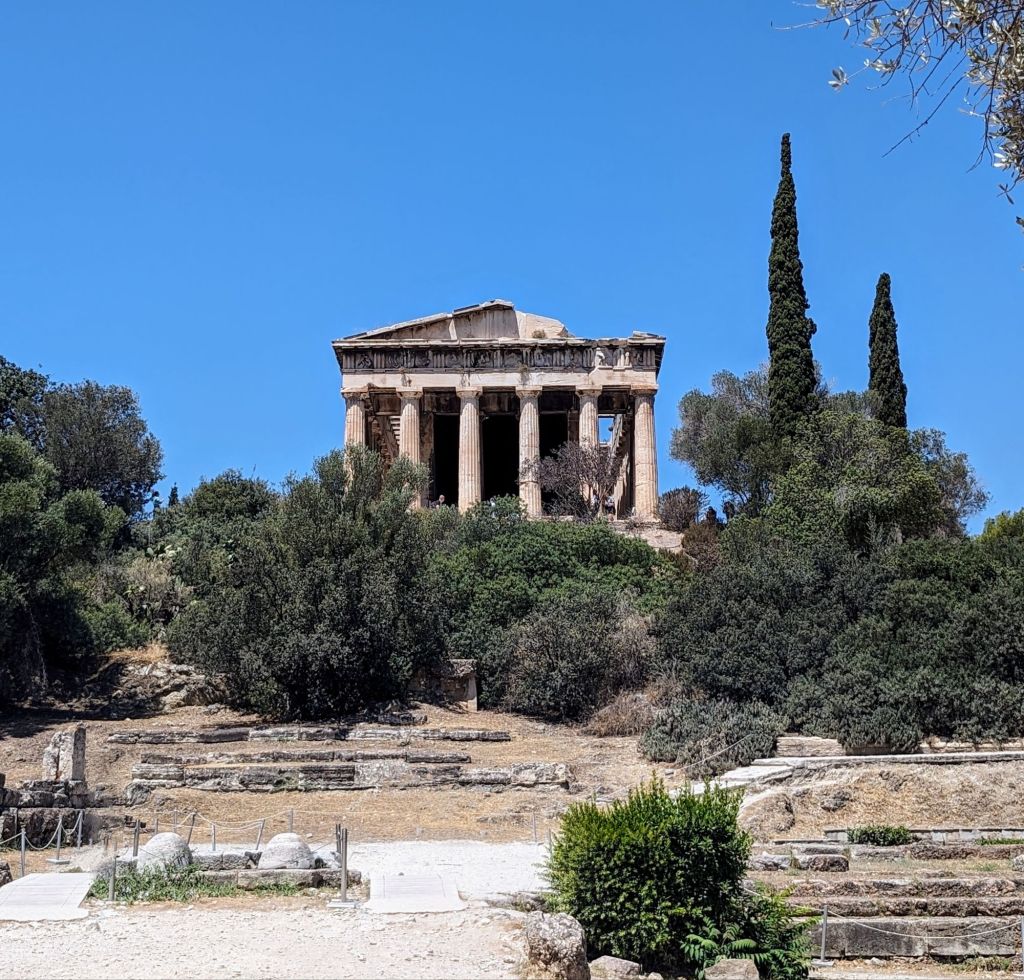
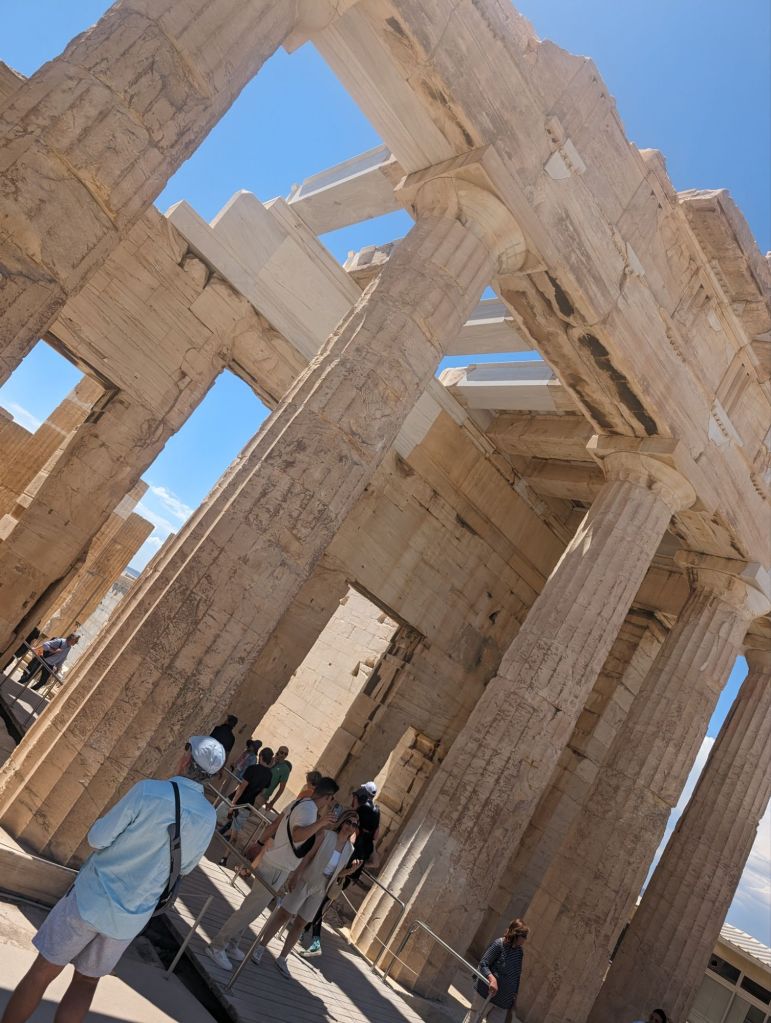
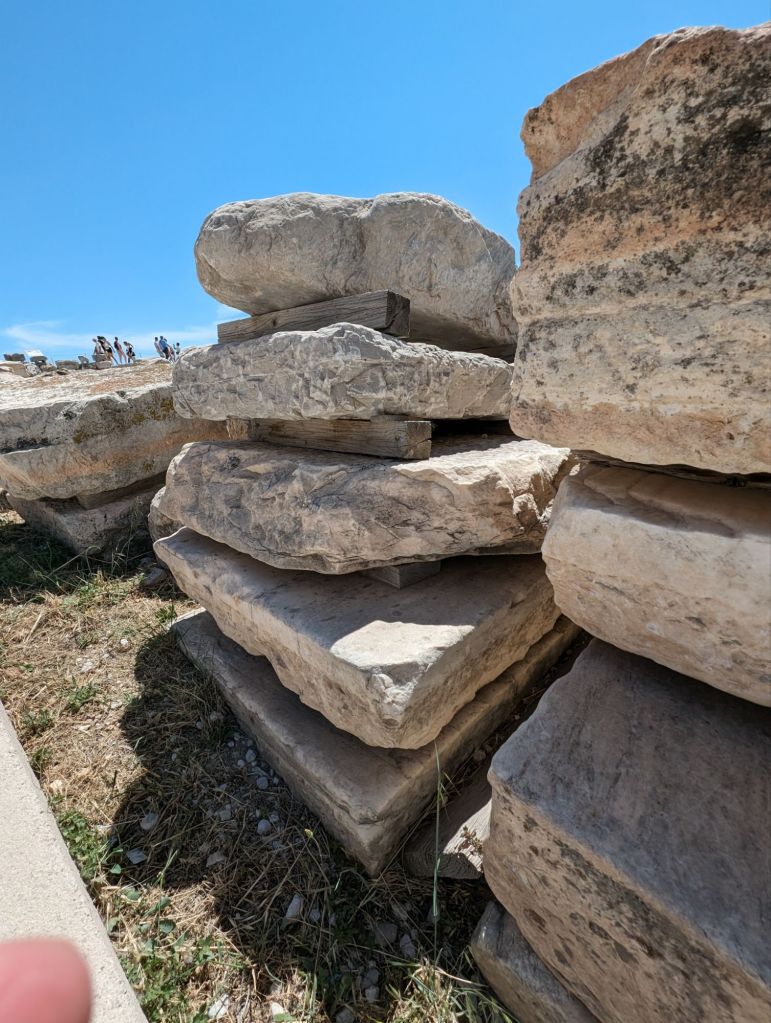
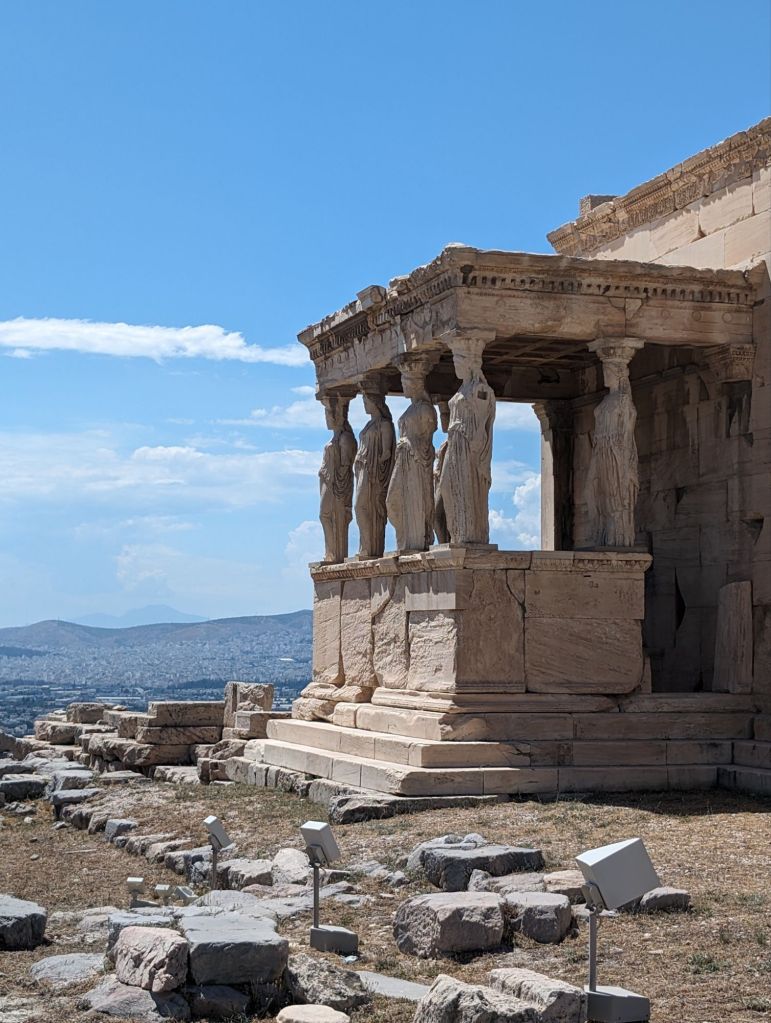
Getting back to what is important…the ruins. Some still in somewhat of a building form, some partially there and some are just in piles.
The history and the stories of the people that lived back then are way more interesting, than the ruins themselves. If you ask me.
There was so much more to Athens then just ruins, history and graffiti.
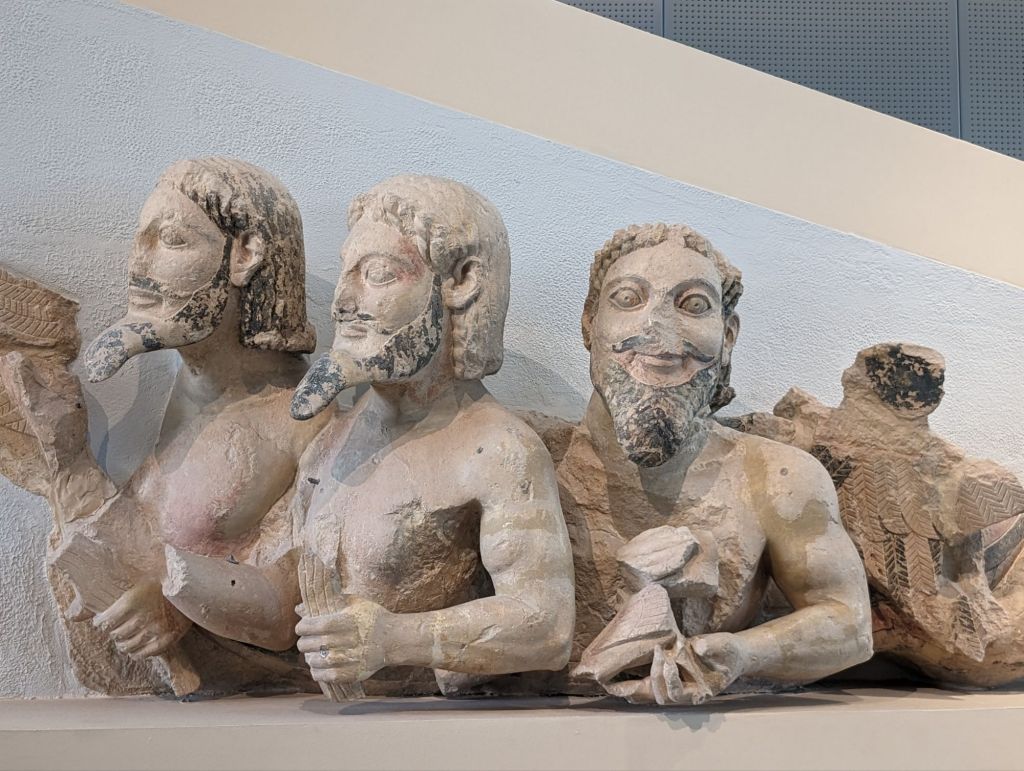
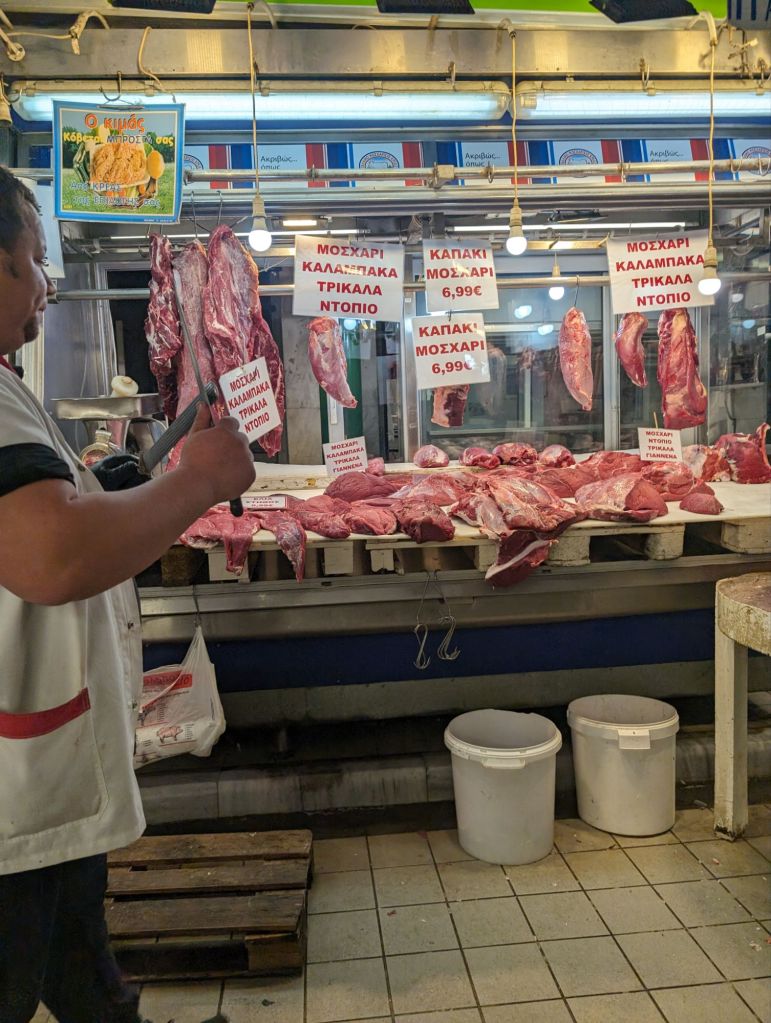
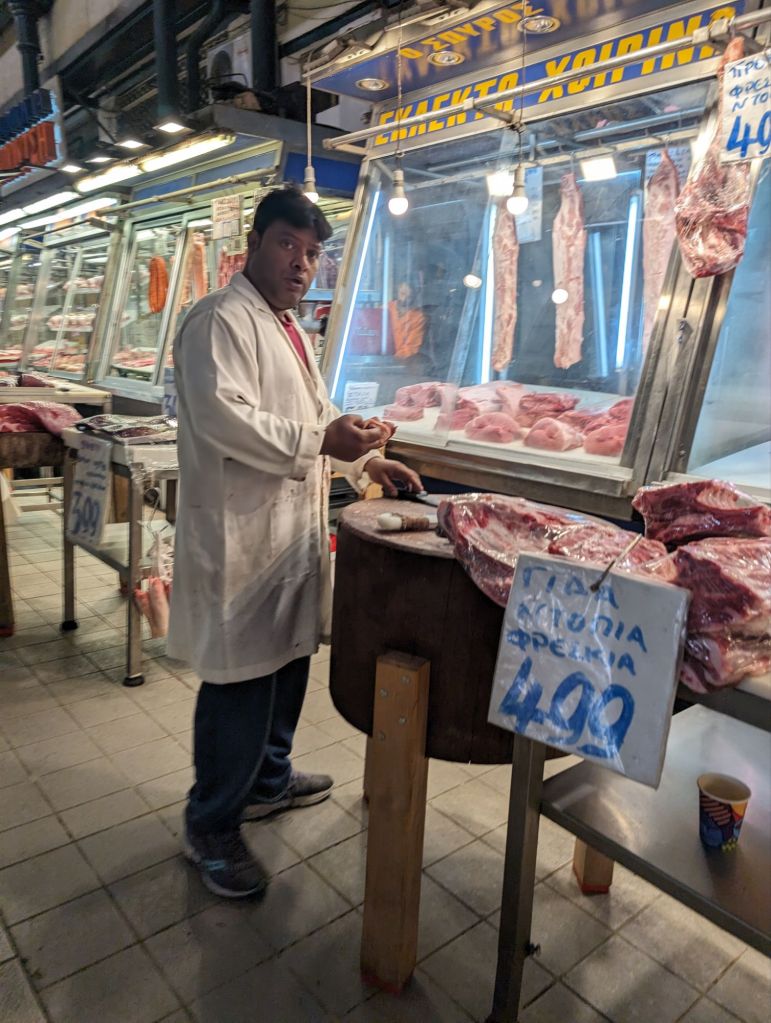
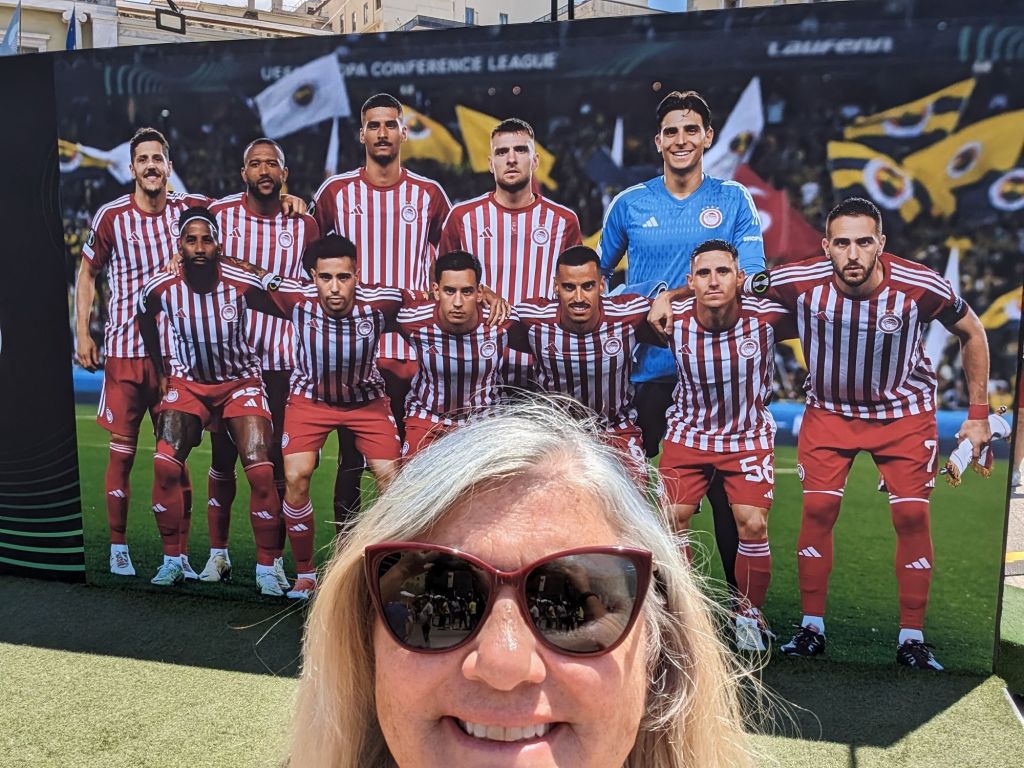
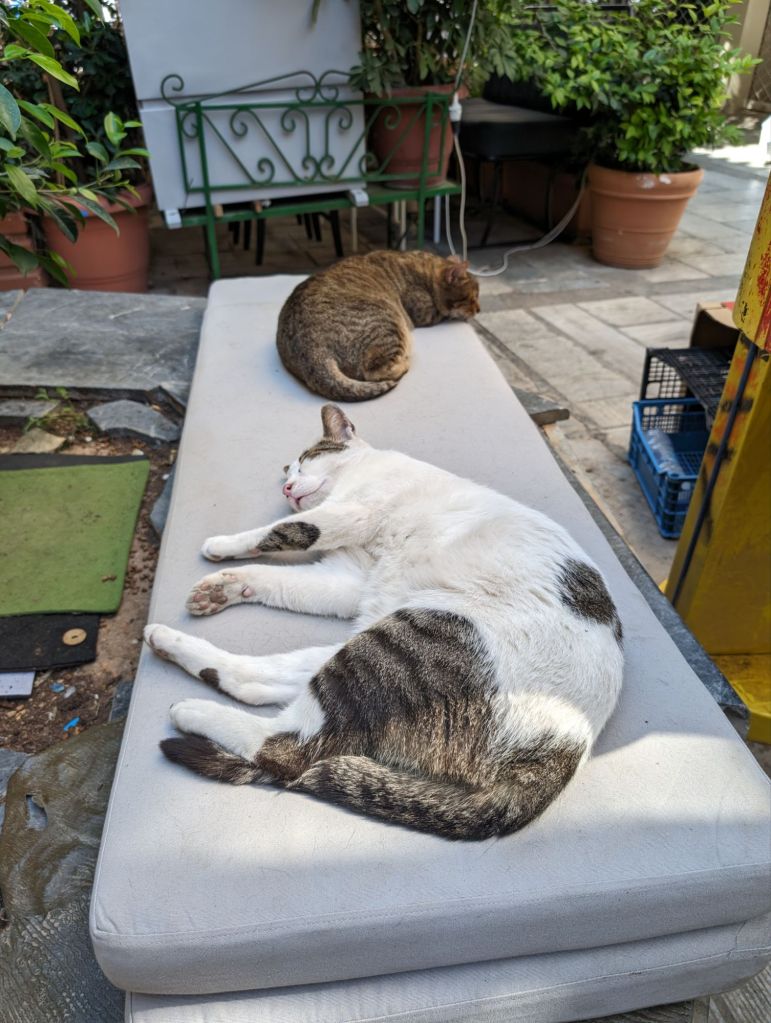
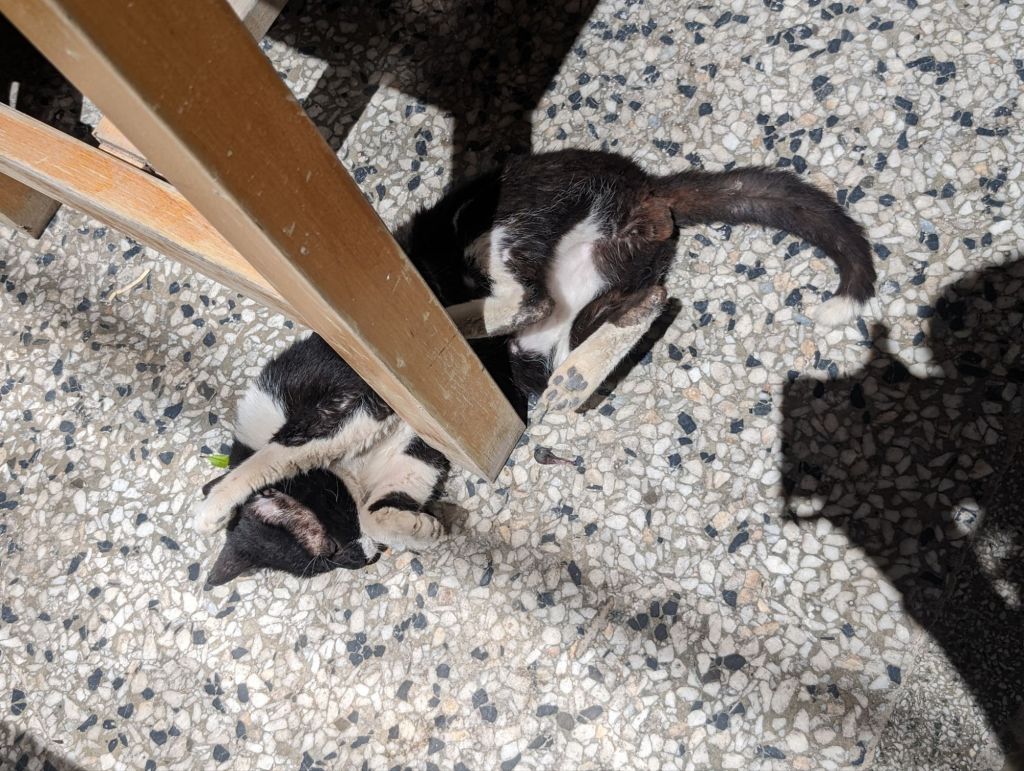
Like the meat and fish market, a Soccer event and the cats!
And finding cool little spots, that have big personalities!
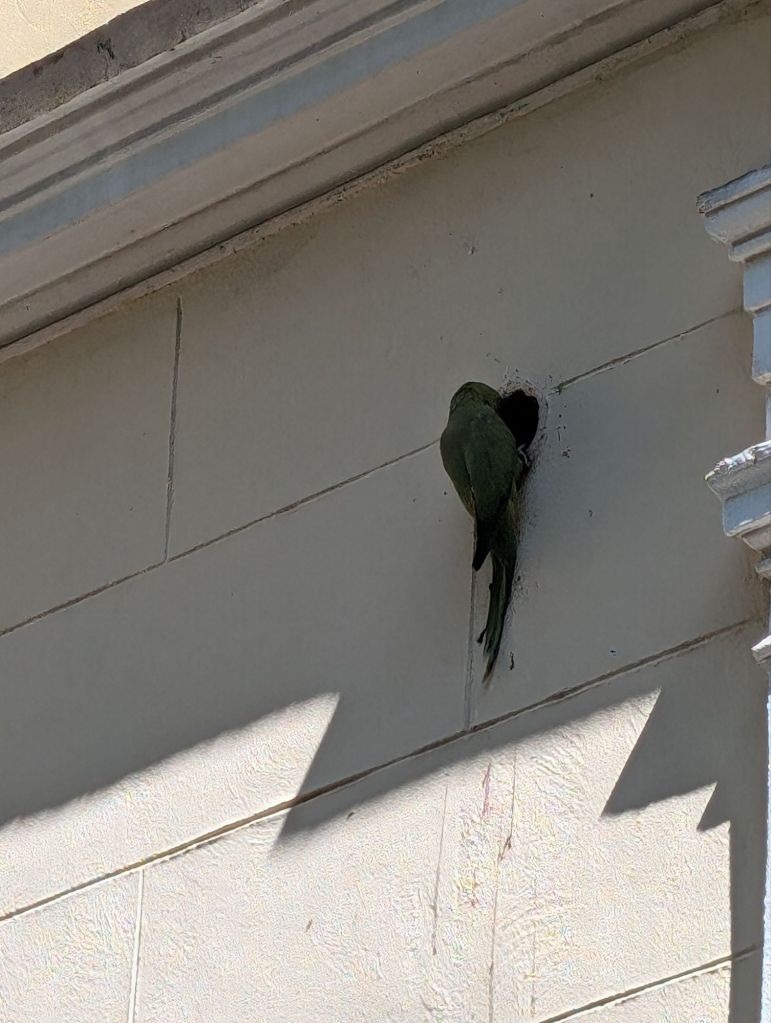
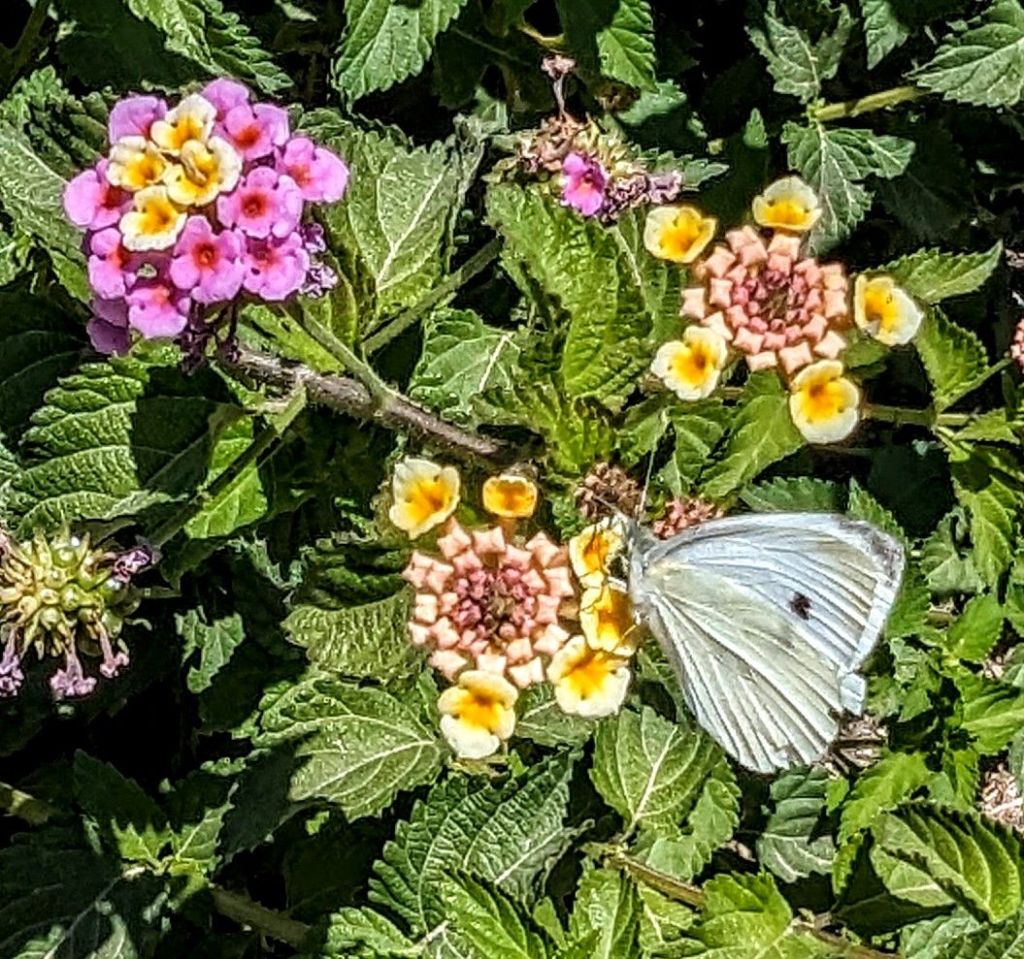
To Athen’s flora & fauna!
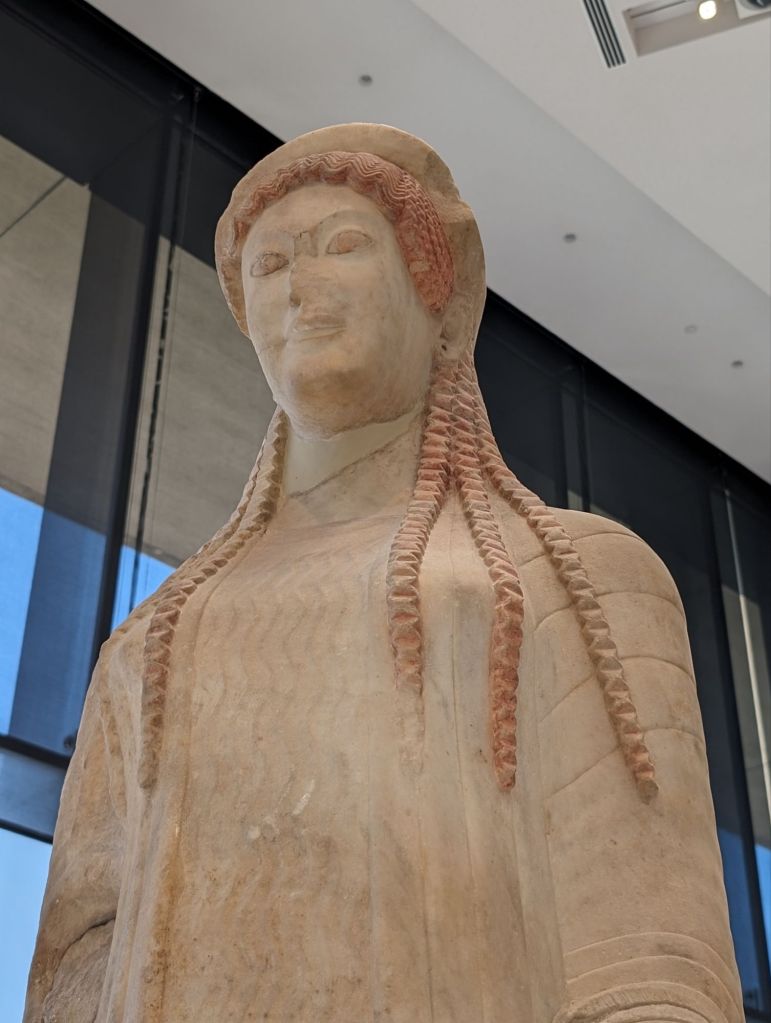
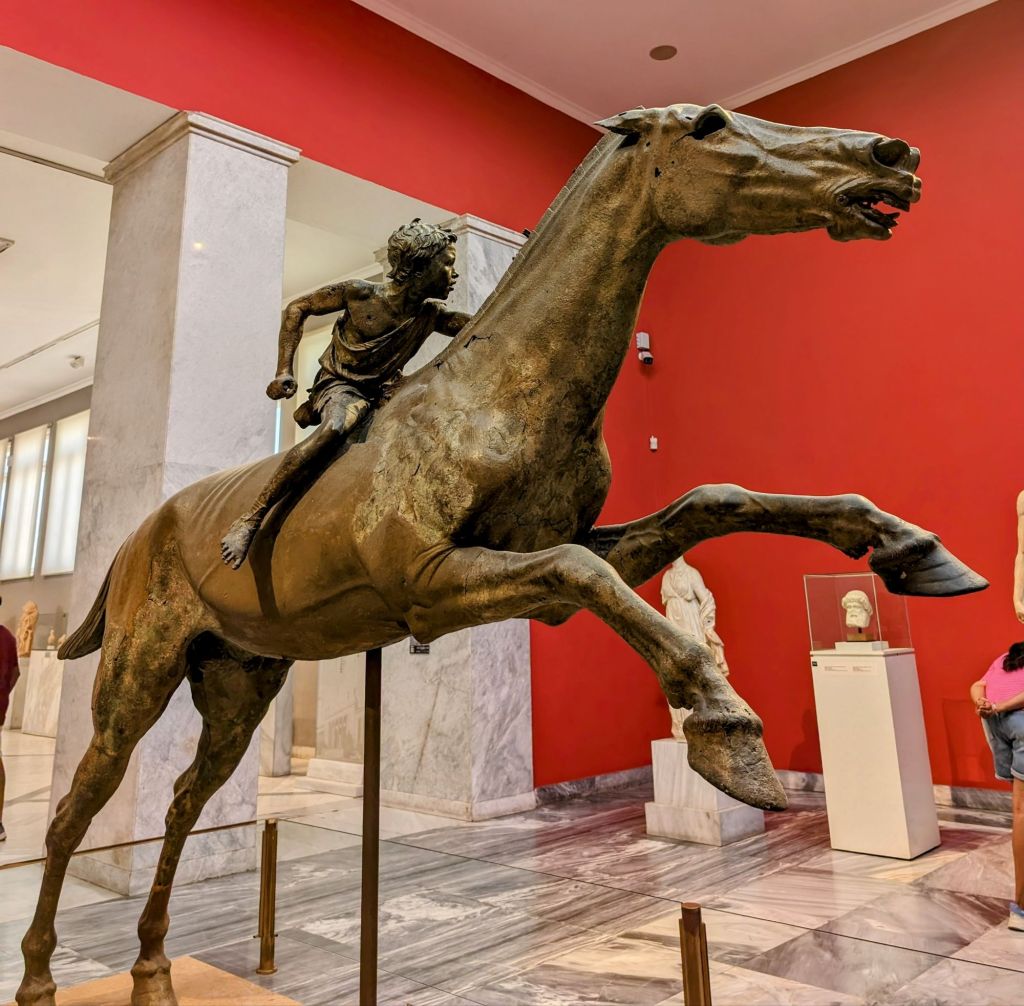
A big city of history and we just learned a tiny bit of it.
You have to spend time to go through it all because modern life lives over layers and layers of history. It may take a lifetime to peel them off.
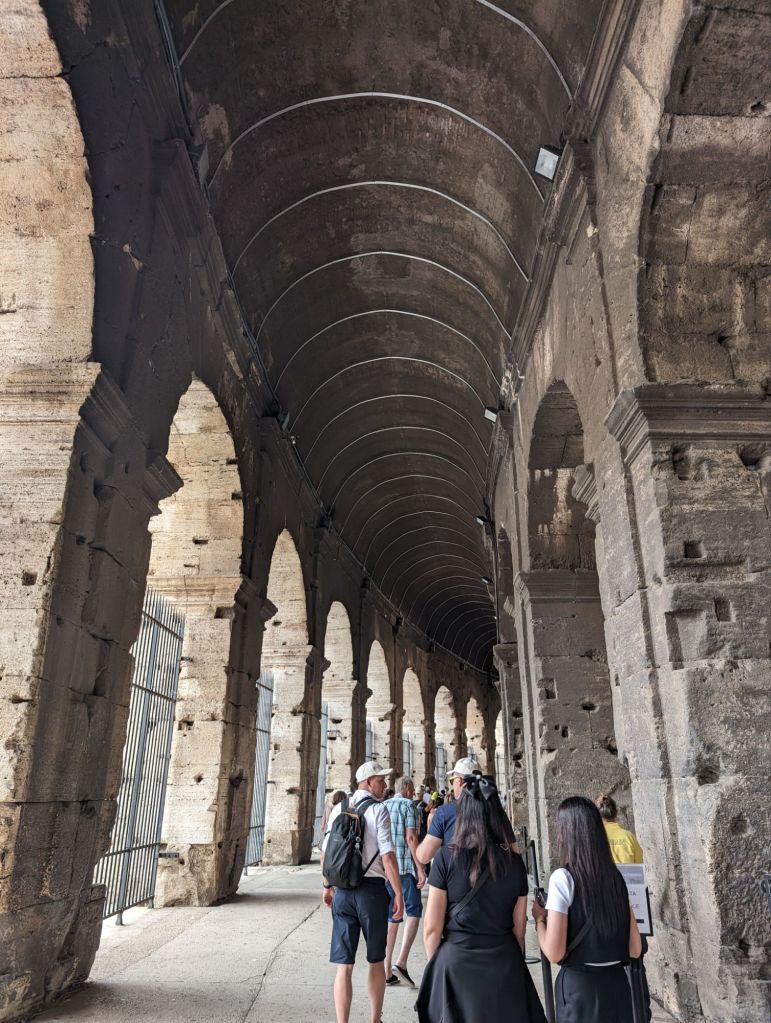
We are in Rome now and leave tomorrow, so not sure what my next post will cover. I may do one just for Rome. Although we were here only a short time, we crammed a lot of big buildings in.
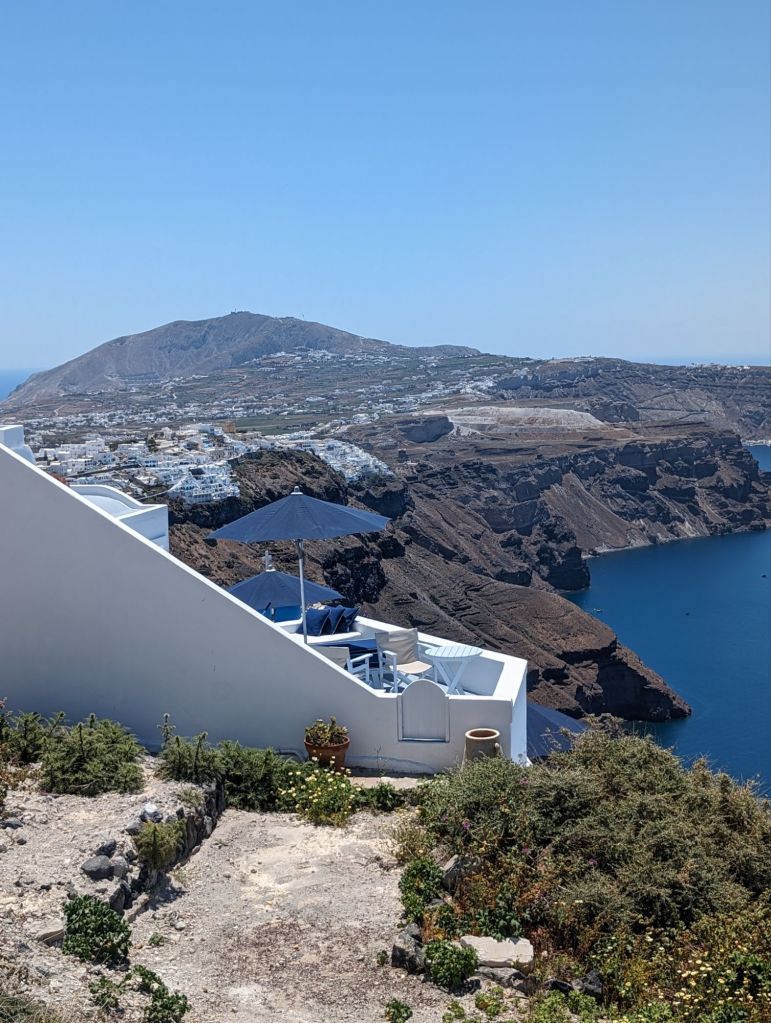
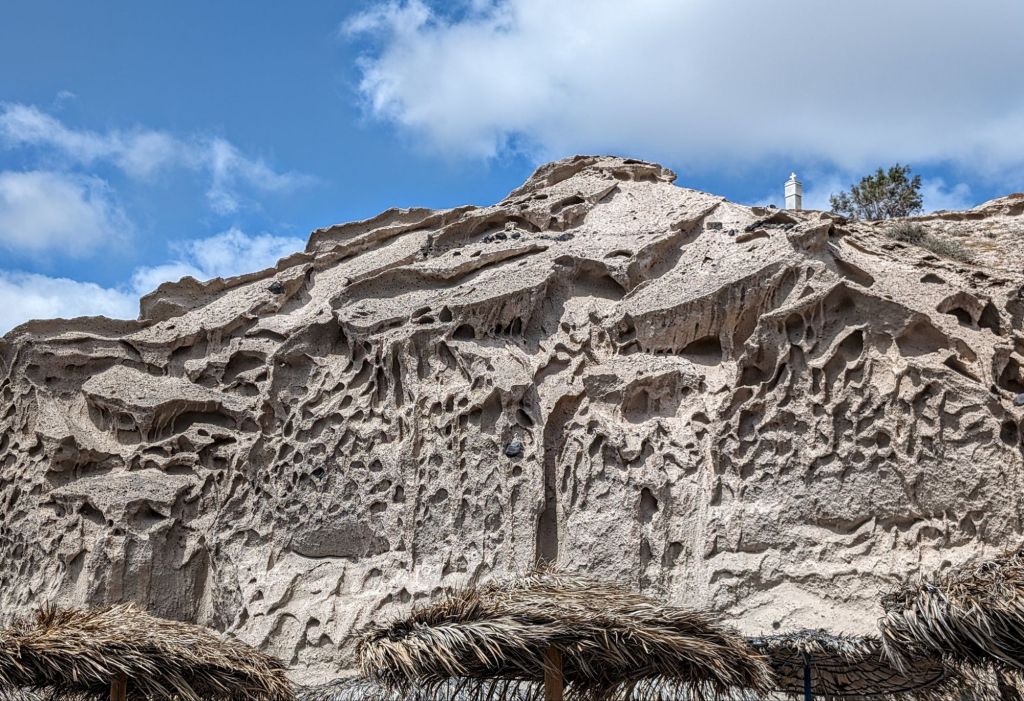
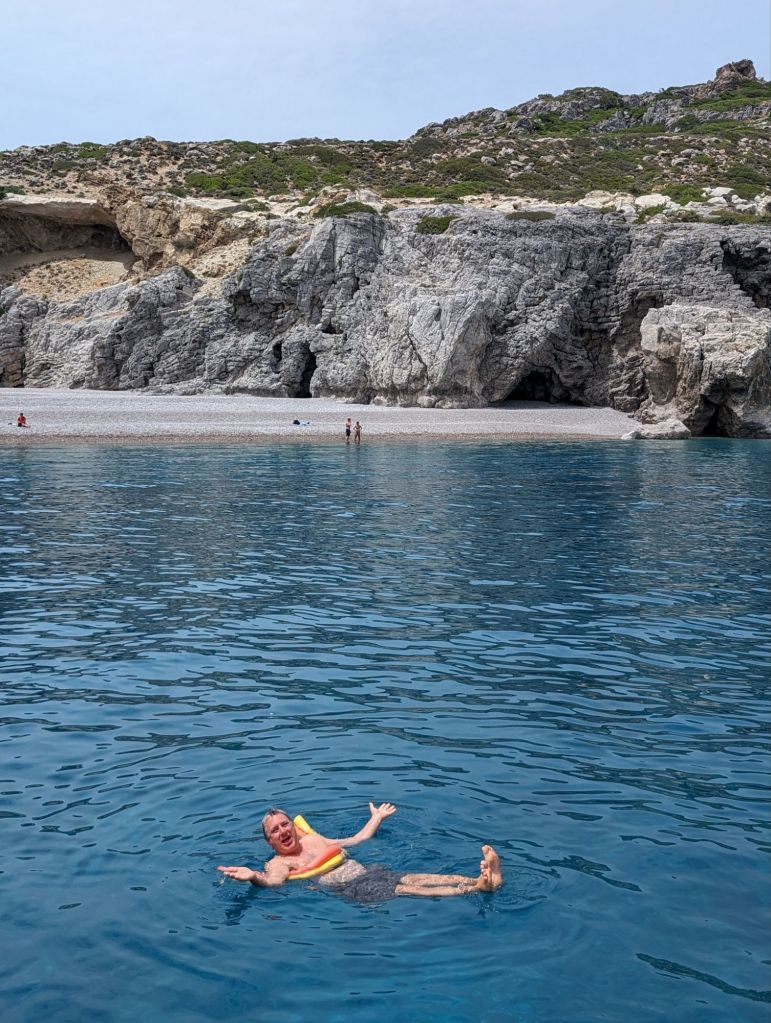
After Rhodes I was a bit at odds with Greek Islands. Don’t get me wrong, the history is unmatched, old medieval Rhodes Town unbelievable, the clarity and color of the sea to die and dive for. Yet, the very arid plant life and rocky geography, and the super cold water were not what I was expecting. The beaches I saw were wonderful but not…ok…Caribbean Island Beaches. I said it. With that said, we did enjoy our time on the Santorini Beaches.
I wasn’t expecting the same, but I also wasn’t expecting cold water and desert landscapes.
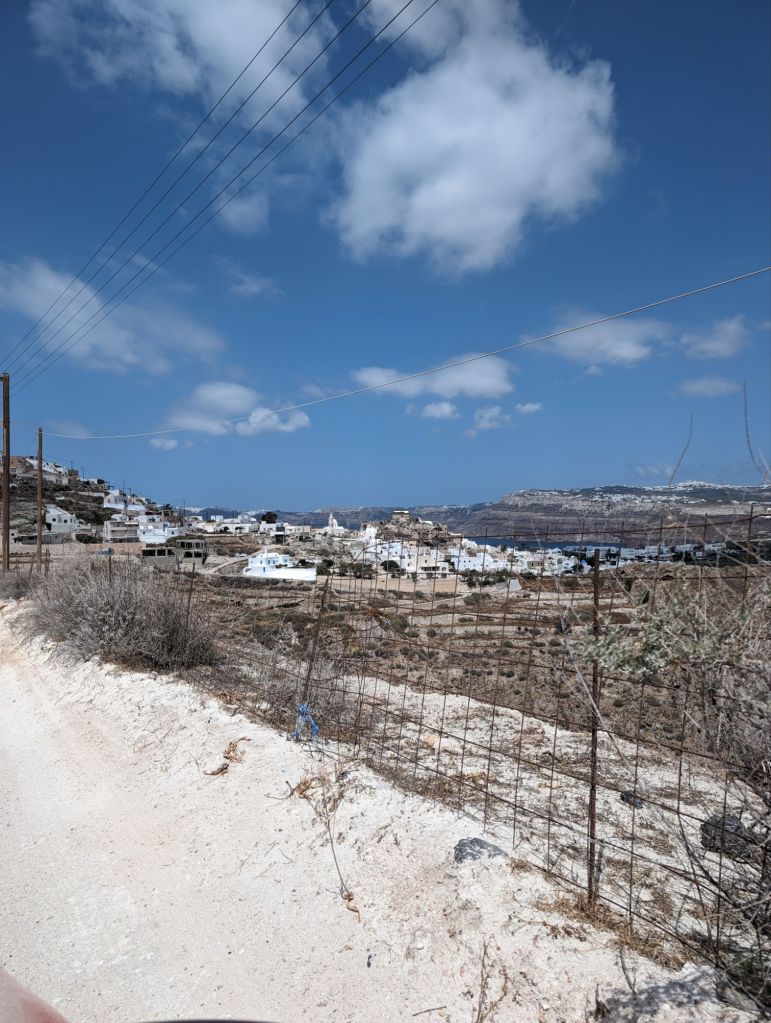
So I was, ok, just here for the history. But… Somehow the people of Santorini turned a dry rocky deserty volcano erupted place with crazy high cliffs and rocky beaches down stupid curvey roads and with cold water to boot into a beautiful worldwide sought after vacation location.
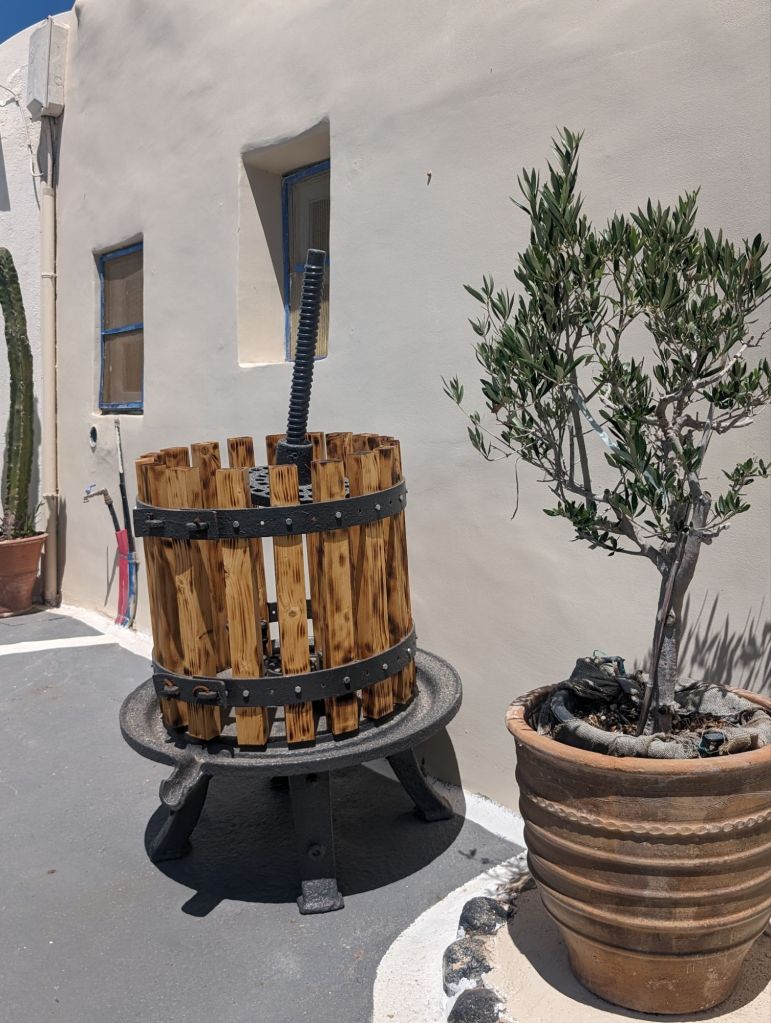
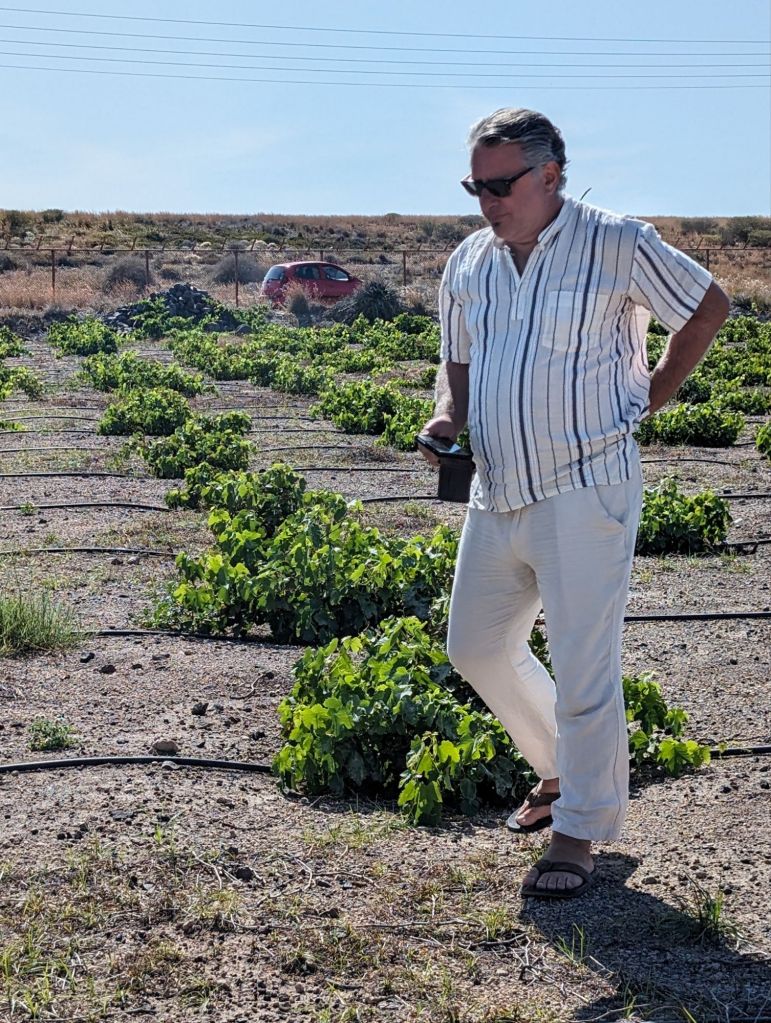
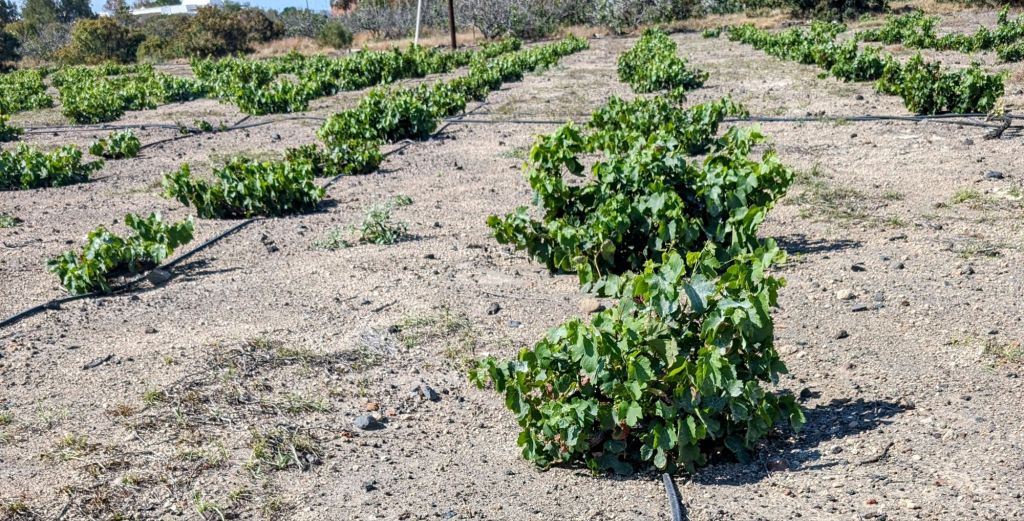
And to top it off, they grow grapes here in such an interesting way that the plants basically water themselves. It doesn’t stop there, they have been making wine for 100s, 1000s of years.
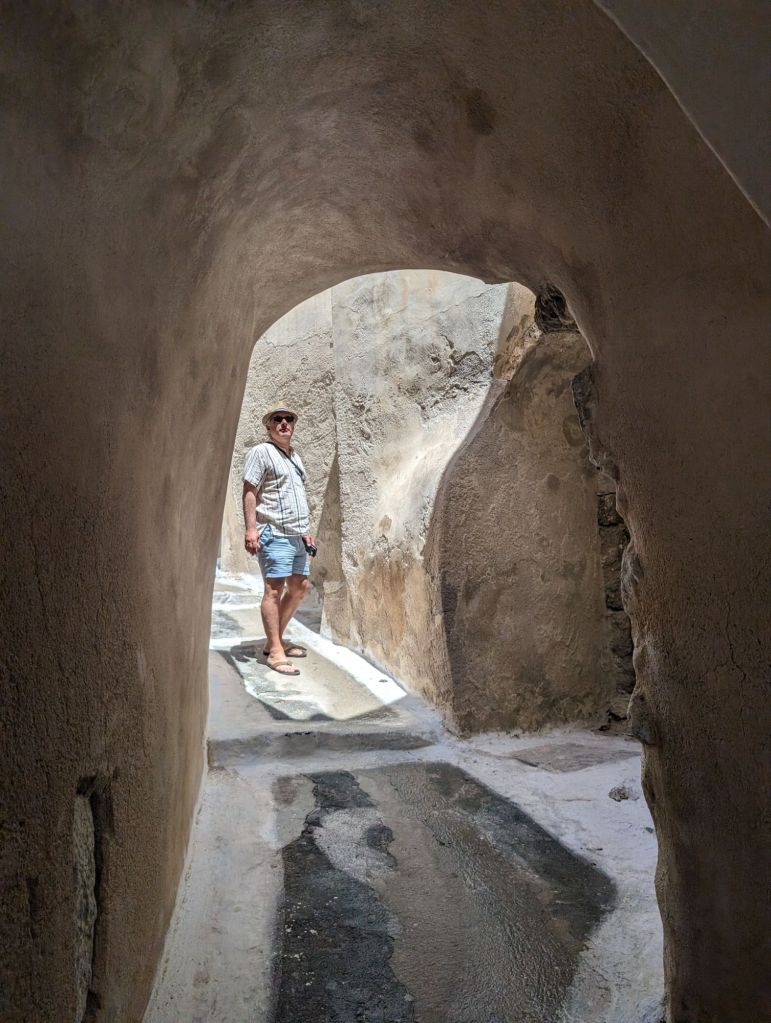
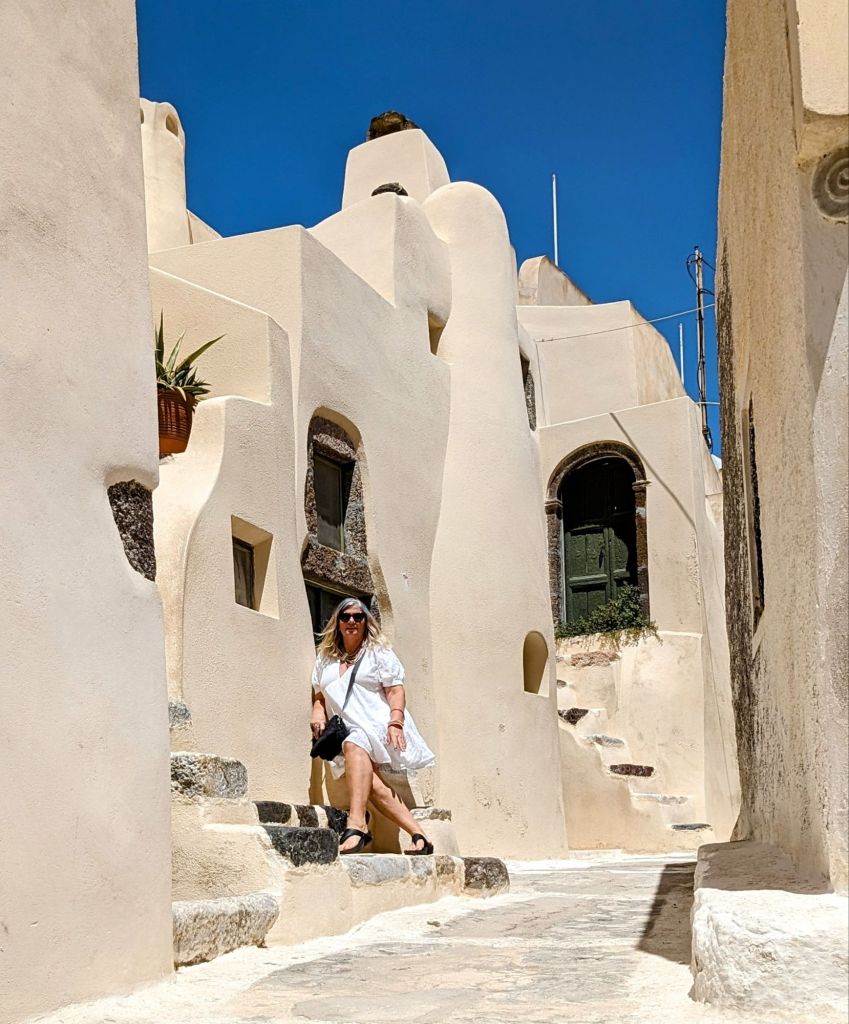
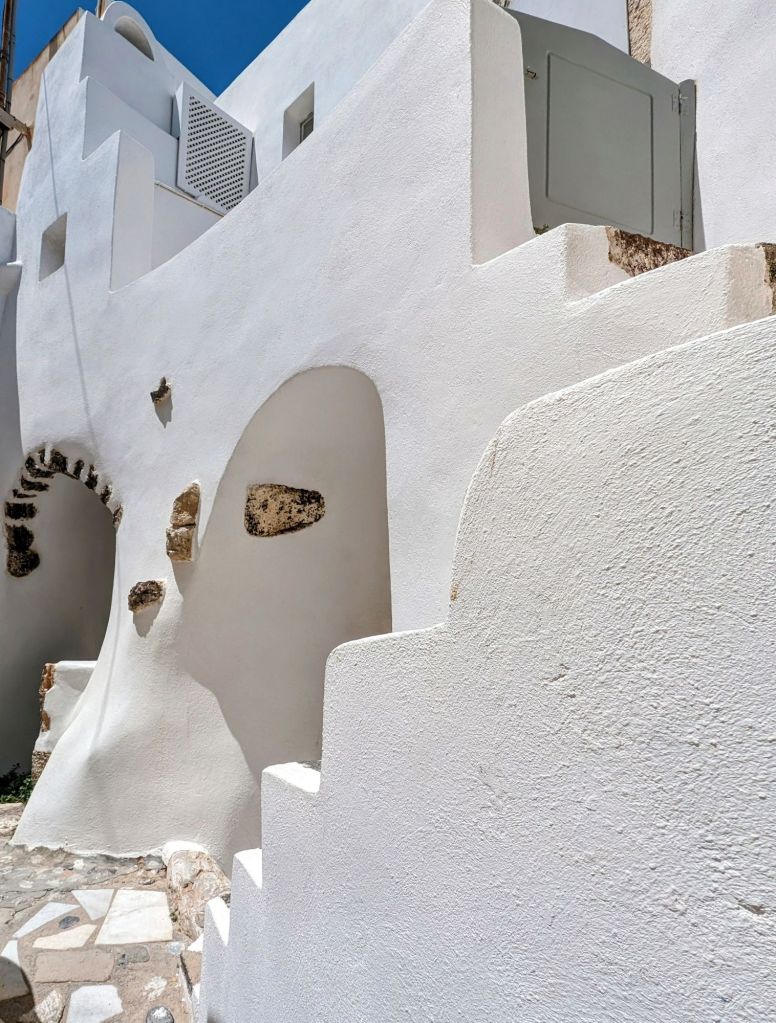
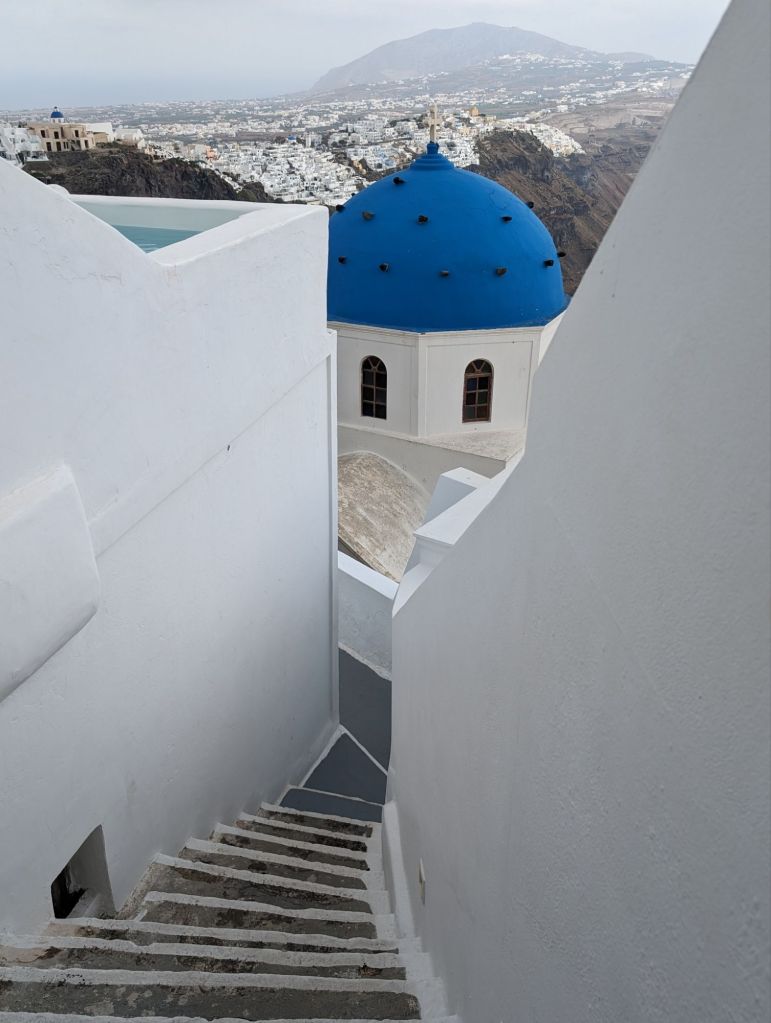
The building decision was amazing too. So although Santorini has plenty of solid ground land to build on, they decided to build down the very high cliffs. And get this…instead of “streets” they decided to have pedestrian only walk ways and alleys that have stairs and curves and turns down the cliffs too.
And to make that attractive the architects designed the buildings with curves and domes, and painted them all white, with a splash of blue on churches!
Well it worked! And I am sold and in love.
Waiting for a ferry to Athens now, but will miss Santorini.
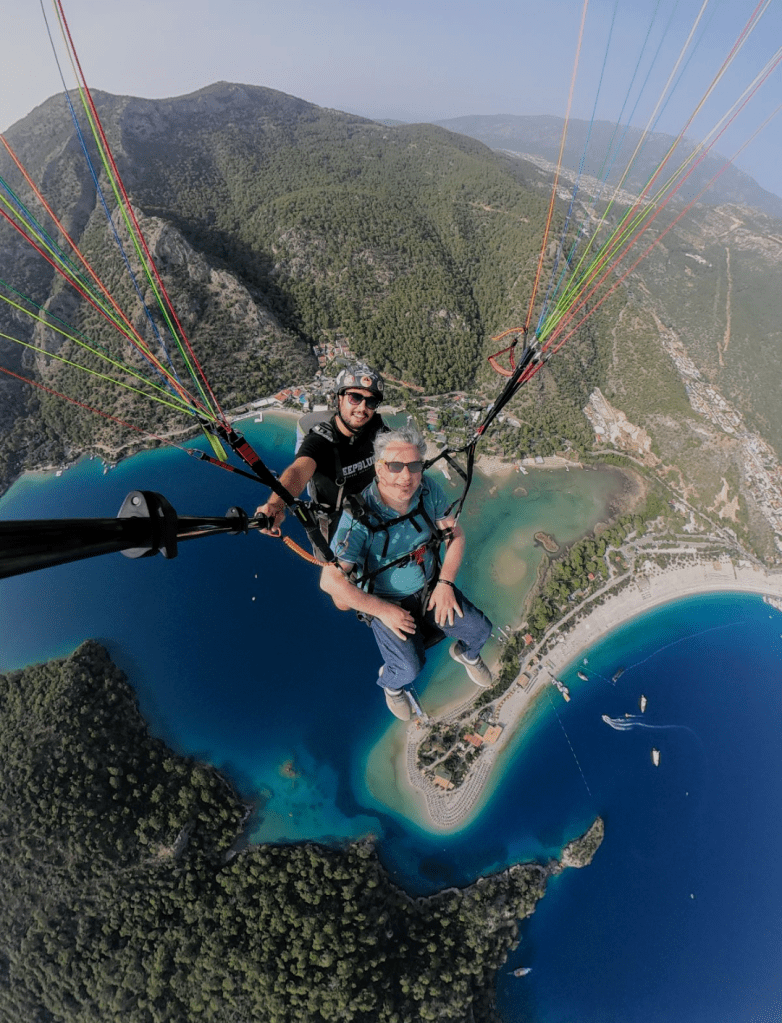
I learned things about myself. I can, although extremely scared, jump off the top of a 5k mountain, but walking down extremely steep, uneven gravely steps with no railing sends running away these days. Go figure, aging is weird.
ADVICE:
We were in Santorini in the late of May, but still it was chilly at nights and mornings. Maybe it is this way all summer long. Depending on the winc and cloud, it may be cool all day long.
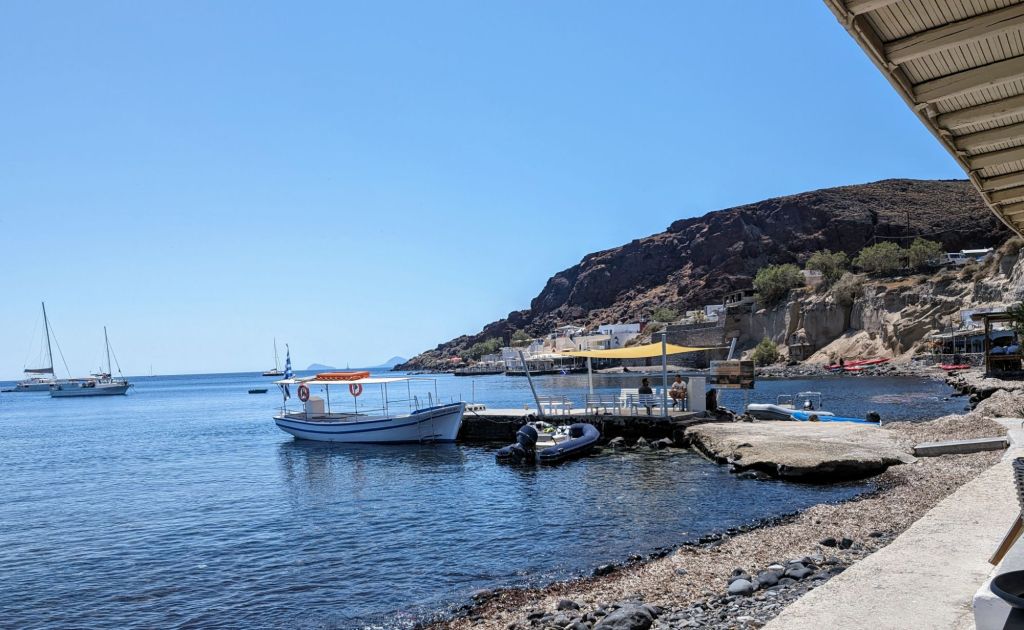
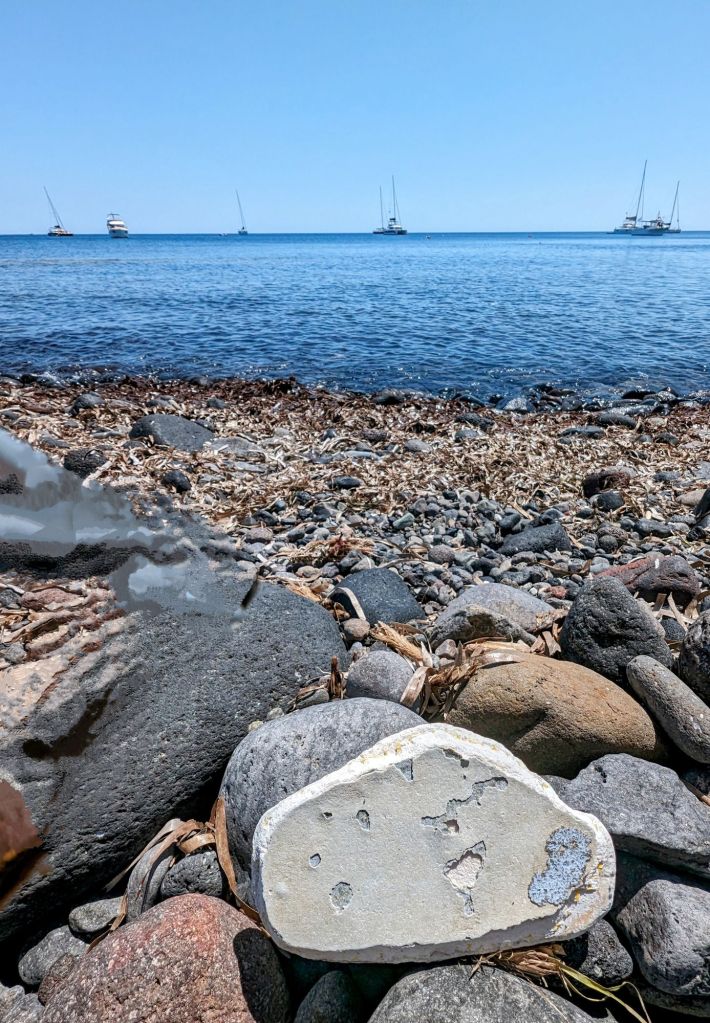
The beaches are very hard to get to, but you must. I mean, you’re on an island…see the beaches. They are very rocky, the water is cold, and depending on the popularity there will be a place to eat, drink or lay on lounges. One in particular is really cool, not because it is most likely a beach beach, but the back drop cliff/sand walls are beautifully drastic. Nature has made art all on its own, so go see Vlichada Beach.
We tried to visit Oia, but it was too crowded. I recommend to stay in another town. We stayed in Imerovigli and looooved it. Will tell you more about our hotel there, and all the hotels we stayed in on this trip, in a future post. Do definitely go to the tiny cover fisherman village below Oia, Ammoundi Bay. It is Adorable with the best seafood! Warning, it is not easy to get to. We rented a car, and that helped. I recommend getting a car, only if you are ok driving crazy winding mountain roads. We saw all of the island though!
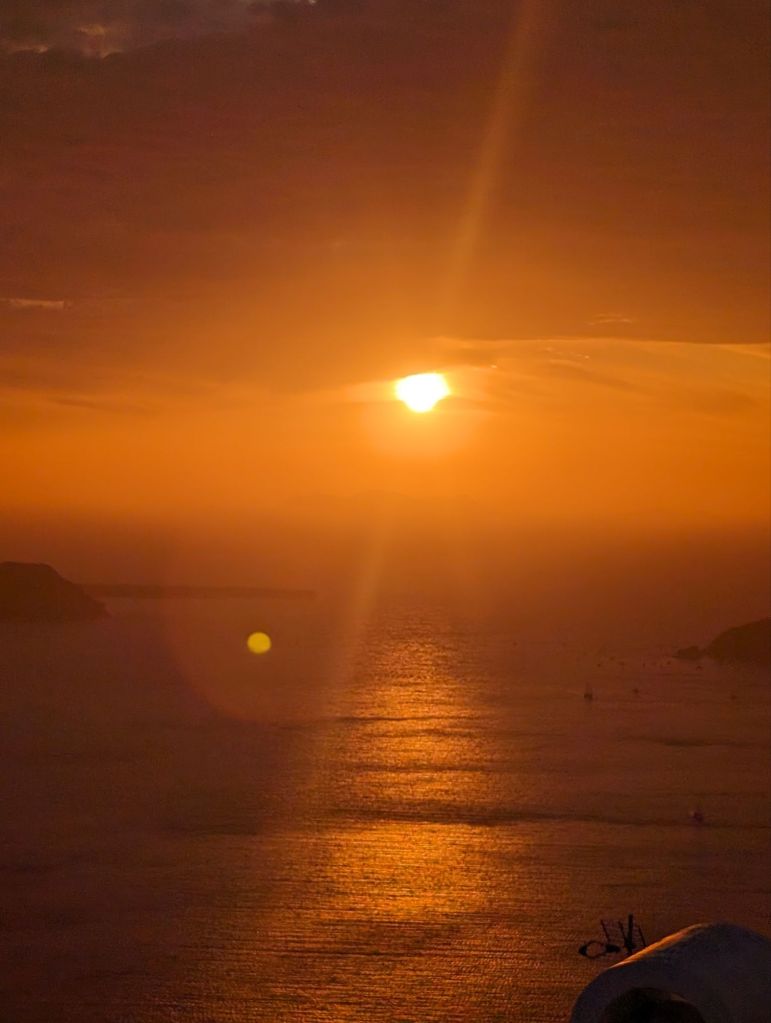
PS…Santorini is an amateur photographer’s dream. There are no bad photos here.
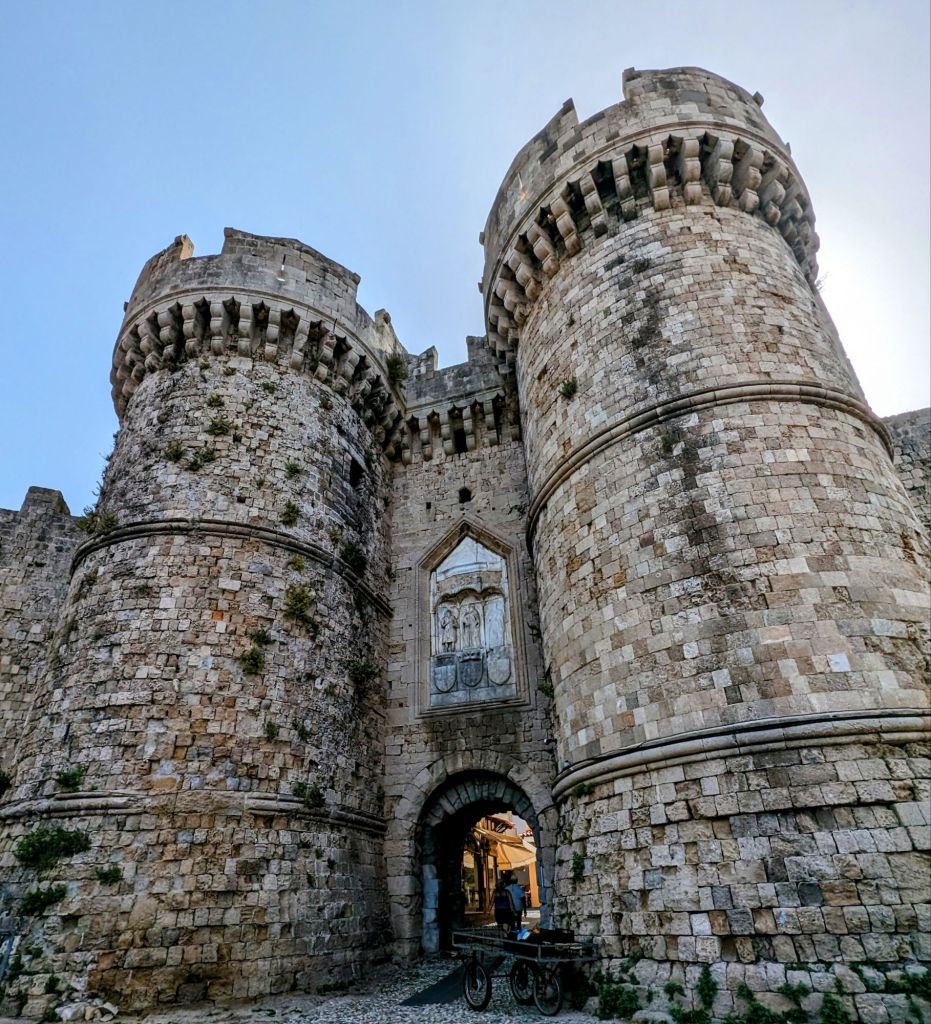
Like the roads in Old Town Rhodes, it started off bumpy!
Our ferry was cancelled, so we had to drive 2 hour to get to another ferry spot, and then was told we had to wait 5 hours for the next ferry. Was a bit stressed, but things turned around qwhen I saw a colony of bunnies! They were just hanging out! And then better yet, Jim got us on an earlier ferry we were told was full. We were the last to get on, but all was right in our traveling hearts.
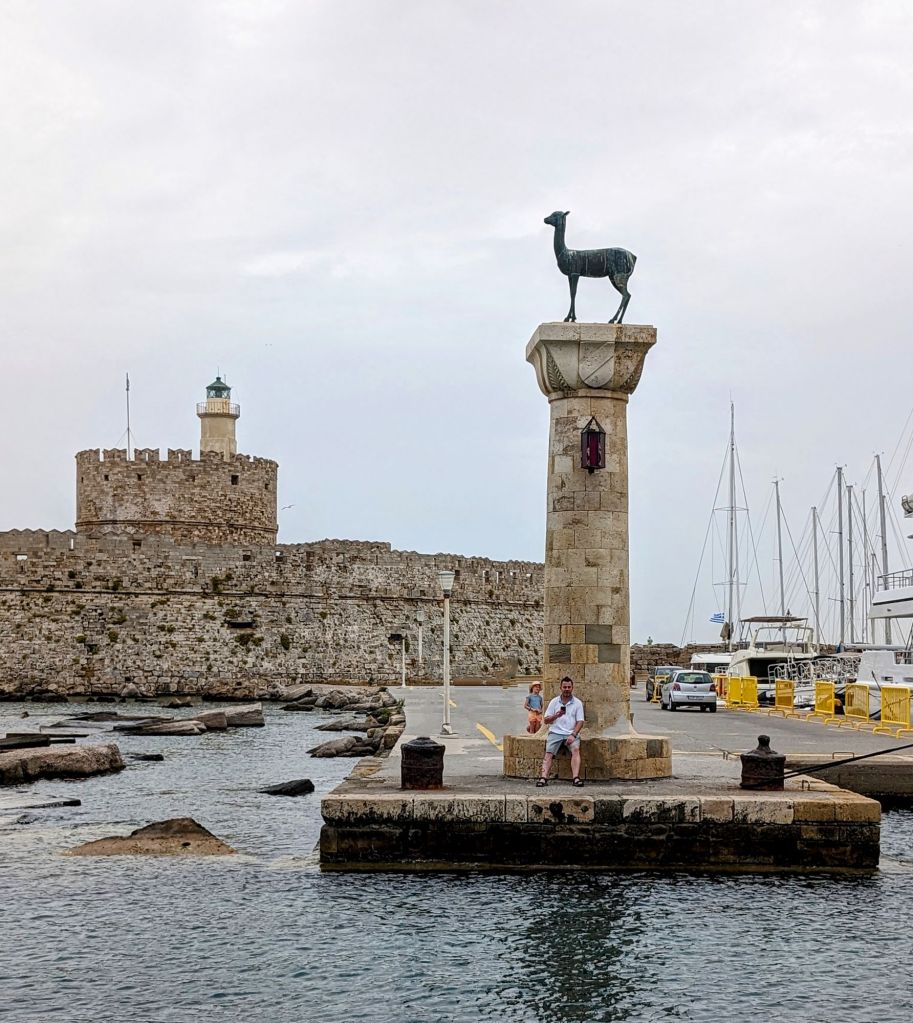
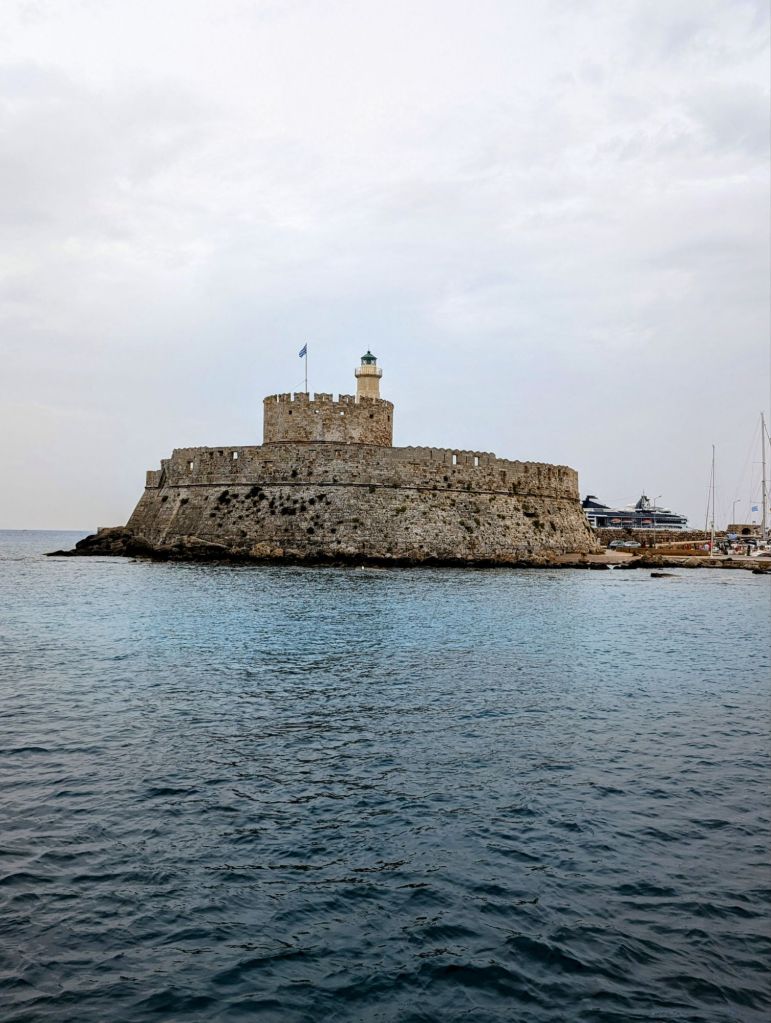
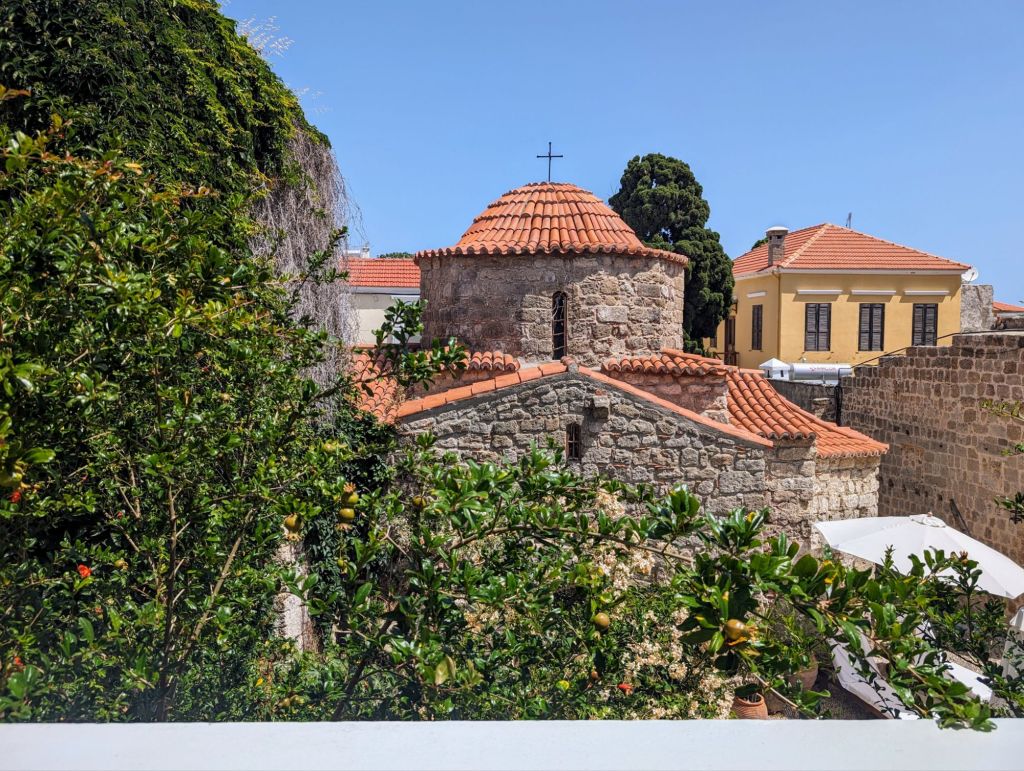
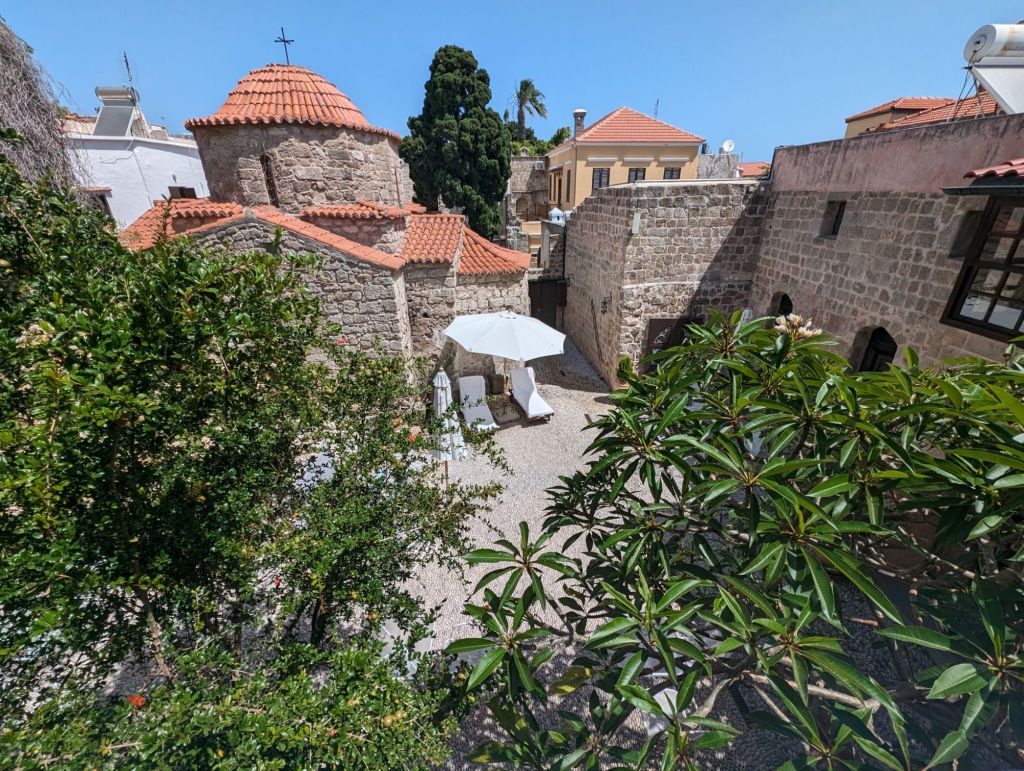
We stayed in the medieval area of Rhodes Town. It’s beautiful, with tiny streets going off in all directions made either of river rock or marble. Ancient rock walls line these streets. It’s just beautifully confusing. You can meander the tiny streets and alleys for hours, picking a street cafe to then people watch, when your feet and legs get weary.
We did our own tour of Old Town our first afternoon/evening, including a meander inside the palace.
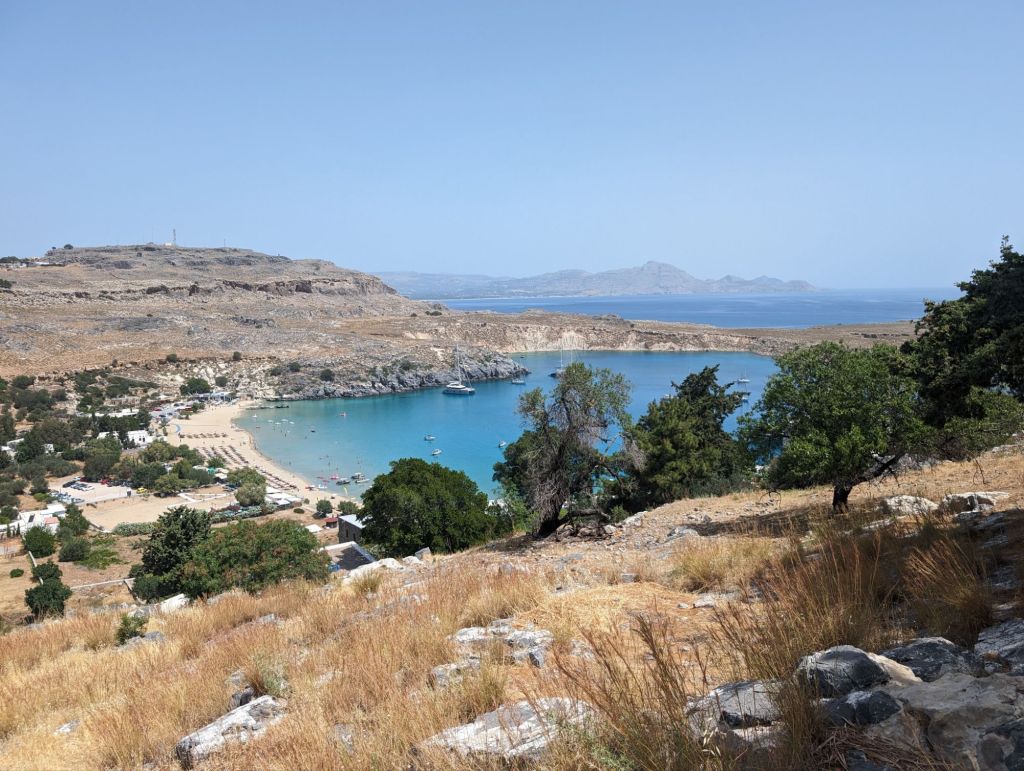
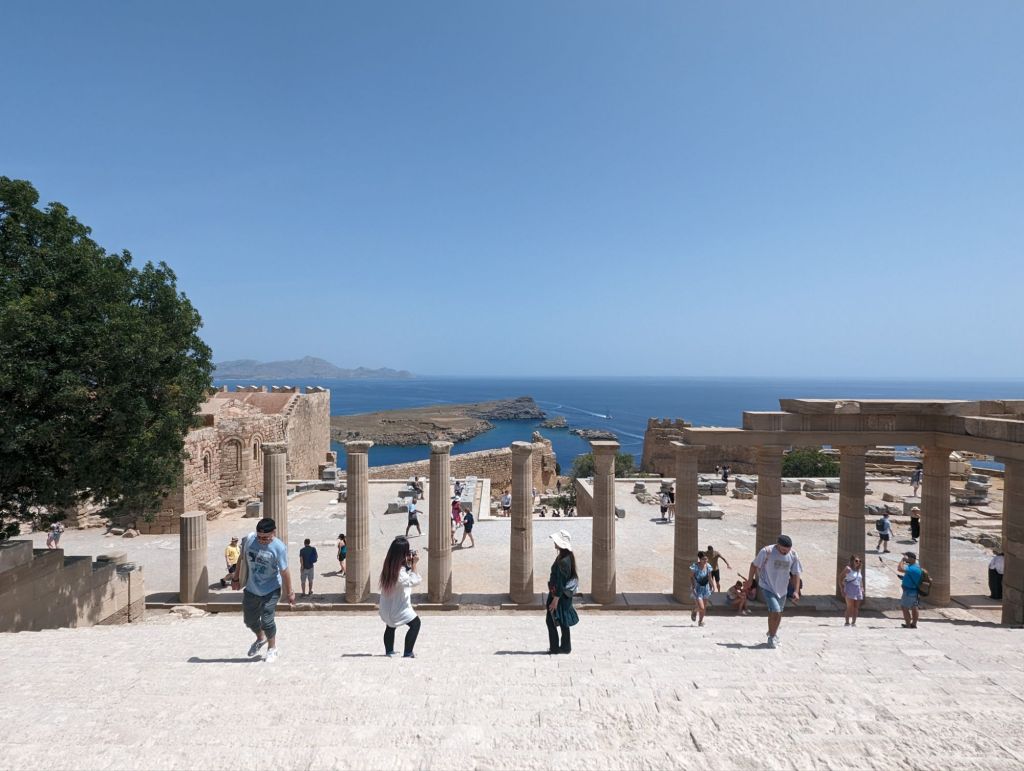
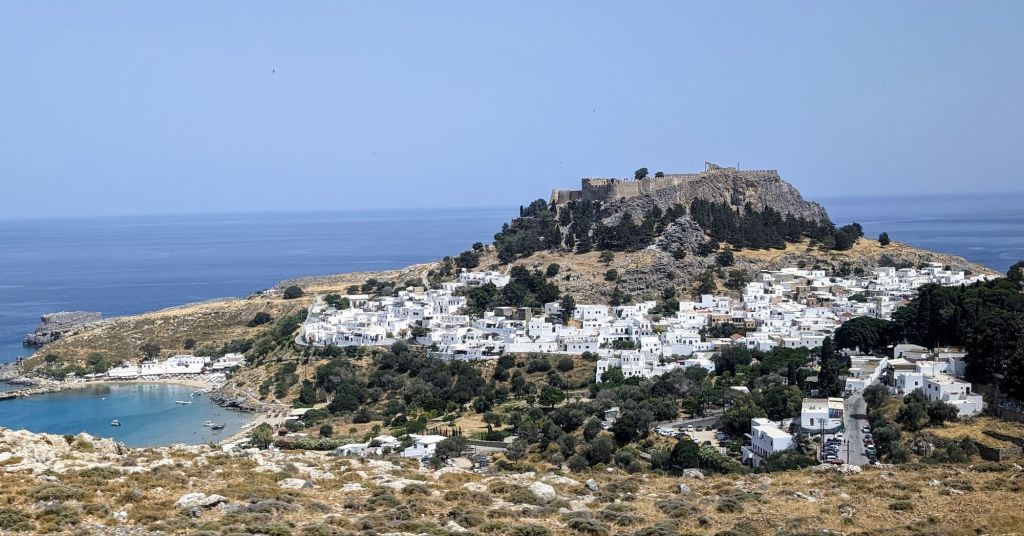
Our second day we took a bus to Lindos, another cute but way way smaller town of meandering foot traffic only streets and alleys. We went straight up around 30 flights of hills/stair to the amazing Acropolis. Then we meandered down around 50 flights to the beach for lunch and a cold dip in the Aegean Sea. It was smart because we had a 20 flight up climb still to do and it kept us cool.
Our 3rd day we took sail on what I thought was going to be a nice big catamaran, but nope, Jim booked a pirate ship! It was not a pirate themed tour though, they did keep us well fed and had plenty to drink. There was no walking of planks either. We went to 3 wonderful spots to swim, we jumped off the front of the boat and snorkeled, although the water was beautifully clear and blue, there were no fish. I brought bread on the 2nd stop, we got a bunch of fish and snorkeled a bit more, but the water was sooooo cold it affected my body and I opted out of the last swim spot, but Jim jumped off the top deck and swam to shore. It was mostly overcast for the day, but we got some sun for the trip back to town
Our last day, we slowly made our way up to the Acropolis in town, which is nothing compared to the one in Lindos. And then after a 2pm lunch, we lounged, and then hit a museum for our last day!
ADVICE:
I recommend staying in the medieval part of Rhodes town. Our place, St. Artemois Boutique hotel was more than awesome. Attached to the old, maybe ancient, church St. Artemois. It has only 4-6 rooms only with a pretty courtyard. Made to order Breakfast was in the courtyard and came with our $125. a night fee. Maria is a gracious host too.
I’llSTILL ADVICE:
If you don’t like cold water to swim in, do not go to Rhodes in May, even late May. Even hot out some days the water was still freezing.
We found Rhodes town and Lindos kind of crowded at times, (of course especially with cruises) but the locals said it is nothing compared to high season, which starts in June. I don’t know if the water gets warmer later into the summer, but the air does.
Also, I recommend Lindos, it’s definitely a workout but as far as history / ruins go its cool and with a beautiful view. Maybe go with a guide to learn more about it than the few informational signs we read.
Good-bye enchanted beautiful Fairy Chimneys, amazing valleys and colorful balloon clouds in the sky.
Hello high desert, Silk Road Caravan Stops, Dirt Roads, Romani Camps, Rumi and Whirling Dervishes!
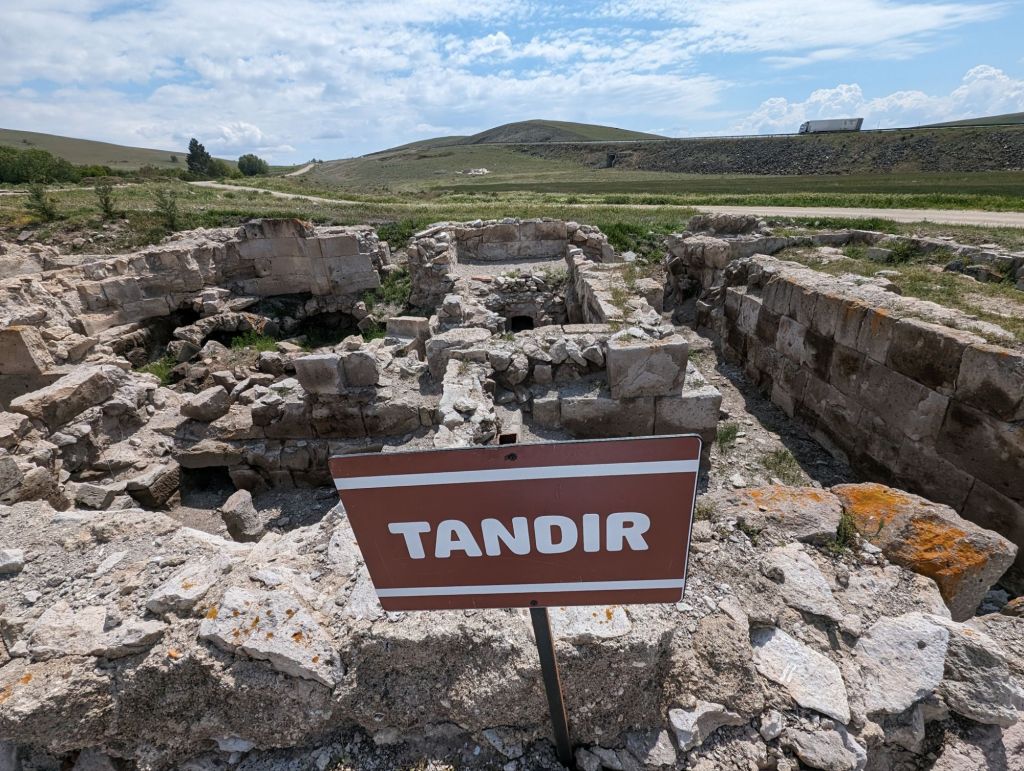
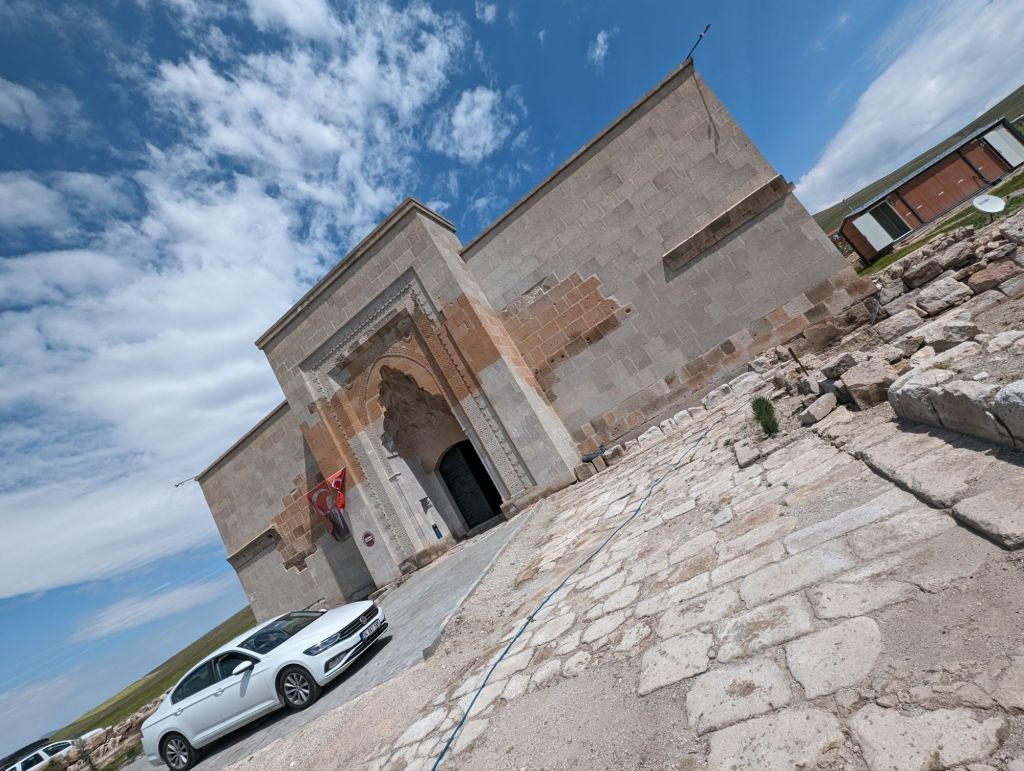
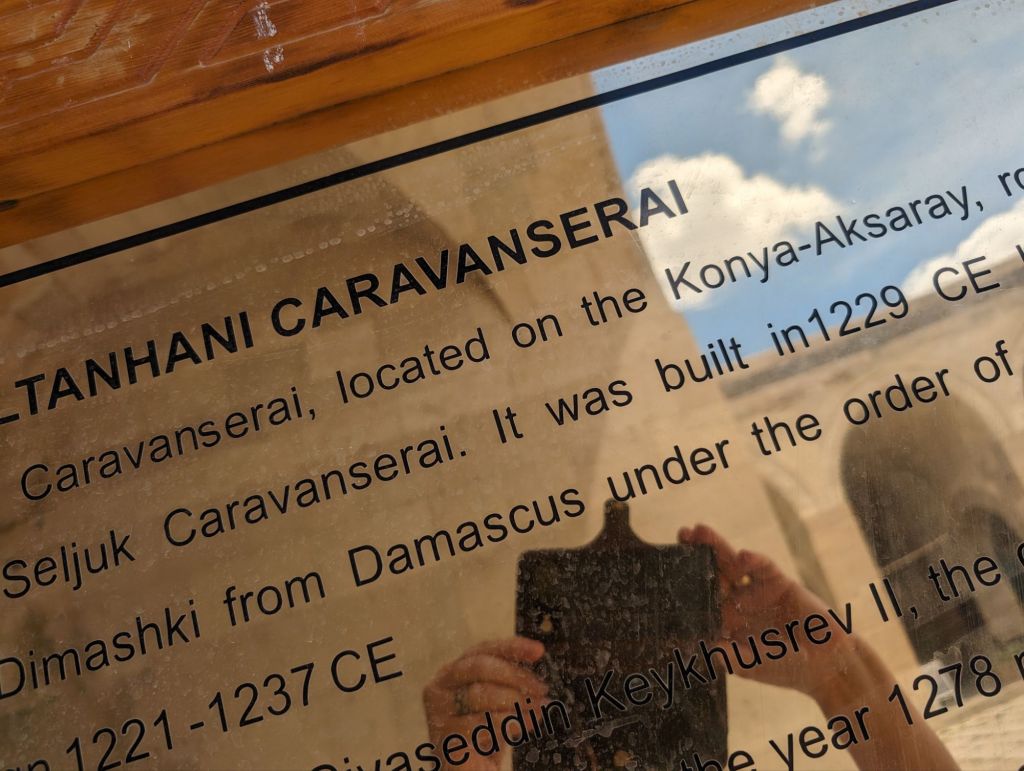
First pull over is a ancient caravan stop along the Silk Road from China to Europe. The history, the the adventure, the dangers, oh my! The trails from the US East to the West is nothing compared to this.
ADVICE: Do stop at the Silk Road Caravan Stops. Unless you have unlimited time, don’t go off roads looking for more history.
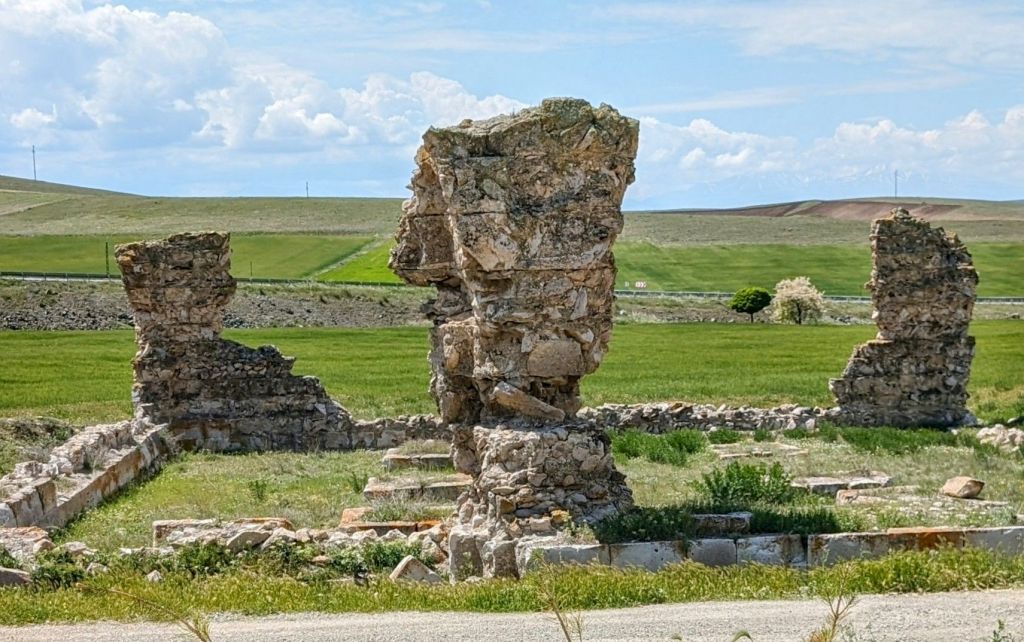
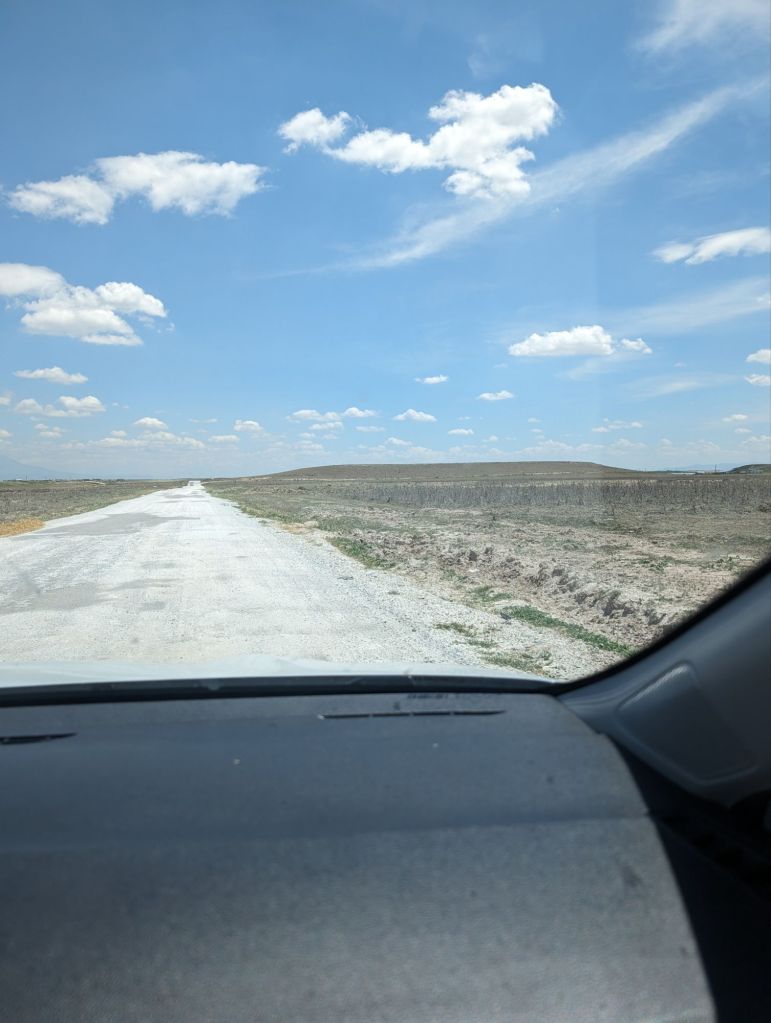
Looking for another ancient Silk Road Caravan Stop got us off road, a wee bit lost and on an adventure.
We finally found it! Ha, no we did not. But we did find one in a small town!
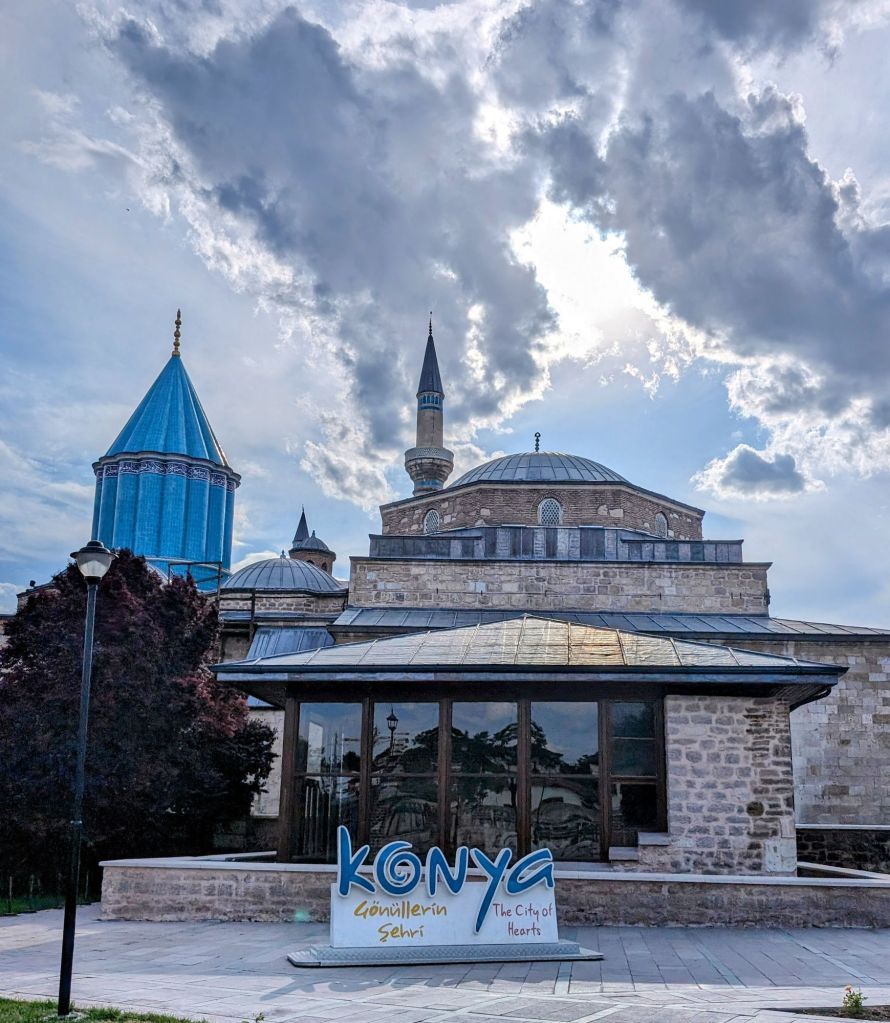
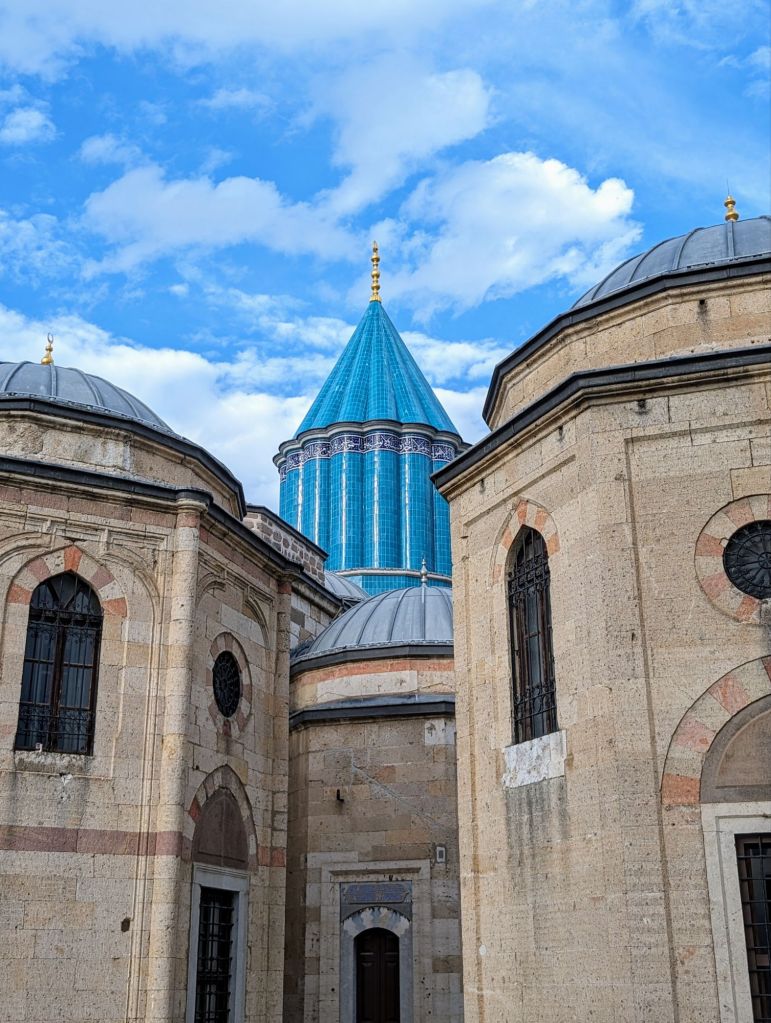
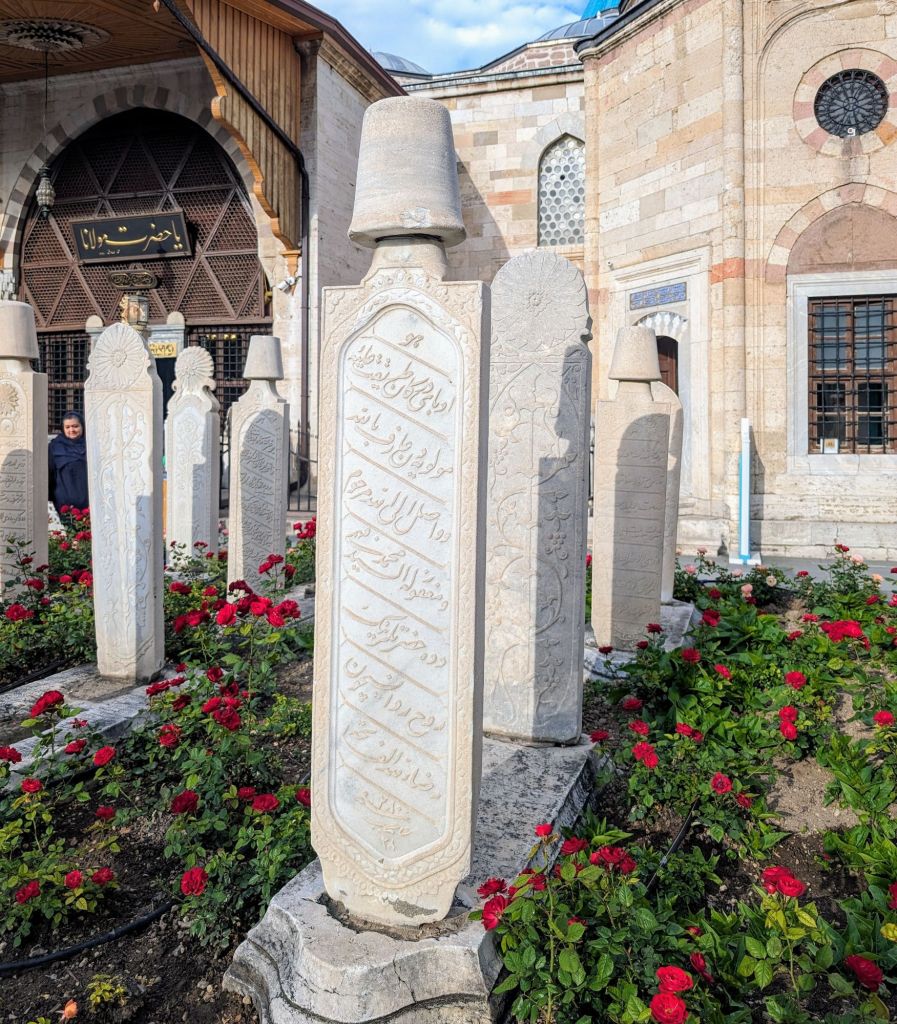
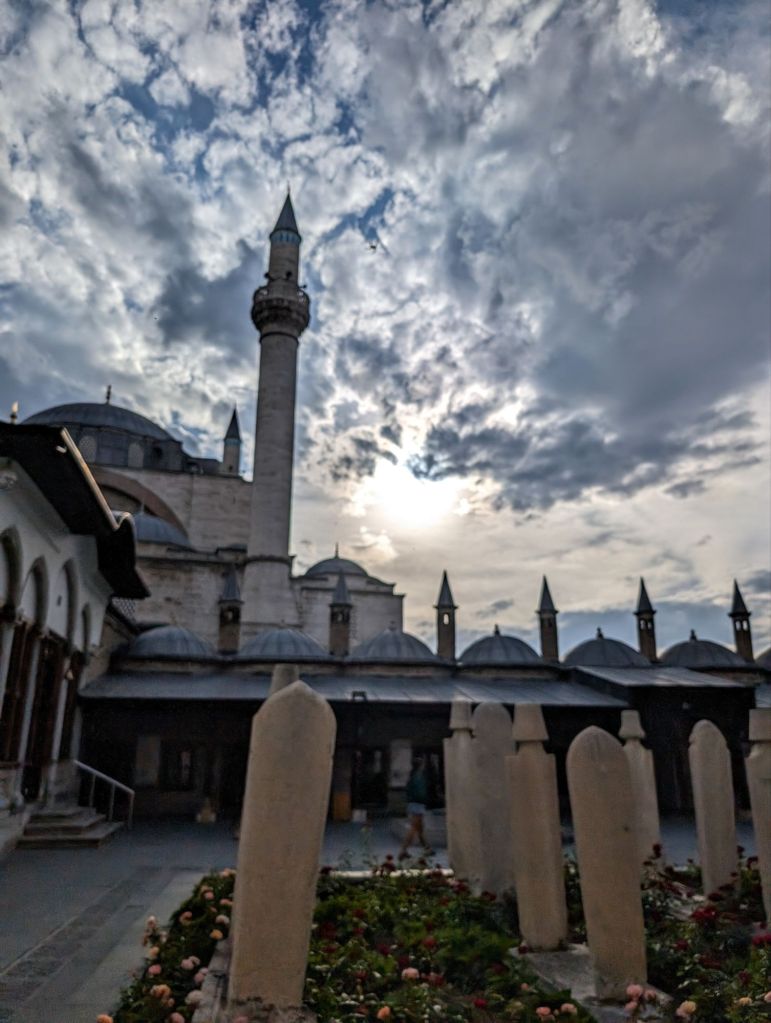
We reached Konya, home of the Whirling Dervish and its creator, who lies in death there too.
I always associated Rumi with the yoga/self help/hippy seen, but he was a Sufi muslim, which is kind of a hippy sector of Islam.
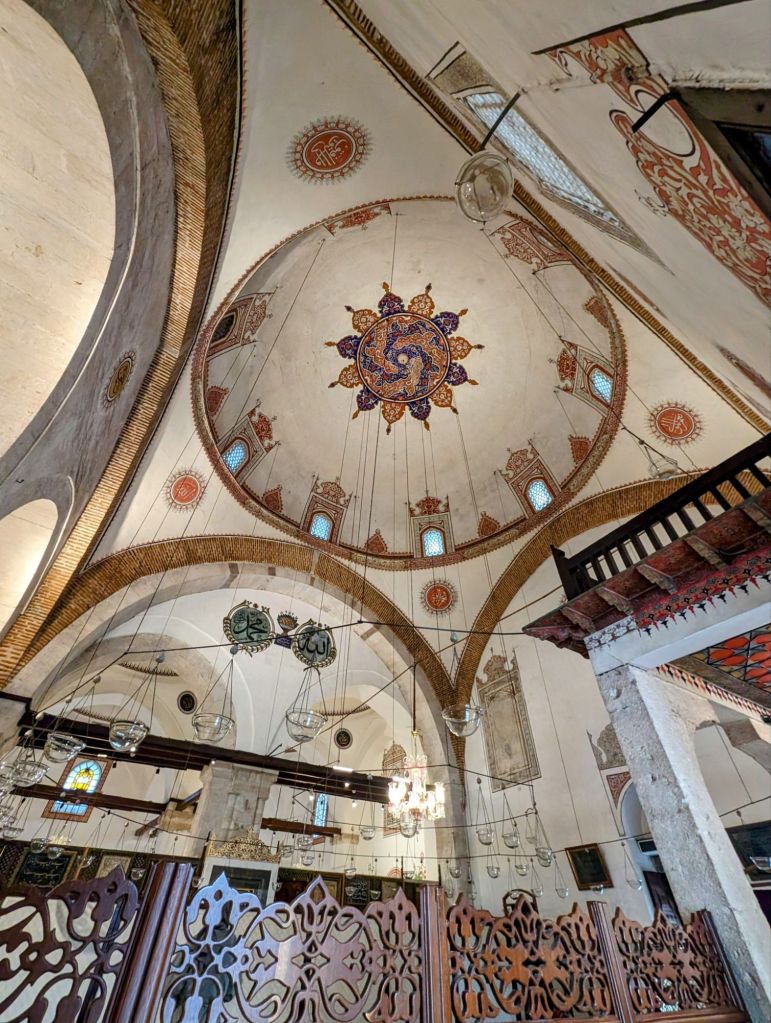
We went to the museum/mosque where the Whirling Dervishes do their ceremony, but unfortunately we were not there on a night they do it. Sad to miss them, but visited Rumi’s resting spot.
ADVICE:
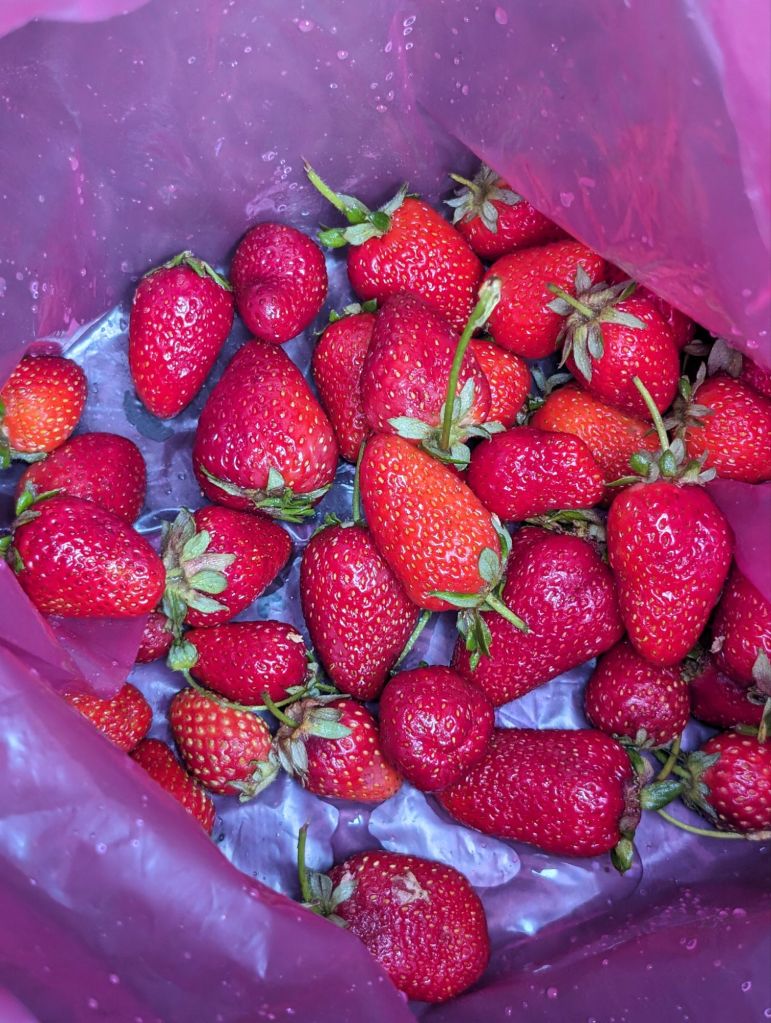
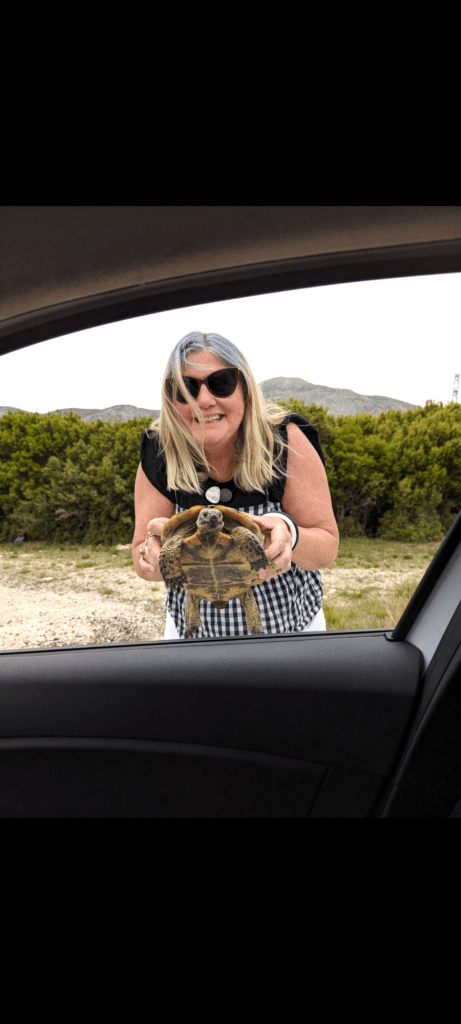
Try to go to Konya on a weekend to see the real Whirling Dervish ceremony. Do stop at roadside fruit stands to buy a kilo of strawberries for $2.50 (do wash before eating though). And definitely help tortoise safely cross the road.
We walked around the city center and turned in for the night for a long road trip the next day.
The drive where I bought strawberries from the farm, opium poppies grew, and I saved 2 Greek Tortoise to boot!
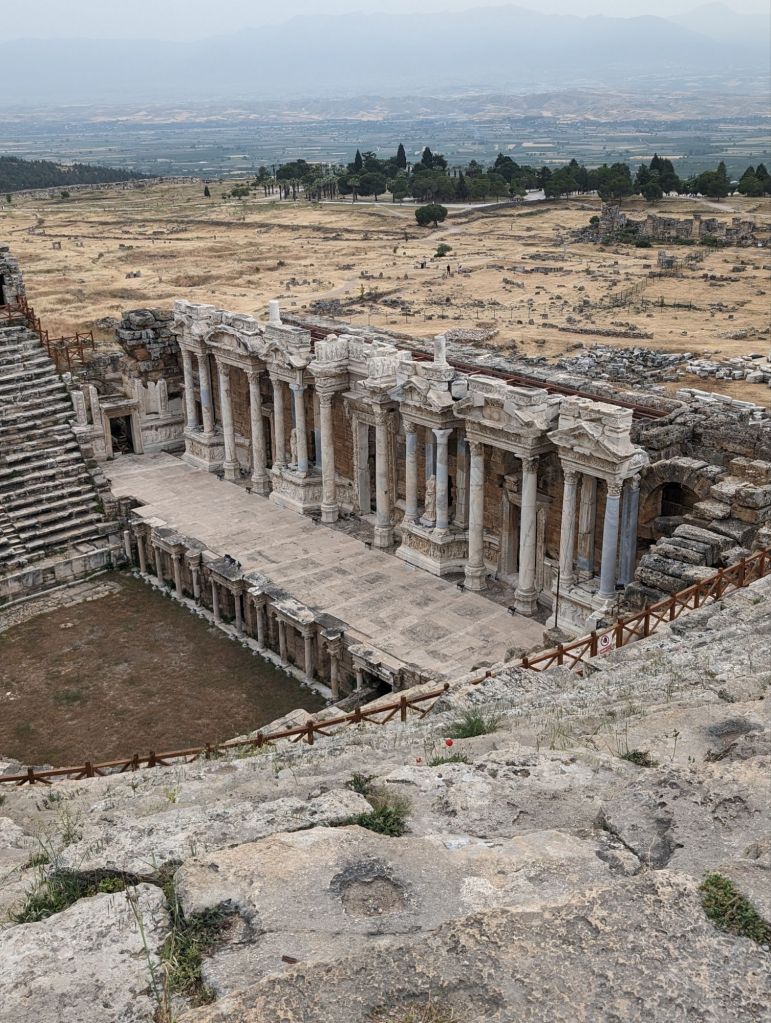
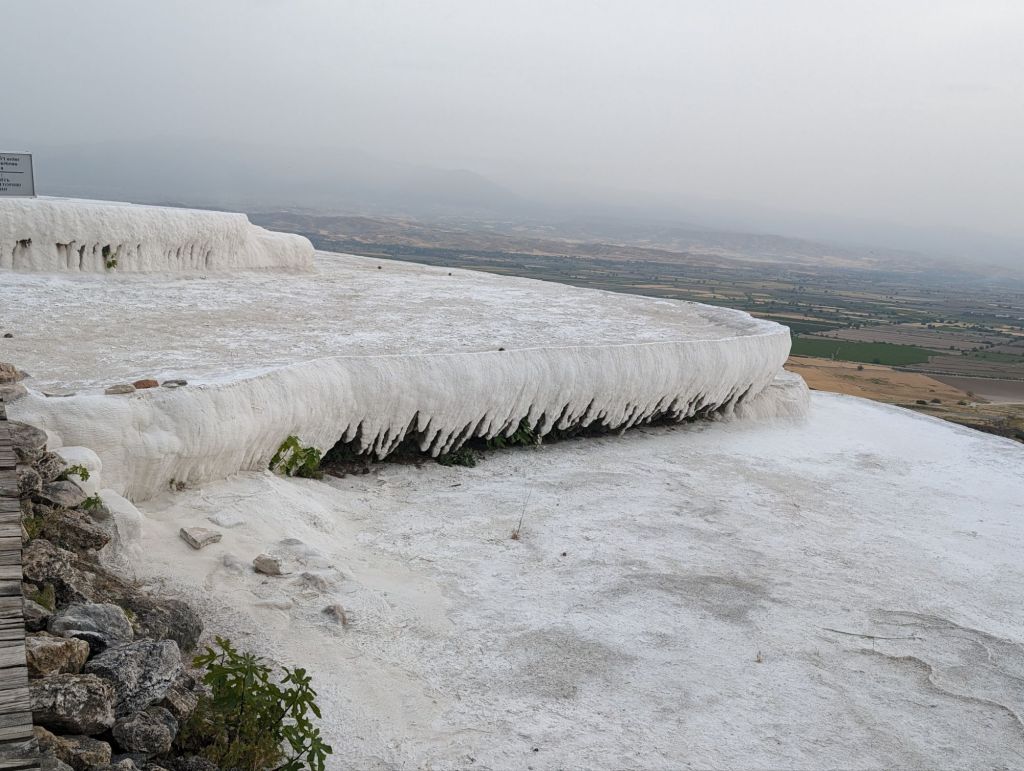
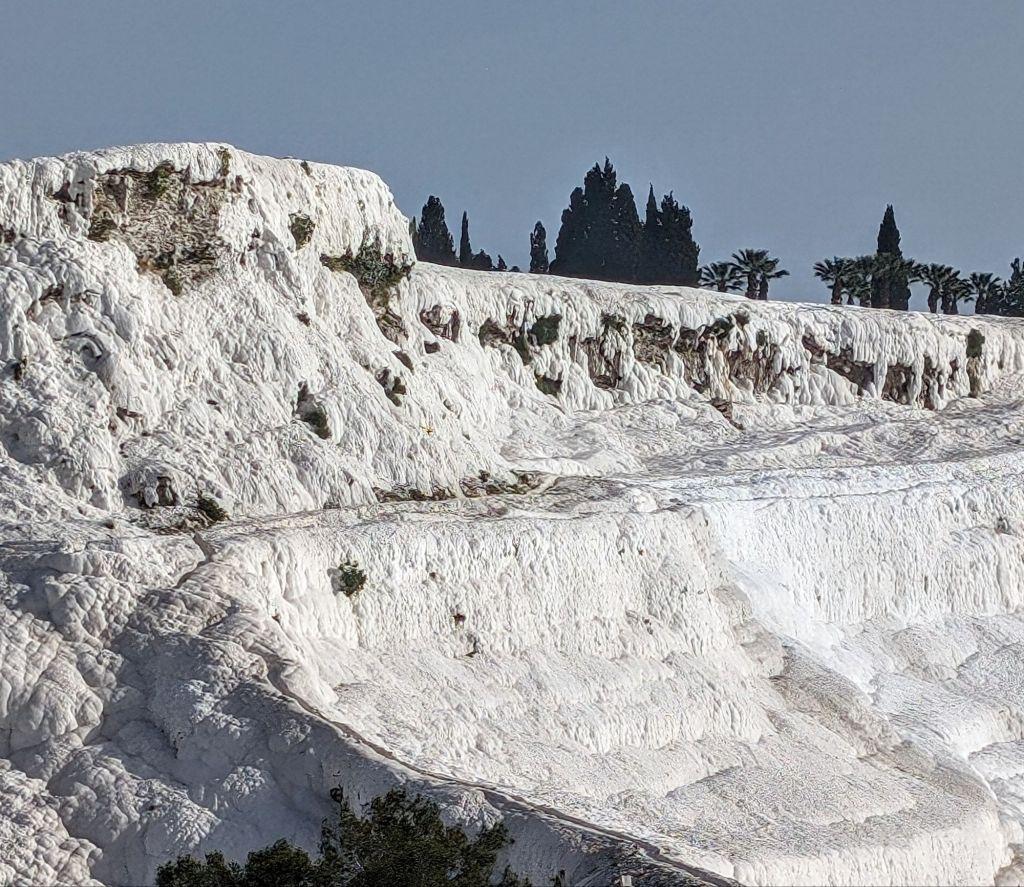
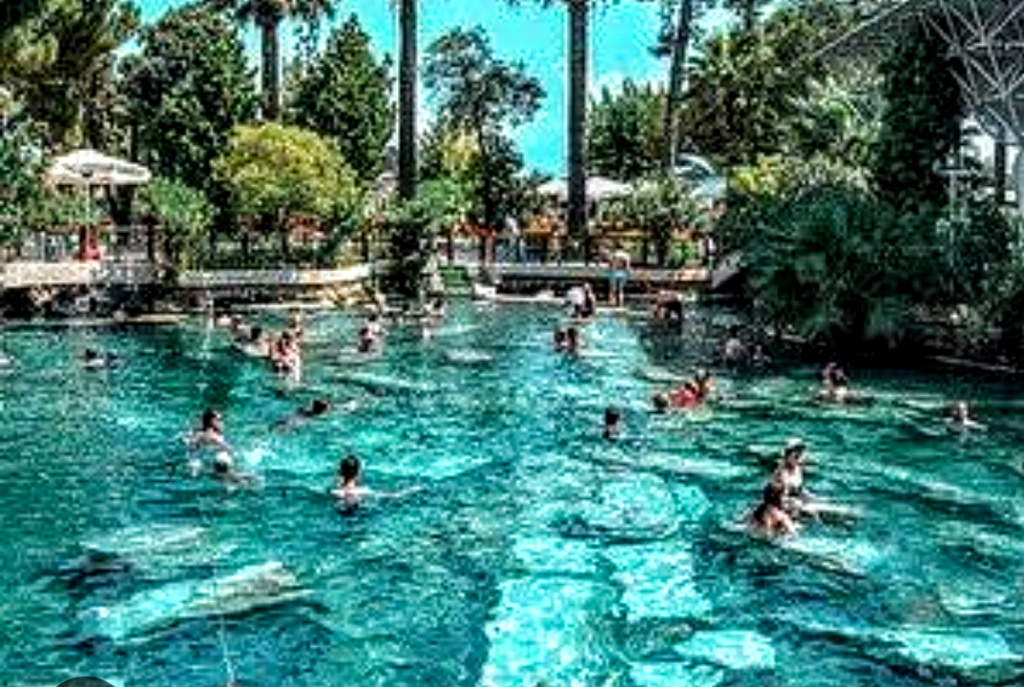
And then came Pamukkale, aka the Cotton Castle, which is a hard calcium buildup dripping down a mountain side for 1000s of years from the natural hot mineral springs. And let me not forget Hieropolos, an ancient Roman town, which was smartly built by said hot springs.
ADVICE:
The travertine (cotton castle), Cleopatra’s pool and the Hieropolos ruins are all in one 30 Euro fee. No wait, Cleopatra’s pool is extra, but it is in the same park. Carry towels, bathing suit, and water in with you. We did not know this.
The warm spring water “pools” at the top of the travertine are beautiful but just wear shorts to go in, they are very shallow, not very warm and the bottom is weird to sit on.
And do all three, including the hike up to the theater at Hieropolos.
We packed in a lot that day, the ruins, and a swim in Cleopatra’s pool, which was another hot spring (immediately above) where ruins are tossed about the bottom. She never went, but the water was brought to her to bathe in upon reaching the shores of Turkey. And also, we slightly bathed in the cotton Castle’s very shallow pools of hot mineral spring water at the top of the mountain.
It was another early night for an over the mountain road trip to the beach the next day, with a stop at a farmers market and a quick stop to save another turtle!
And we made it to the sea, the coast, the Blue Lagoon, Baby! We are having a nice rest for 1.5 days before we head to Rhodes, Greece!
ADVICE:
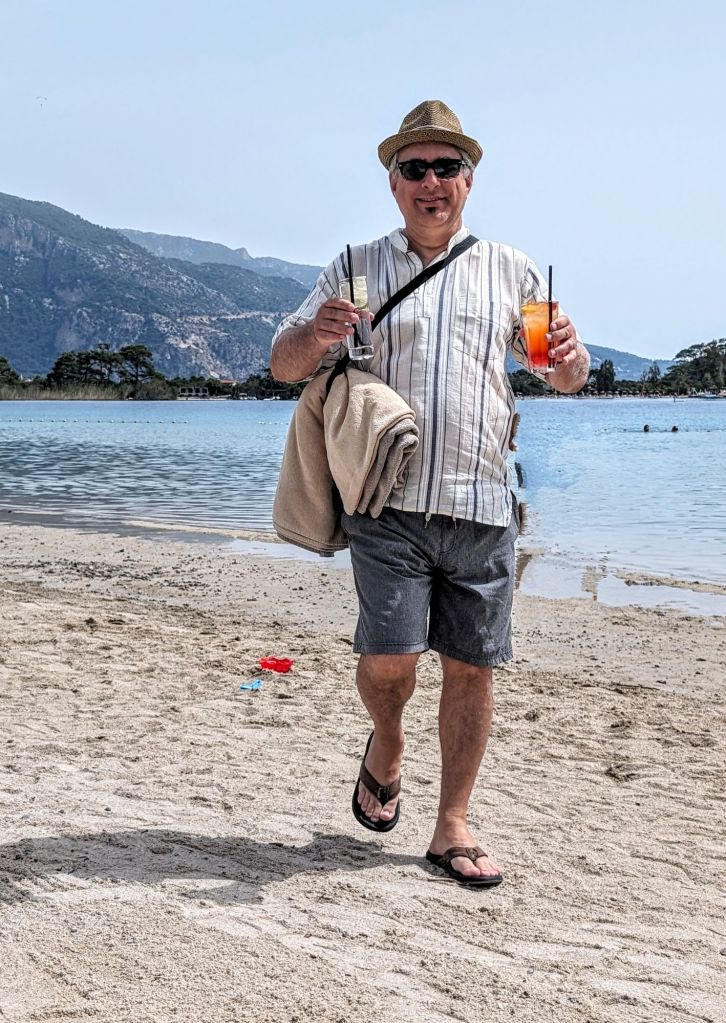
If you want a quite very chill stay, get a hotel on the Blue Lagoon. If you want party and action, stay in the beach area of Oludeniz. Do hang out and do activities in the Oludeniz beach area. The pirate ship cruises, the sky dotted with paragliders and the all around festivity is appreciated.
Beach Time, Eating, Drinking, a great massage and then we jumped off the top of a 5000 mountain!
ADVICE:
Do go paragliding here if you want to. It is scary before the take off, but so beautiful and relaxing once you are in the air. Other than that enjoy the many colorful parachutes in the sky all day. Also we went in May, so it was mellow and the water was chilly.
It was amazing, but honestly it scared the caca out of me before we took off. I mean, who purposely walks to the very edge of a 5000ft high mountain with a kite on their back. Um, me, I guess, with weak knees, fear in my heart and my brain exploding. But I did it, we both did it.