100% FROM RECYCLED MATERIALS…
AND IT LOOKS GOOD!
UPCYCLING AT ITS BEST!
 |
| From How To – Wreath |
AND DOES NOT SMELL!
—
SUPPLIES YOU WILL NEED:
– Toilet Paper and/or Paper Towel Rolls (lots of them)
– Old Magazines
– Glue Gun
– Scissors
– Spray Paint
– A paper plate
—
START CREATING!
 |
| From How To – Wreath |
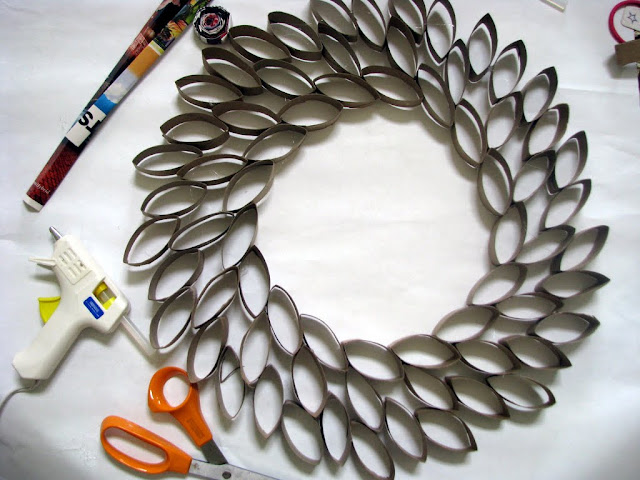
1) CUT ROLLS!
Toilet Paper rolls can be cut into 5 pieces. They do not need to be perfect or the exact same size.
The paper I buy seems to stick to the roll at the end, and taking it off is the hardest part of the whole thing!
2) START DESIGNING WREATH!
 |
| From How To – Wreath |
Start to lay pieces around the plate.
 |
| From How To – Wreath |
Get your design down.
 |
| From How To – Wreath |
3) GLUE PIECES TOGETHER!
 |
| From How To – Wreath |
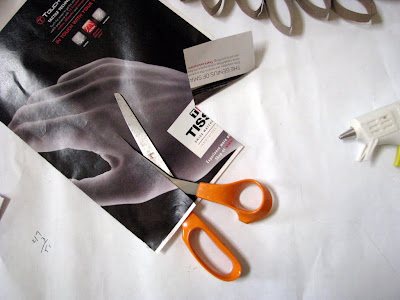
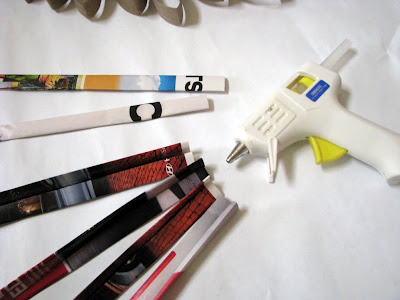
4) START YOUR MAGAZINE PAPER FLOWERS!
 |
| From How To – Wreath |
Tear out pages of magazines, I go for the most colorful. I cut each page into 3 strips.
4) FOLD STRIPS OF MAGAZINE PAGES.
 |
| From How To – Wreath |
Fold them in the width that you would like your flower to be. Honestly, they do not need to be the same size…I just fold them up, and used the glue gun to keep the edges down. I have done it without gluing them down…saves some time.
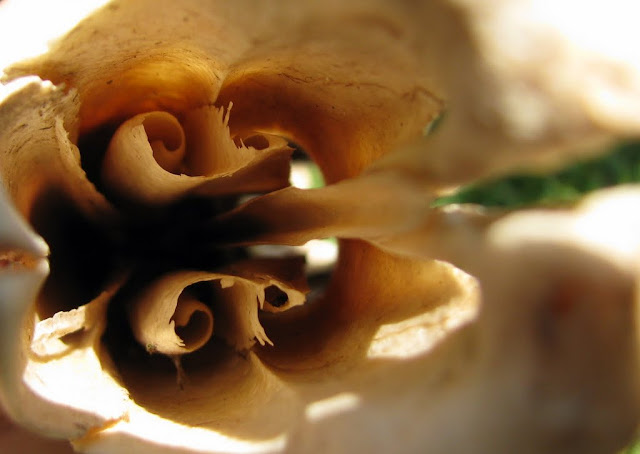
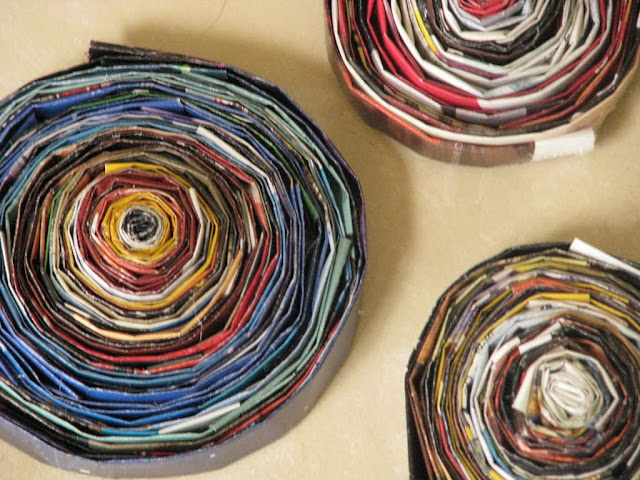
5) ROLL YOUR FLOWERS!
 |
| From How To – Wreath |
Just start rolling. I glue down the last edge of a strip and then the beginning of the next edge strip. And you can make them as big or as small as you want!
 |
| From How To – Wreath |
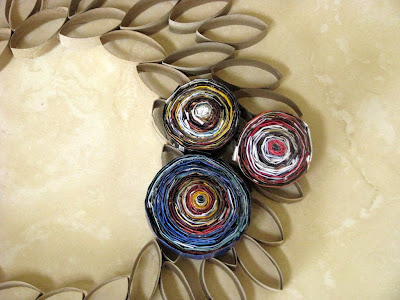
6) LAY OUT WHERE YOU WANT THE FLOWERS TO BE ON YOUR WREATH.
 |
| From How To – Wreath |
Do not glue yet!
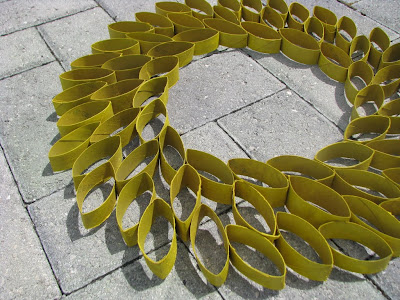
7) SPRAY PAINT YOUR WREATH.
 |
| From How To – Wreath |
I picked yellow, which worked well on that white paper, but did not come out that yellow on the brown paper rolls!
So pick your color wisely, or test it. Or you can just go plain…I have another piece hanging in my living room with no color!
 |
| From How To – Wreath |
Let Dry!
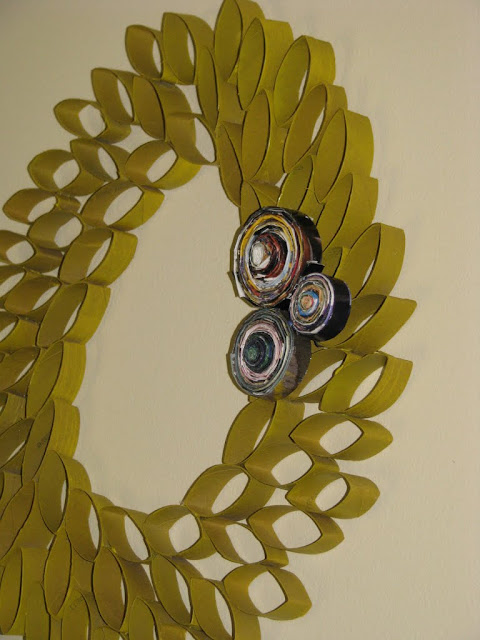
8) ATTACH YOUR FLOWERS!
 |
| From How To – Wreath |
CONGRATS!
You made yourself a Garbage Wreath! Made art and saved stuff from the landfill!
———————————————————————————————————————————————————————-