Posts Tagged ‘diy’

I’m a Hard Core Auntie because…

20161020_065648

I Encourage My Nieces and Nephews to Make!  Okay, sometimes I Make them Make!

IMG_1501190073994

But not with cooking or Drawing!

This is my Mirror Identical Twin Nieces Drawing a Picture, Together, at the Same Exact Time.

Isn’t that cool?  (PS…I did not teach them to cook or drawer, but I encourage it.)

I have taught them other Creative Things….

By way of Helping this Aunt Upcycle, Rehab and/or Fix!

2016-10-23 15.07.31

I got these old, Ratty, painted gold Chairs for Free. I thought this would make a Good Learning project for my Brother’s Kids!

20161019_162205

I was surprised, because ALL three, even the 15-year-old brother, got into it!

The took Apart the ratty seats with disintegrated Foam and weakened zig-zag Wire coils.

20161022_151420-1

And with the h=Help of Uncle, they Built the Seats back up Again!

20161023_105139-1

They Added Batting to the new foam, again, with the help of Uncle, and of course, Under my Direction.  I was solely Only the Project Manager on This Remake!

20161022_162911-1

Then the new Upholstery was added to the fixed seats!

But we Were Not Done Yet!

20161022_162920

After a Full, but light Sanding, they spray painted the Chairs!

20161023_141525-1

When Dried, they Put the chairs all back Together again.

They were so Proud of Their own work!!

20161023_141352.jpg

So Proud, I just Gave the Chairs to them to use at Home!

And their Creativity has not Stopped There!

My Brother was Gifted a box of old scratched up 45 Records.

20170604_145741

My 15-year-old Nephew was inspired by Them!

20170604_145812

He added Record Decor Along to his growing broken Skateboard Collection.

20170604_151822

He Came up with this on his Own and I am one Proud Aunt!

And his 12 years Sisters make this Upcycling Aunt Just as Proud!

20170706_095908 (2)

It started with a Curb Alert Free Stuff Pile where I got to Teach my Nieces Picking 101.  Stop the Car. Get Out of the Car. Take a Real Close Look.  My nieces Loved a couple of Wood Boxes in the Pile.  And Of course I eyed a Mid Century-ish Metal Stand or Table Base.

20170706_095908

They put the wire table together with one of the wood boxes and made a table.

20170706_110312

Then they added a Lower Shelf!  Now they have a Bedroom Side Table that Holds their Pet Rat’s, Ink Spot and Einstein, Cage.

And Speaking of Ink Spot and Einstein…

20170730_101112

The Twins looked up Online How to Make a Rat Cage Hammock and They Made one All on Their Own.

Look Close at the Stitching…Isn’t that so Cute.

Then there was this…

DSC_0446

We Took her Camping and she Whittled a little Man and then added the Moss Hair.

Her Idea and Her Work.

I Love seeing the Creativity Grow in Young People and am Fortunate to be Able to see it First Hand in Some of my Nieces and Nephews.  I can’t wait until my next project with them!

Also, I Feel my Very Own Creating Mode Coming Up.                                                                So, Stay Tuned for my Next Creative Blog!

Thanks for Visiting and Do Please Come Again!

Gnome


We moved closer to the In-laws and I developed a hang up for a pile of old fence boards that have sat on their side yard for ever.

I finally got brave and asked if I could have some and then My Big Hang Up Started.

Okay it started with this…

Rack6 (2)

I picked up this cool piece of wood and then made this necklace holder from it over a year ago

I make art from old leather belts, so I have a lot of belt buckles hanging around.

And then I made this out of the other half of the wood.  Rack4 (2).jpg

I realized I like making hanging racks out of interesting and unusual bits and pieces.  Although hard to tell between my cool old kitchen gadgets, the rack is made from old metal water facet knobs and big butterfly screws.

So once I had the fence boards…The Hand Ups Began!  I started to dig around in my widgets, gadgets, screws, hooks and thingies.

Racks8

I went first to my mass amount of belt buckles and made a couple of my mini necklace holders.

Rack7

I have been noticing mermaids a lot lately because my older sister who was diagnosed with Stage IV cancer last year loves them.   So, I have mermaids around and made this beachy themed key and coat rack.

Racks9.jpg

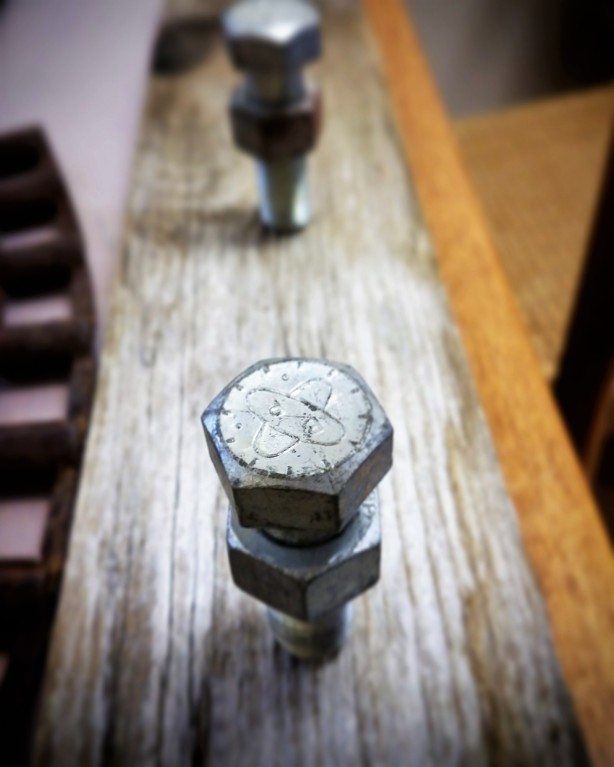
I dug deep and found these huge screw things with a nuclear-ish symbol on the ends.  I loved them and finally found a project for them!  They would make great “hooks” for a coat/jewelry rack!

Rack3

I had more wood but was running out of ideas, so one day I really dug through my stuff and I did not even know I had these little red hooks.  I love the bright color against the awesome worn wood grain.

20170809_170216 (2)

This one makes a Great Industrial Chic Necklace holder!

I ventured out from just making racks, I made some signs too.

Rack2

Vintage and Ready for Sale.  Original Handmade Art Things made from Vintage Stuff!

Easy to Make your Own and Easier to Buy from Me!

My Favorite sign is the one I made for my brother for sales we do together.

Rack1

I Introduced my brother to the old fence board and now he has his own line of cool things.  Come to one of our sales!

Rack5

I hope to open up an online store again soon too.  So you can shop directly from the comfort of you home!

Thanks for visiting and Come Again!

Gnome


Mix an Outdoor Shower and a Visiting Sister…

20160822_175434-1 (1)

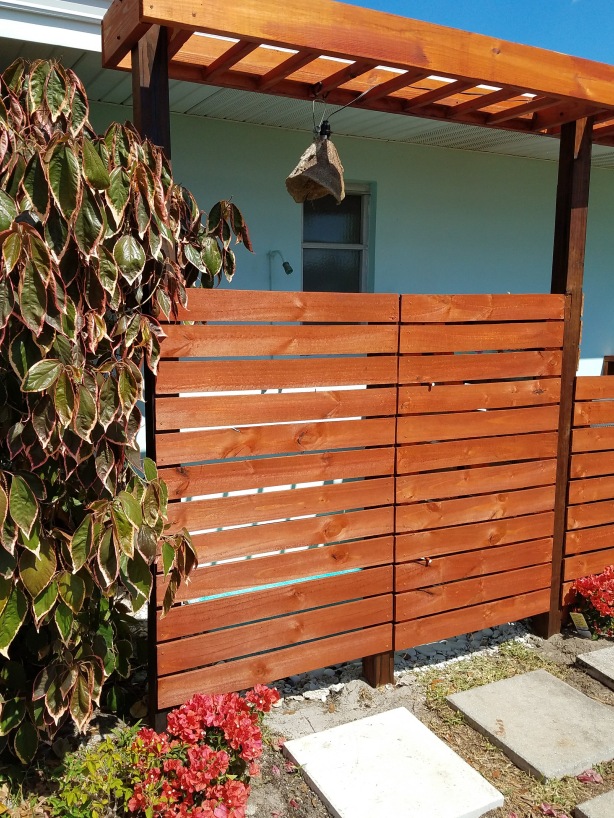
And you get Motivated to Build an Outdoor Shower Enclosure!

20161215_120759


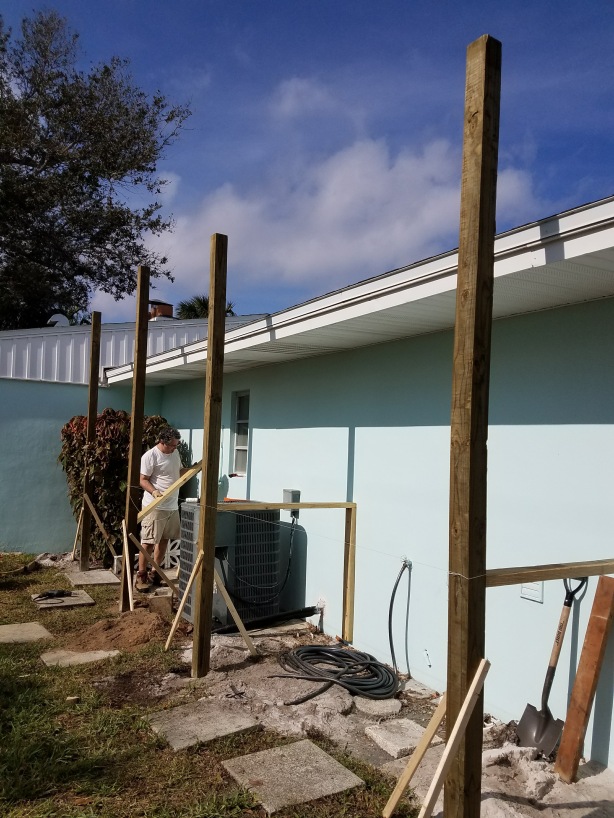
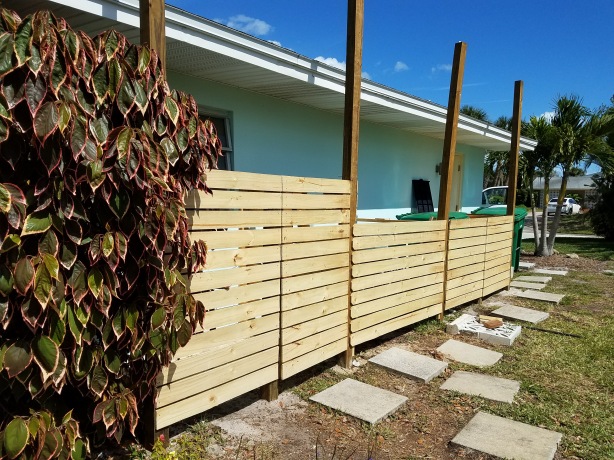
Our Home, The Gnomad Pad, is in Florida where Outdoor Showering is Quite Nice. This Shower is in a Corner were the Air Con Unit and Near Where We Put Our Garbage Pails so we decided to Hide it all, not only Naked Bodies.

Well, after many discussions between the Hub and I, it was decided that the Fencing Needed to be somewhat Mid Century-ish and there will be an Arbor.  Lots of sketches were made and Pinterest posts were looked at…and finally we agreed upon a Design.

20161215_165328

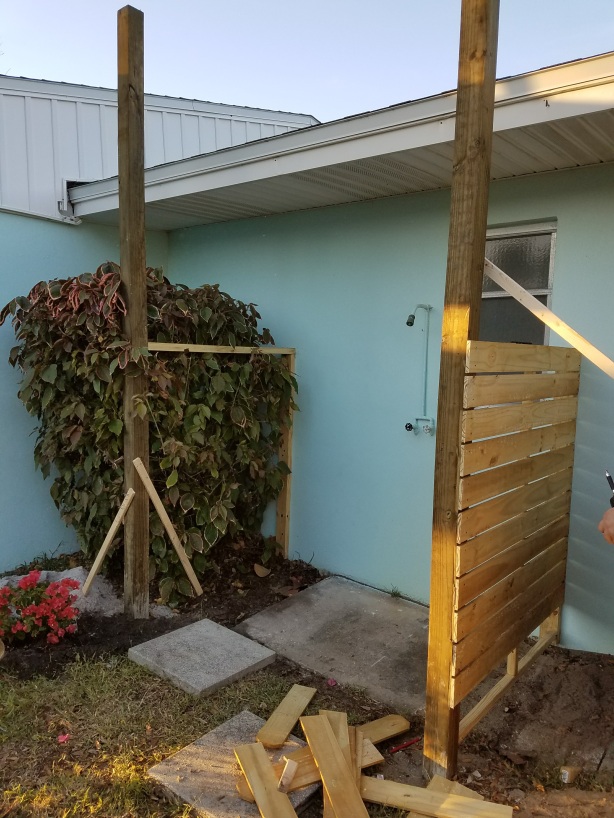
The Shower area is coming together.

20170303_124635

Fencing is done…but not the Arbor.

IMG_20170307_132154_631

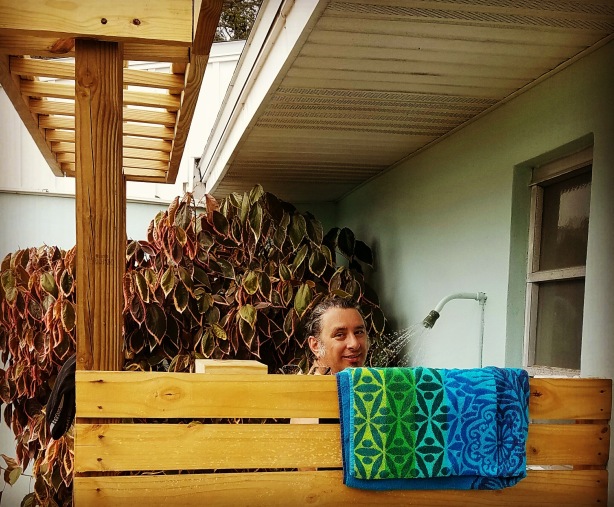
Using the Shower Before it was Done…but the Arbor is Up!

20170310_091703

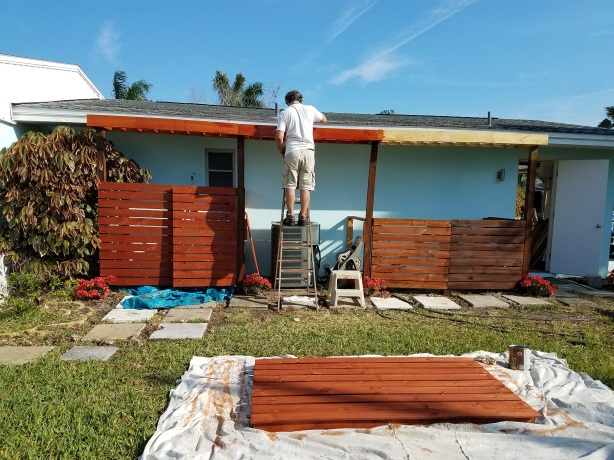
The Staining Process. I stained the Whole Fence and The Hub did the Arbor.

Okay, He Built 96% of the Entire Thing On His Own!

20170310_115423

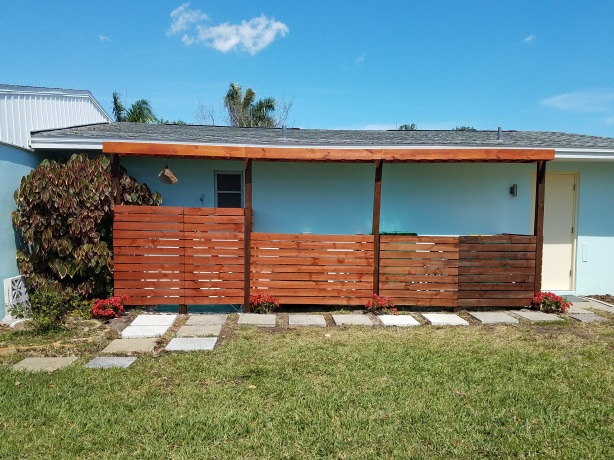
It’s Done!!!!  Even with Bougainvillea planted to Climb up the Arbor!

You may notice the far right gate door is darker.  Well, when one goes crazy staining all day without mixing the gallon of stain, the bottom of the can is darker.  What is done is done, but there you go…Do Not Do That.

20170310_115438

The Shower Outside…

20170310_115040

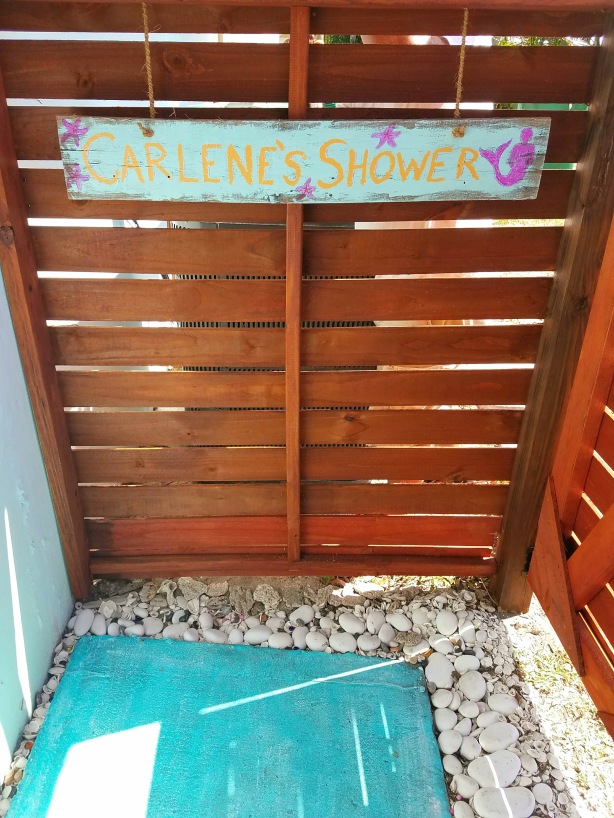
And Inside…Even with a Dedication Sign to My Sister!

IMG_20170309_083359_776

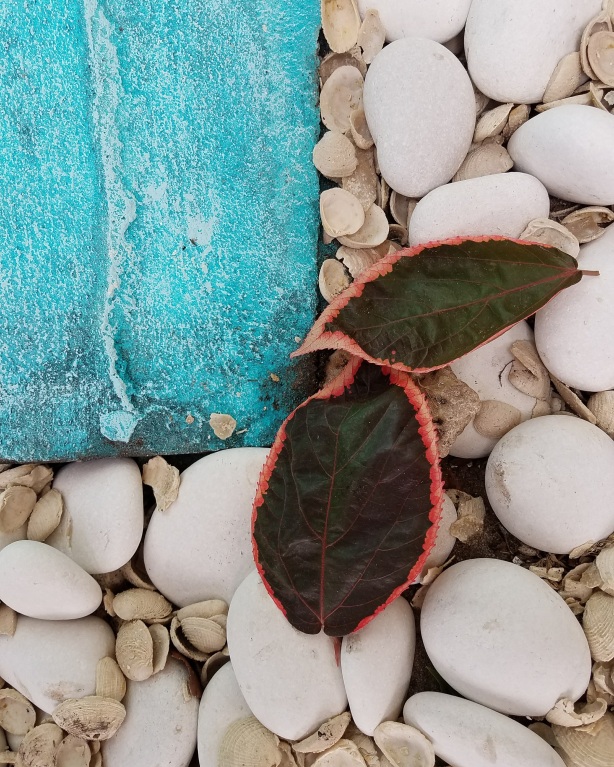
I Did The Shower Floor…And I am Digging it.  Simple Blue Spray Paint, then a Wash of Light Blue Paint Brushed over it.  Rocks, Shells and there You Have it.

Had the Board Laying Around and Just Handed Painted it.   My Sister Loves Mermaids and she is Fighting Cancer, So I Made the Mermaid Bald.  She also has a tattoo of a Starfish because if they Lose Arm, they just Grow One Back which is a Testament of How She has Lived her Life.

Cancer will Not Beat This One.

20170308_111327

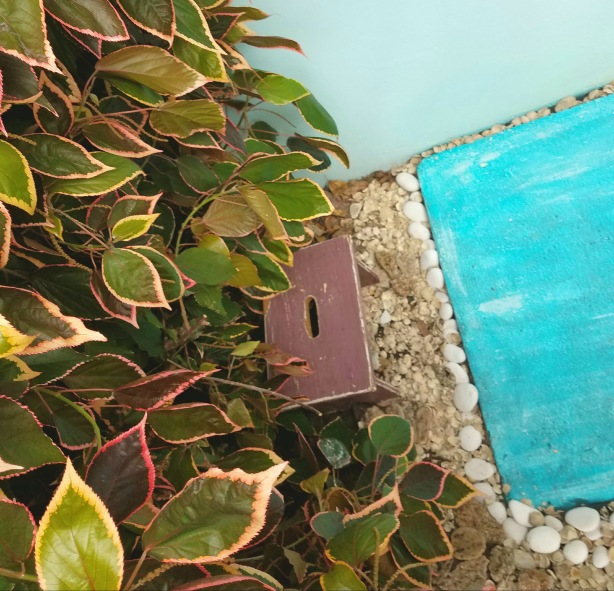
One side of the shower is open to this large bush.

20170310_120235

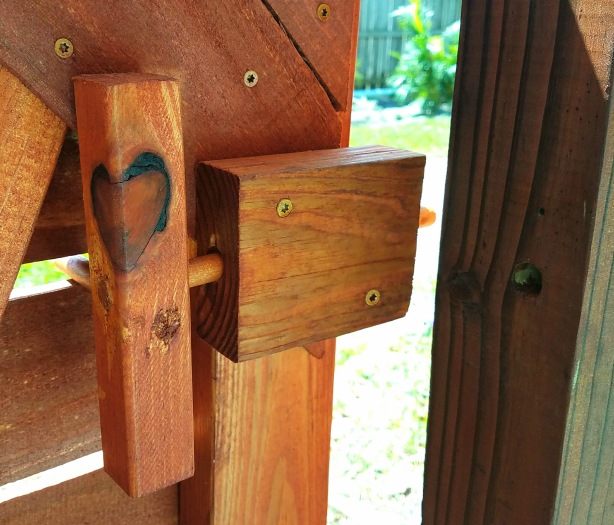
The Very Cleaver Hub Came Up with a Non Rusting Door Latch.  And he Made it with Love.  The Wood Had a Heart on it and he Just had to use that Piece to Go There.

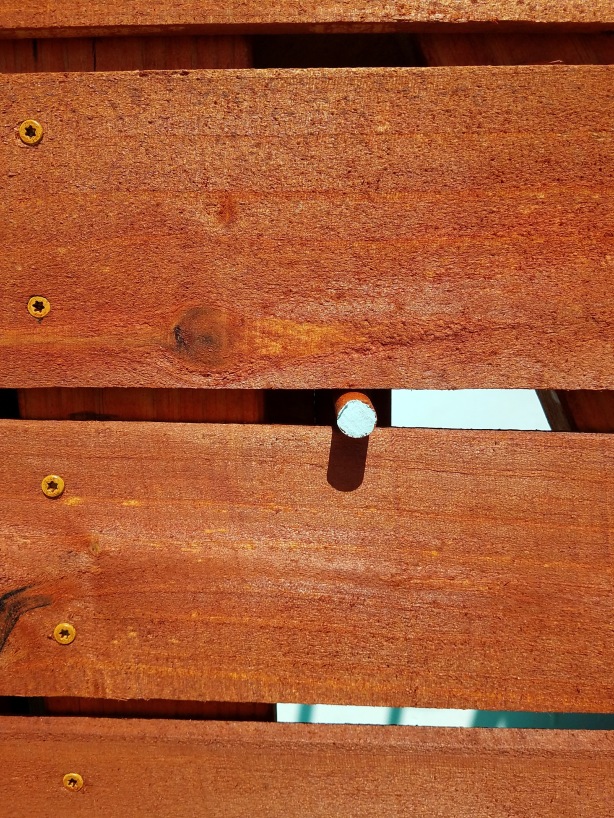
20170310_120143

That Little Blue Dot is how you Unlatch the Door.  So Cute and Cleaver.

And if You Want to Shower After Dark….

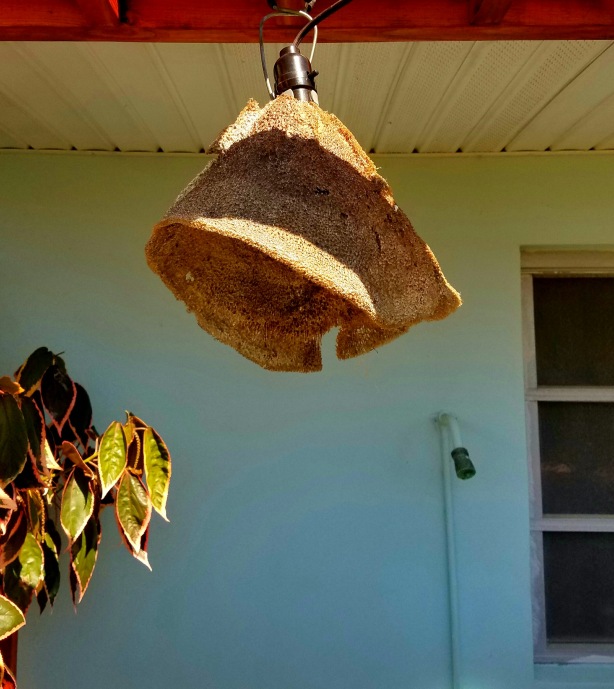
20170310_131156

We made a Light out of  a natural Cup Sponge found on the Beaches in the Keys of Southern Florida!

Can’t Wait to See it Being Used for a Mini Family Reunion This Summer!

Homes…

One Step at a Time!  Next is the Back Patio!

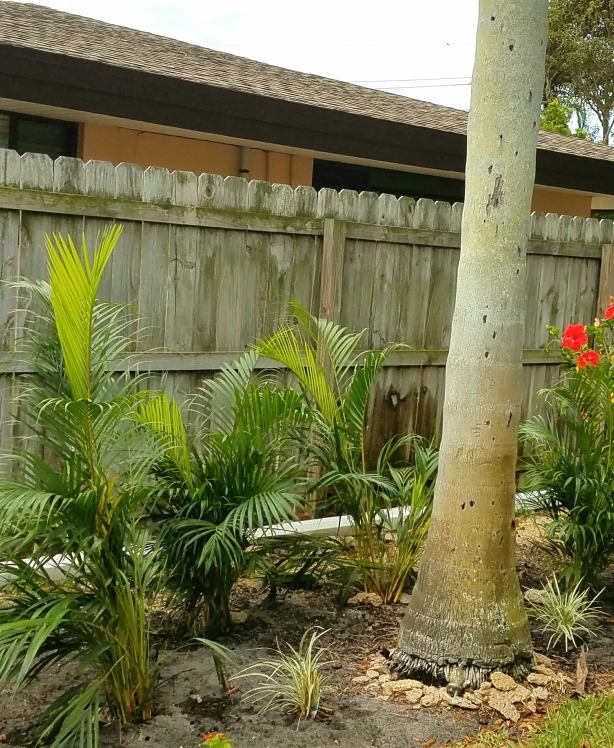
20170308_093023

We did Plant these Palms Hopefully to Grow and Block Out the Neighbors Ugly Side Yard and to Block the Neighbor Out too.  All our Neighbors are Great Except this One Person, who Killed Our Orange Tree. See an Earlier Post to Find Out How I Made Lemon-aide out of that Dead Orange Tree at  https://ourownbigworld.com/2014/10/08/passive-aggressive-diy/


20170308_092917

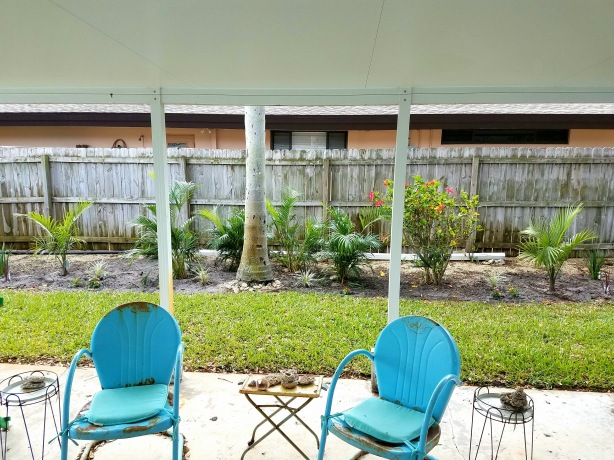
Now We need No Rusting Matching Patio Furniture.  I am Making Sheer Flowy Curtains, but there Needs so Much More Work to Be Done!

Stay Tuned!


RoamingGnomadGraphic

It all Started with a Large Ball of Twine.

And then Some Gray Yarn.

IMG_20170128_131723_027

And Once the Sticks Got Involved…History Was Made.

I have a big wall that needed decor, so I set to making a big piece.

I knew macrame was going to be part of it, but not exactly sure how.

20170128_145957

I attached the twine and yarn and let it all sink in.

20170130_152342

Then I went for it, but I got stuck on what to do after the first row of Macrame.

IMG_20170129_113631_080

It sat like this for quite a while, but the rolled up yarn and twine at the bottom did give me an idea.  But before I could work on that part, I had to finish the other parts.

IMG_20170131_125300_717

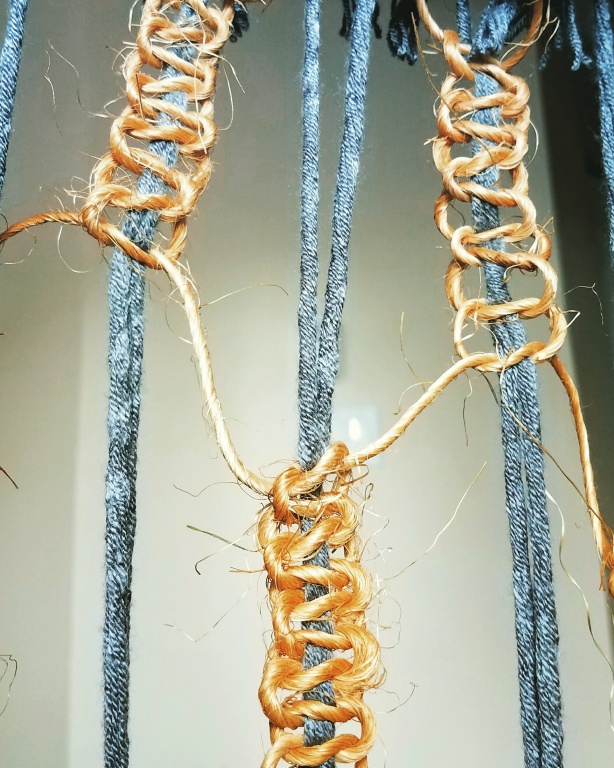
So I continued to make these large macrame knots and my sister described the look as “Lace”.

20170223_093917

I kept going with the big square knots and the “lacey” look.  When I finished I added something a bit different.

20170223_144917

Some Poofs made of Twine!

20170223_115940.jpg

I Made a Lot of Poofs!

IMG_20170130_113946_947

And Not just Twine Poofs, but Grey Yarn Poofs as Well!

IMG_20170223_175544_702

I attached the Poofs and Loved them….all of my Pretty Little Poofs.

IMG_20170223_174559_297

I even added one to the Very Top!

20170223_173456_001

And There You Have It…

Poof…MacraLace!

This one is for my Wall, but if you are Interested in Your Very Own Poof…MacraLace, Please Comment Below.

———————————————————————–RSVP-Stamp-6


From TubesLove

It all Started with the above tins that my Friend sent me.

You see, many years ago I turned tiny tins into nicely decorated pills boxes for all my girlfriends. I used to make small Christmas gifts for most of my friends every year. I guess she thought I could do something with her collection.

I had recently moved right into the inner city of Chicago. Along with the Skyscrapers, great views, museums and awesome restaurants there are also people down on their luck. I had not been in a living situation in a long time were I saw people who were homeless, out of work and/or sick asking for money in my neighborhood, every day, every where I walk. My heart was breaking for them.

I came up with the idea to use the tins to decorate and insert some  money and small things for these people, my TINS of LOVE! Then I realized they were way too small for what I wanted to do.

From TubesLove

I was saving Toilet Paper Rolls for Art projects. When I realized the tins were too small, I looked at a roll one day and thought this size would be better, my TUBES of LOVE!

From TubesLove

The plan was to start handing them out right before Christmas and throughout the winter for as long as I had supplies.

I had already been collecting 1 dollar bills and quarters to put in my TUBES of LOVE. I told a few friends and family about my plan. My Mother Inlaw, who collects a lot of stuff, sent me a box of stuff to stuff in my TUBES of LOVE! I also bought big multi-packs of gum.

From TubesLove

After Halloween, I collected leftover single wrapped candy from my neighbors and bought bags on sale for the TUBES of LOVE, for a bit of fun.

From TubesLove

I made a list of all Shelters, Food Pantries, Soup Kitchens and Warming Centers in Chicago for each one of my TUBES of LOVE.

From TubesLove

On the Sheet of Paper, I wrote a Note.

From TubesLove

I thought of items besides the money and candy, and thought soap and aspirin could be helpful. I had some hotel soaps and shampoos. The little bars of soap were too big, so I started to cut them down to a size that would fit, wrapped them in clear cellophane and labeled them.

From TubesLove

I also divided a large bottle of acetaminophen into packs of 6-8 pills each too.

From TubesLove

I had to cut the sheets of info down to fit better inside the tubes.

From TubesLove

The plan was to roll it all up and then stuff it in the TP Roll/Tube!  Yes, All of the below would fit into One TUBE!

From TubesLove

I started with rolling the items up in a dollar bill.

From TubesLove

Then I would roll that up with candy on each end in the folded in inforamtion Sheet.

From TubesLove

Easy Peasy!

From TubesLove

It all Fit Perfectly!

From TubesLove

But just so stuff would not fall out when it was opened, I put a small piece of tape at both ends.

From TubesLove

After I stuffed around 30 Tubes, I then decorated each TUBE of LOVE.

From TubesLove

Just Basic Decorating, as I was going to Wrap them as well.

From TubesLove

First Round of TUBES of LOVE Ready to be Wrapped!

From TubesLove

Fun and Light-Hearted. Literally, there are little hearts on them!

From TubesLove

Stuffed with Love!

From TubesLove

Part of the Idea for TUBES of LOVE is Recycle / Upcycle. So along with all the other items I saved, I also saved paper bags. I cut the bags up to lay out flat.  I painted it all

From TubesLove

I had 2 sessions of fun using paint and markers.

From TubesLove

I wrapped them “candy” style using string at each end. The First Batch was Done!

From TubesLove

They were all handed out before we left town to have Christmas with out family. During the time away I got my nephew and nieces involved with making more TUBES of LOVE! We also handed some out in Sacramento, CA, where they live. The rest I brought back to Chicago with me. Below is two of the TUBES of LOVE my twin nieces Stuffed, Wrapped and Decorated.

From TubesLove


an

From TubesLove

I received 3 boxes of supplies from friends and family!  I was overwhelmed and very happy.  After exploration of these boxes, I realized many of the items were over-sized for the TUBES of LOVE.

From TubesLove

So I went bigger, Bigger TINS, that is! It all started with tiny tins and now I was back to tins, but bigger and better! I went to the Salvation Army Outlet Store here in Chicago. I bought Tins, and Socks as I learned they were highly needed. The women checking me out, actually gave me a better deal on the items after she heard about my TINS of LOVE project.

From TubesLove

So Much More Love Stuffing! The tins I used would vary in size, but I do not want to go too big as I need carry them as I give them out.

From TubesLove

I still decorated the TINS of LOVE like I did for the TUBES of LOVE, but since many of the TINS were already nicely decorated, I now do less decorating and more stuffing!

From TubesLove

At Top of the Above Photo, on the right and left, you will see TUBS of LOVE. Yes, I have expanded to using Plastic Tubs/Containers/Jars as well. Happy to recycle/upcycle as much as I can!

The TINS of LOVE above are my current batch.  I am down to just a few more as I handed some out the other day.

I have supplies to make more, but I need more containers!  I will do another batch of TUBES of LOVE before I get more TINS/TUBS. I am going to Cleveland soon and will see if I can give away some of the TUBES of LOVE there.

From TubesLove

I will hand them out for the rest of Winter or until my supplies run out.

If you have any questions on how you can do this as well, please comment below and I will get back to you as soon as possible.  Or if you want to donate any stuffing items to my TUBES/TINS/TUBS of LOVE Project, please comment as well and leave your email address for private communications.

By Education, I am a Recreational Therapist. I have worked with Youth a lot in this position and my favorite activities were art related, if I could include a lesson that made the project even better.  I would love to do this project with more Children. I can volunteer with programs within Chicago if you would like me to lead this project at your program!

Thank you and I hope you Enjoyed this project of mine!

————————————————————————————

RSVP-Stamp-6